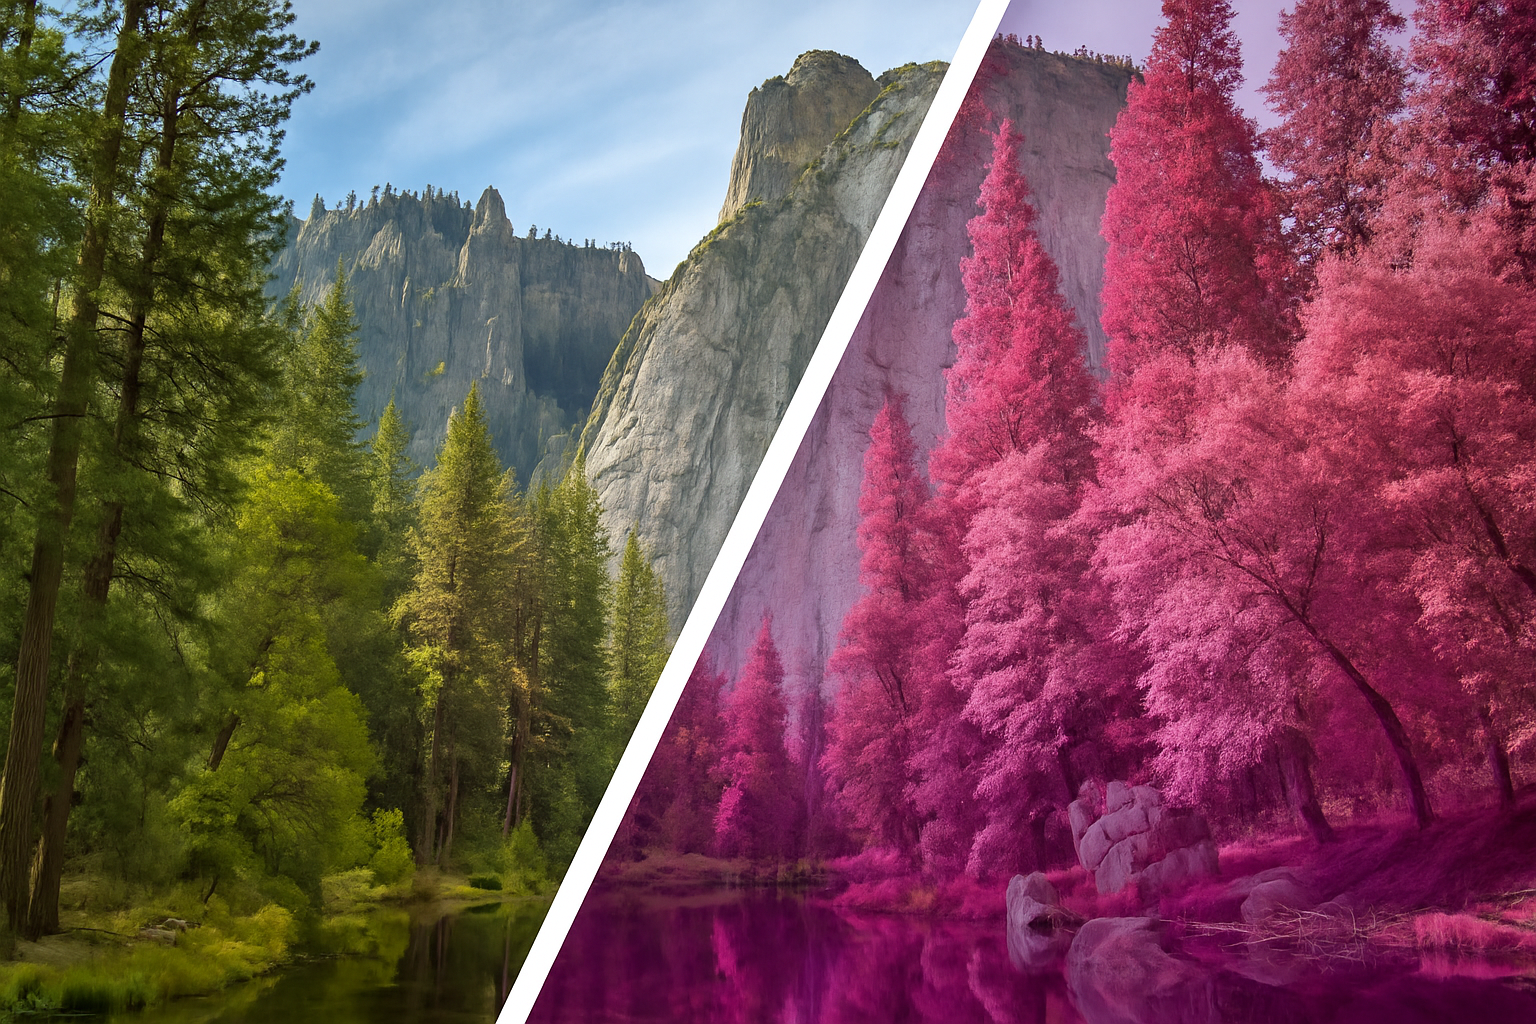
Delve into the World of Infrared Photography with Ease
Infrared photography has long been a hallmark of experimental photography, casting everyday landscapes into an otherworldly dreamscape. However, getting your hands on expensive infrared photography equipment isn’t always feasible. Thankfully, Photoshop provides a quick and easy way to replicate this striking effect with just a few simple steps. Whether you’re a Photoshop rookie or a seasoned pro, our step-by-step guide will help you get started on transforming your landscape photos into surreal works of art.
Step 1: Duplicate and Invert
The first step to creating an infrared look is to create a copy of your original image layer. This is your safeguard—always a good idea when working on an irreversible effect. Simply duplicate your landscape photo by pressing Ctrl + J (Windows) or Cmd + J (Mac). Next up, invert the colors of this copied layer by hitting Ctrl + I or Cmd + I. Don’t panic when your photo morphs into a garish color palette. You’re on the right path.
Step 2: Change the Blend Mode
With the inverted layer selected, navigate to the blend mode options: This is typically found above your layers, where it likely currently reads “Normal.” Change it to Color. This adjusts how the layers interact, setting the stage for some colorful magic.
Step 3: Channel Mixer—Flipping the Colors
This is where things get scientific. To correct the colors while still preserving the effect, we dive into the Channel Mixer. Click on the “Adjustment Layer” icon (a half-filled circle), then select Channel Mixer.
- Red Output Channel: Set the Red to 0% and the Blue to 100%.
- Blue Output Channel: Set the Red to 100% and the Blue to 0%.
These tweaks are where the actual infrared magic happens, flipping the color channels to create the distinctive color signature of infrared photography.
Step 4: Pump Up the Reds
Now that the basic effect is in place, you may want to tweak the reds to make those infrared hues pop. Navigate to the Adjustments panel. If it’s not visible, simply go to Window > Adjustments. Click on the Hue/Saturation adjustment layer and target the Reds in the dropdown list of colors.
- Hue: Drag it to -30 to give it a pinker tint.
- Saturation: Increase it to +20 to intensify the effect.
Wrap Up: See the World in Infrared
And there you have it! With just a few easy adjustments, your regular landscape photos can take on the mesmerizing look of infrared photography. The beauty of this technique is its openness to experimentation. Feel free to adjust the saturation, explore different blend modes, or let your creative spirit run wild.
Whether you’re looking to shake up your Instagram feed or add a splash of surreal beauty to your portfolio, this handy Photoshop trick will bring new life to your images. So go ahead—dive into the dreamy world of infrared, and let your creativity shine.
Need more inspiration? Check out our video above or explore more tutorials on our YouTube channel. Keep pushing those creative boundaries, ’cause in Photoshop, the possibilities are endless.


