Dive Back Into Psychedelia with This Mind-Blowing Photoshop Guide
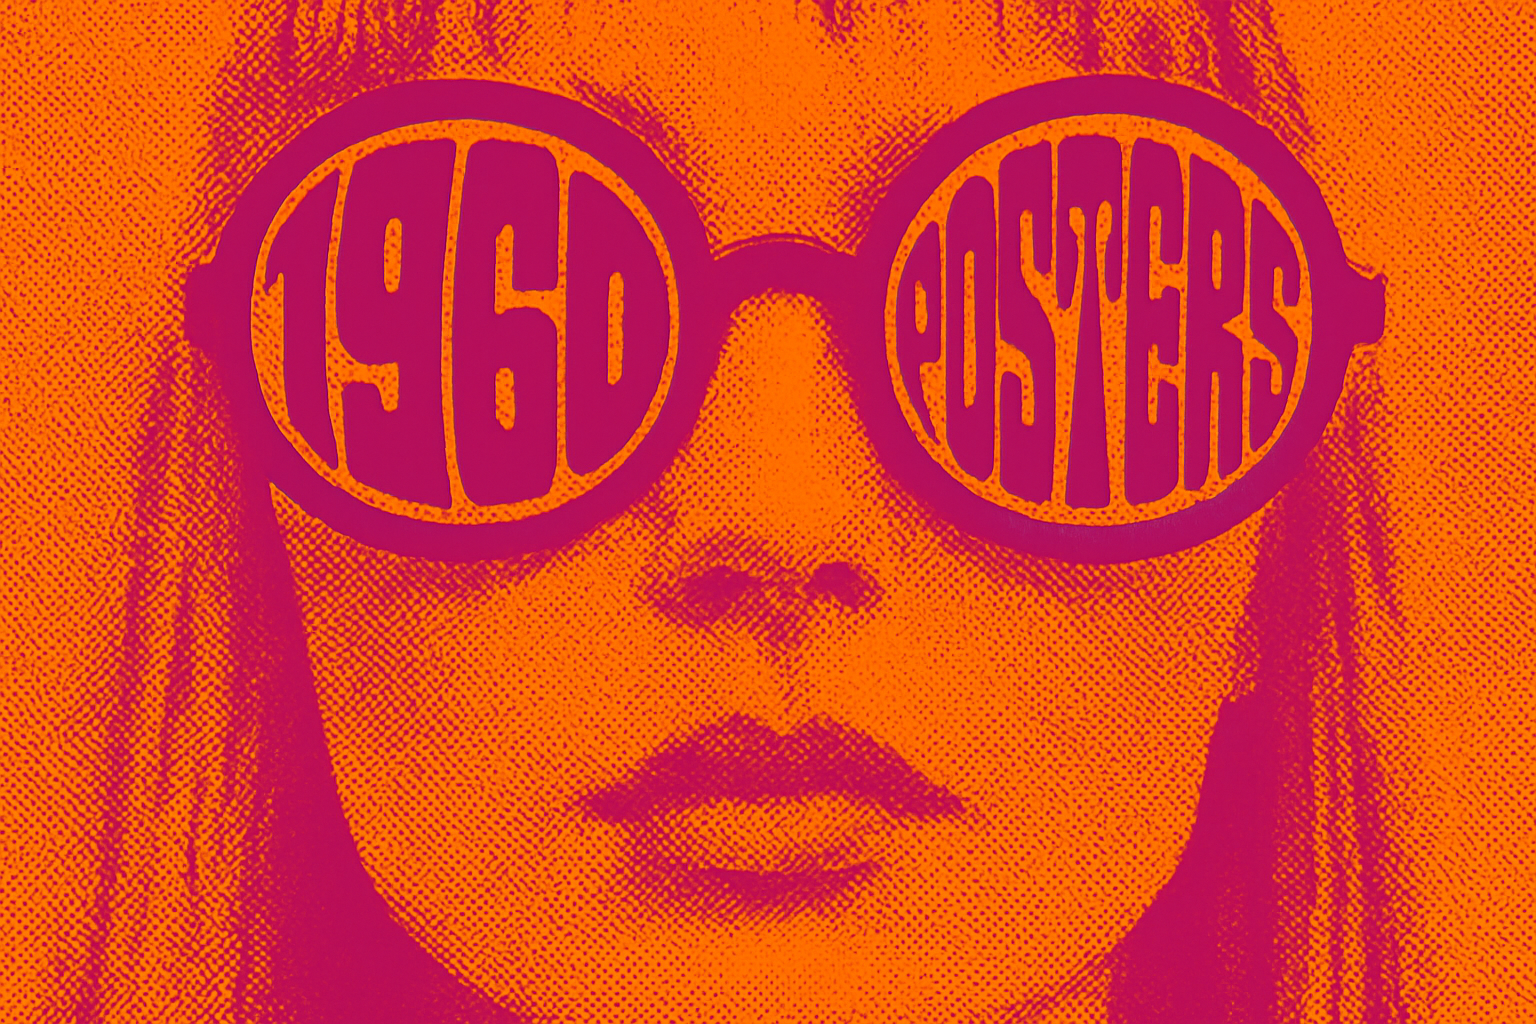
If the sizzling colors and mind-bending patterns of 1960s psychedelic posters have ever captured your attention, you’re not alone. Rock music’s rise during that era was matched only by its equally vibrant counterpart in the art world. Today, we’re going retro as we dive into the bold world of psychedelic art by recreating a famed 1967 poster designed by the legendary Victor Moscoso. Using Photoshop, we’ll embrace those wild designs and produce something that wouldn’t look out of place in the Haight-Ashbury district. Whether you’re a seasoned Photoshop wizard or just starting on your creative journey, this project is a perfect blend of art history and digital creation. Buckle up; it’s going to be a colorful ride!
The Blueprint of a Rock Classic
Creating art reminiscent of the 1960s means embracing vibrant colors and dynamic patterns. All you need is a downloadable Photoshop template [you can find the link in the video description], which includes both the historic poster and a modern photo of your choice—everything to kick off your psychedelic journey.
Components of the Template:
- Bottom Layer: The original 1967 poster featuring the three iconic colors of that era.
- Top Layer: A photo you can replace with your own image to infuse a personal touch.
Opt for the vintage aesthetic by utilizing the supplied typeface similar to Moscoso’s original, bringing authenticity and flair to your project.
From Lenses to Layers: A Step-by-Step Guide
Get ready to jump into action by focusing on one of the most mesmerizing elements of the poster—those iconic sunglasses. Here’s a streamlined guide to navigating through Photoshop’s powerful features.
Select and Define with Precision
- Step 1: Zoom in on those sunglass lenses with the Quick Selection Tool set to a size of approximately 10 pixels. Remember to activate the ‘Add to Selection’ icon.
- Step 2: Make your selections, removing unwanted areas by holding Alt (or Option) and dragging over them for a cleaner look.
- Step 3: Smooth your edges and selections like a pro using Select > Modify > Smooth, and set the pixel parameter to 50.
- Step 4: Save your invaluable selection for later steps as you’re bound to revisit this area.
Non-Destructive Edits and Halftone Transformations
Transform your image into a dynamic black and white halftone while maintaining the original intact. This means converting the photo into a smart object. Navigate to the Filter Gallery and open the Sketch folder to find the Halftone Pattern. Set it to a size of 3, contrast of 25, and type ‘Dot’. Voila, you’ve now crafted the base of a psychedelic masterpiece.
The Magic of Gradient Maps
We’re taking a detour into the realm of gradient maps to render your halftone photo into a splash of psychedelic colors. Activate the gradient map via the Adjustment Layer icon and open the Gradient Editor. Here’s where you paint your art with iconic red and orange tones.
- Left Stop: Pick the vibrant red from your swatch image.
- Right Stop: Transition into a bright orange.
Fine-tune these gradients to provide a seamless blend between hues, recreating the psychedelic vibe that defined an era.
Borderline Brilliance and Textual Flair
Adding a border? We got you. Whether you’re a stickler for detail or a do-it-yourself kind of artist, here’s how you can frame your work:
- Create a new layer atop your list.
- Fill it with any color; its purpose is purely stylistic, rendering the inside invisible while the styles remain intact.
- Customize with a red Stroke (32px, inside position) and an engaging Inner Glow (blue, 100% choke, 50 pixels size).
Time to splash some creativity with text. Channel Moscoso by embedding text into the iconic sunglasses. Start by activating your Horizontal Type tool and navigating through these straightforward steps:
- Utilize the provided font.
- Adjust size, alignment, and warping with maximum creative freedom.
Warping Text
Text can be transformative, especially when it’s warped. Each layer of text deserves its transformation as a smart object, after which you’ll use the warp tool to manipulate it into the desired lens shape, mimicking the original pattern.
Take a step back, admire the bewitching colors and forms you’ve just recreated, and in the relaxed embrace of nostalgia, revel in the fact that you’ve just brought a slice of the ’60s into the 21st century. Remember, with tools like Photoshop, you’re not just editing; you’re crossing time, capturing essence, and most importantly, creating art. Keep the creativity flowing until next time!