>Elevate Your Creative Craft: Create Stunning Photo Mosaics in a Flash
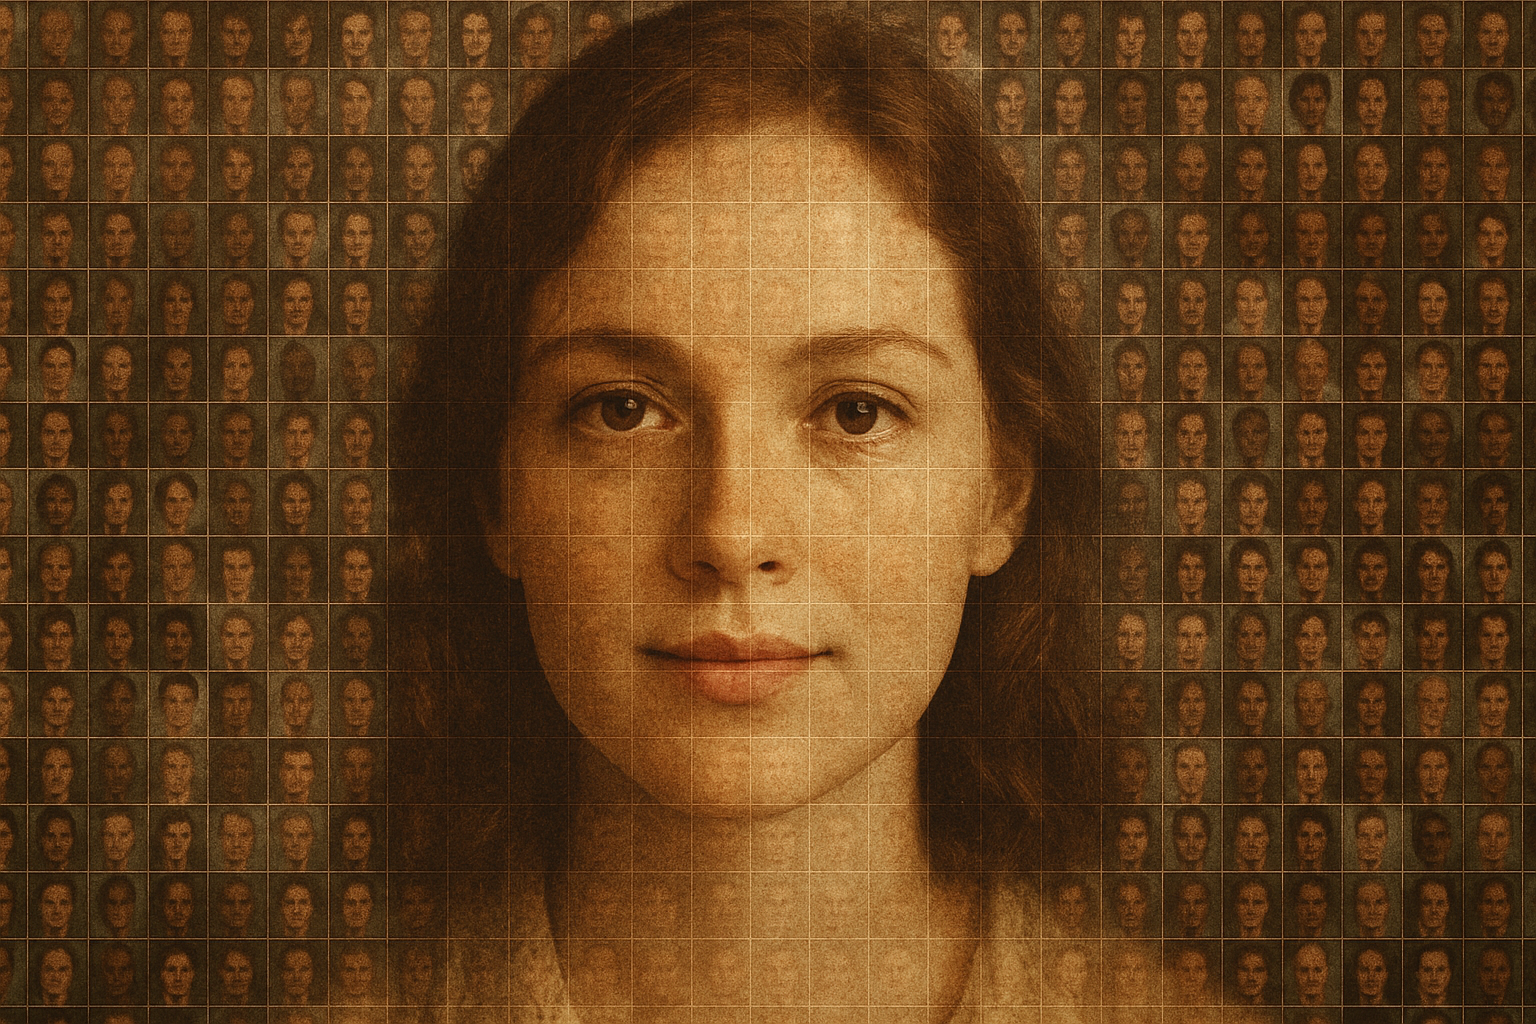
In a world where digital art is continuously evolving, the photo mosaic stands out as a strikingly unique way to display a collection of moments. Imagine transforming a single portrait into a tapestry of tiny photos—each contributing to the grand image like an army of artistic ants marching across the canvas. We’re here to take you through the most efficient way to create a mesmerizing photo mosaic portrait using Photoshop, and show you just how versatile this technique can be.
Step Into the Pixel: Preparing and Cropping Your Image
First things first, let’s pick the centerpiece of your masterpiece. Open up a high-definition image, the one you want to morph into a photo mosaic. Marty, our tutorial guide, suggests starting with a sharply cropped image to set the perfect stage for your mosaic. Pro tip: Setting your height to 1800 pixels and a resolution of 150 pixels per inch ensures a consistent and high-quality outcome. Leave the width open-ended to allow for creative cropping flexibility.
Math, Magic, and Mosaics: Choosing Your Photos and Layout
It’s your chance to bring forth your inner Picassos and Basquiats and choose a hearty collection of images for the mosaic. These tiny thumbnails will act as your photo pixels. Ensure that the number of photos matches up for both the mosaic’s rows and columns—think grids! For a 5×5 mosaic, you’ll need 25 images, while a 10×10 requires a whopping 100. Marty reveals his mosaic formula of a 7×7 grid, totaling 49 images, perfect for an intricate composition.
Cheat Sheet:
- 5×5: 25 photos
- 10×10: 100 photos
- 7×7: 49 photos (Marty’s choice)
Smooth Automations: Deploying Contact Sheet II
Simplify your life with Photoshop’s Contact Sheet II (go to File > Automate > Contact Sheet II). Select the folder with your photos, and set your document dimensions to 1800×1200 pixels at 150 dpi. Make sure you leave “Flatten All Layers” unchecked so you can resize each photo later in the mosaic. Choosing “Auto-Spacing” will keep things evenly spaced and arranged just like you want them—neat and orderly like the grand halls of an art museum.
Unleashing Your Artistic Visions: Customizing the Mosaic
Once Photoshop processes your photos, it will deposit them in a layered stack on the Layers panel. It’s playhouse time! By unchecking the chain links, you’re free to resize and reposition each photo within its layer mask using the Transform Tool (Ctrl/Cmd + T). Drag and drop pictures with an artist’s ease until they align to your vision.
Repeat for Perfection
This part is all about you. Use the Transform Tool to make each square sing the song of your heart. Reorder, resize, and reorder again—there’s no rush, only your imagination.
Master the Slant: Patterns and Blend Modes
With your art in a mosaic, let’s give it the finish it deserves. Define the pattern via Edit > Define Pattern, then grace your original photo with an Adjustment Layer, selecting “Pattern.” Grab your new creation at the bottom of the pattern preset list. Play around with scale—Marty likes 30%, but you do you! Adjust the Blend Mode to “Multiply” and tone it down with a 40% opacity for ethereal effect. Duplicate with Ctrl/Cmd + J and switch the duplicate to “Overlay” for even more dimension.
The Final Touch: Enhancing Details
Your mosaic creation is a sight to behold, but let’s add a cherry on top by adjusting brightness and contrast. Convert the photo to a “Smart Object” (click the icon on your Layers palette), enabling non-destructive editing. Image > Adjustments > Shadows/Highlights is your next stop—tweak those settings to amplify your subject’s features. Marty’s suggestion? Go for a subtle 10% adjustment on Shadows and Highlights for balanced brilliance.
Unleash the Mosaic Maestro Within!
You’ve done it! What once was a simple photo is now an intricate mosaic artwork. Use this blueprint of steps as a launchpad to awe-inspiring visual creativity. Whether you’re designing artworks or cooking up the coolest focal point for your living room wall, this technique will keep your creativity flourishing. So get designing with Photoshop, and craft photomosaic masterpieces worth sharing all over the internet.
Happy editing!


