Blast Off into Hyperspace: A Step-by-Step Guide to the Millennium Falcon Effect
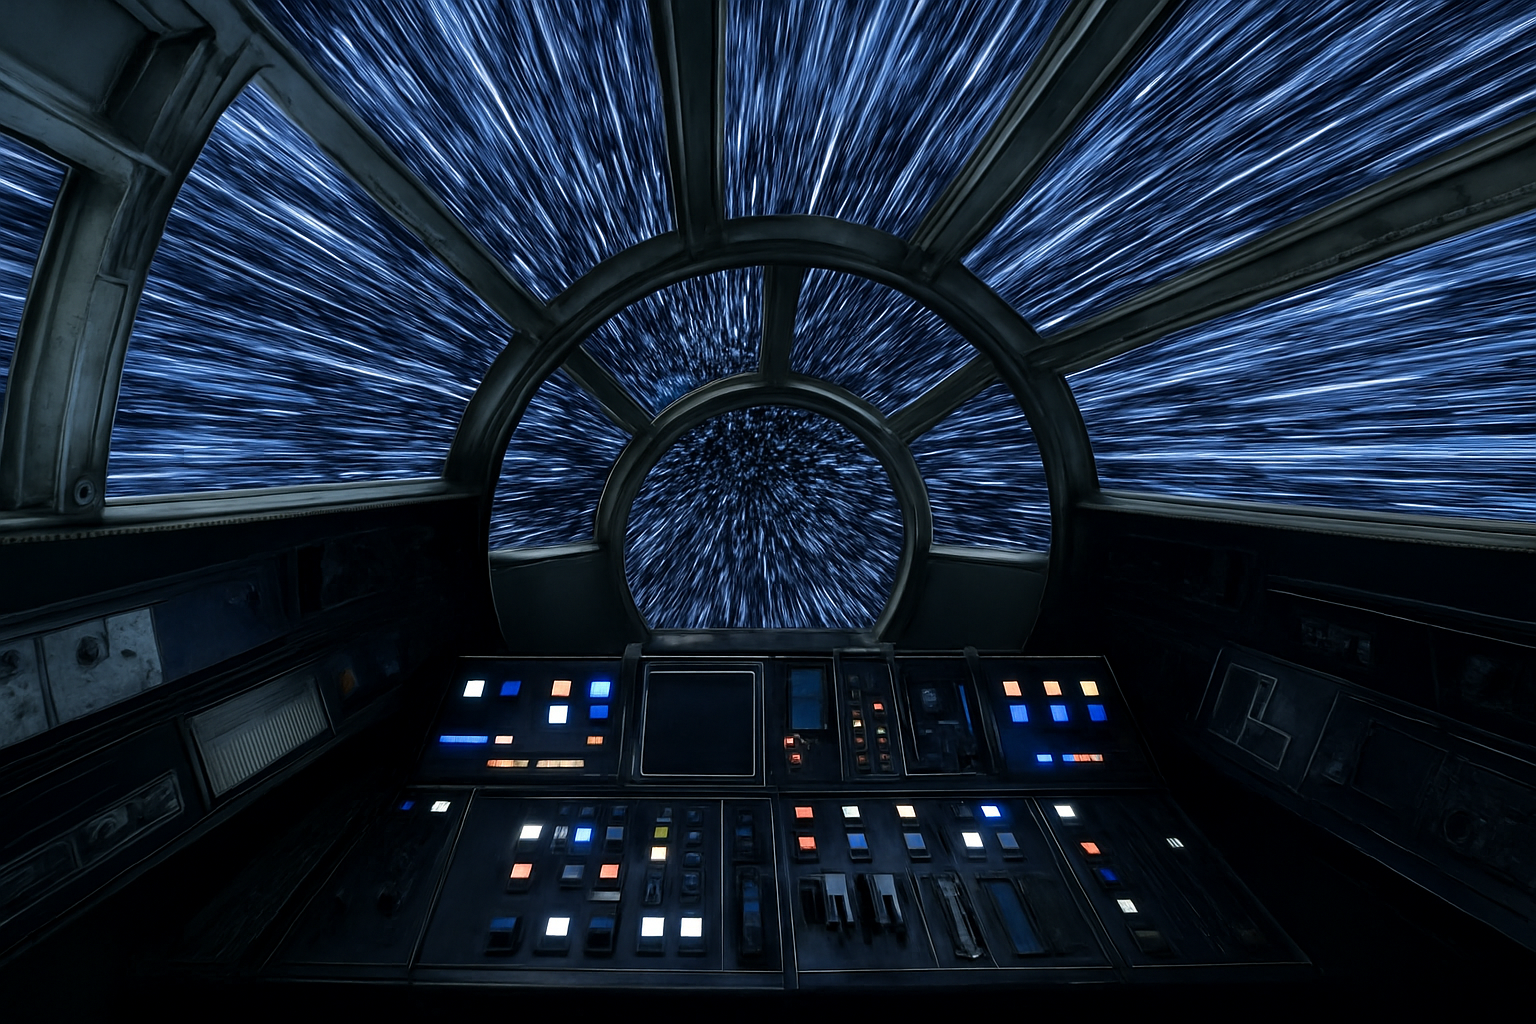
Have you ever wanted to make the jump to hyperspace just like Han Solo and Chewbacca did in “Star Wars”? Well, strap in because we’re about to embark on an exciting Photoshop journey to recreate the electrifying hyperspace effect from the iconic Millennium Falcon cockpit. Whether you’re a fan of “Star Wars” or just love tinkering with cool Photoshop effects, this guide is your ticket to visual warp speed.
Gather Your Tools
Before we dive into hyperspace, make sure you have an image of the Millennium Falcon cockpit handy. Many tutorials offer downloadable project files, but you can also find a suitable image online if you’re looking to cater your creation for a unique project. Ensure you’re fueled up—by that, we mean warm up your Photoshop skills because things are about to speed up!
Setting Up the Warp Drive (Layers)
Let’s kick it off by making a new layer beneath the cockpit using one of Photoshop’s shortcuts: hold Ctrl (Cmd on a Mac) and click the new layer icon. You’ll want this layer to be black, setting the stage for the stars to whiz by. If your colors aren’t black and white, simply press ‘D’ to reset and ‘X’ to switch them before filling the layer. Use `Alt + Delete` (Option on Mac) to fill with the black foreground color.
Now, copy your black layer (Ctrl or Cmd + J) and convert it into a smart object. This allows us to adjust our effects non-destructively, keeping the original intact as we apply our space magic. Add noise through `Filter > Noise > Add Noise`, setting the amount to 100%, Gaussian, and monochromatic should do the trick.
The Blur That Brings Stars to Life
Navigate to `Filter > Blur > Gaussian Blur`, and apply a subtle 0.5-pixel blur. This subtle step sets the stage for the dynamic star trails. Adjust the levels by heading to the adjustment layer icon and selecting ‘Levels’: tweak the input black to 110 and white to 150.
Suspend the laws of physics momentarily by creating two additional smart object copies. With one smart object active at a time, apply a stunning radial blur by venturing to `Filter > Blur > Radial Blur`. Set the amount to 100, choose ‘Zoom’ as the method, and opt for the best quality. Here’s a crucial tip: repeat the filter with Ctrl (Cmd on Mac) + Alt + F to ensure our stars streak convincingly across the screen.
Refining the Star Trails
To polish our hyperspace jump effect, we need to isolate some layers. Apply clipping masks to levels adjustment layers to control the visibility and enhance the contrast of our stars—a necessary tactic as we layer on more complexity.
Using a brush tool with a soft round 700-pixel size, click at the center to impart the mesmerizing zoom effect we all know and love. To further amplify your effect, unlink your layer masks for more control when resizing or repositioning.
Here’s a neat trick: to make those stars pop, expand the scale to 155% through the transform tools (Ctrl or Cmd + T). Once you’re satisfied with their placement, consolidating your layers into folders will keep your workspace tidy and manageable.
Adding Light Speed Dynamics
Let’s take hyperspace to the next level by employing `Linear Dodge` blend modes and adjusting radial blur amounts to 10, then 20 for different layers. The staggered effect it produces simulates the incredible velocity of a hyperspace jump.
Try the ‘Blend If’ method within your layer styles. This allows us to control the luminance blending of different layers, enhancing the stagger effect further by dragging sliders to match your creative vision. Play around with the values; usually, setting this around 70 can lead to glorious results.
Wrap up your cosmic concoctions by grouping radial blur effects, making the layers flourish cohesively. For that extra punch, create an ‘Outer Glow’ using a hexadecimal value of `0048ff`. The radiating blue glow pulls it all together by delivering that sci-fi spectacle right to your screen.
Final Touches
After meticulously layering and adjusting, it’s time for a final touch—doubling the brightness of your layers for that glowing finish. It’s often the tiny tweaks, like increasing your brush to an epic 1100 pixels for one-click precision, that lands your design straight into movie-grade territory.
Voila! You’ve created a mesmerizing hyperspace effect in Photoshop, letting you voyage into galaxies far, far away from the comfort of your creative workspace. Whether you’re using these techniques for a creative project or just adding to your digital skills arsenal, this step-by-step journey is here to inspire the cosmic artist in you. May the force—or in this case, the Photoshop plugins—be with you!