
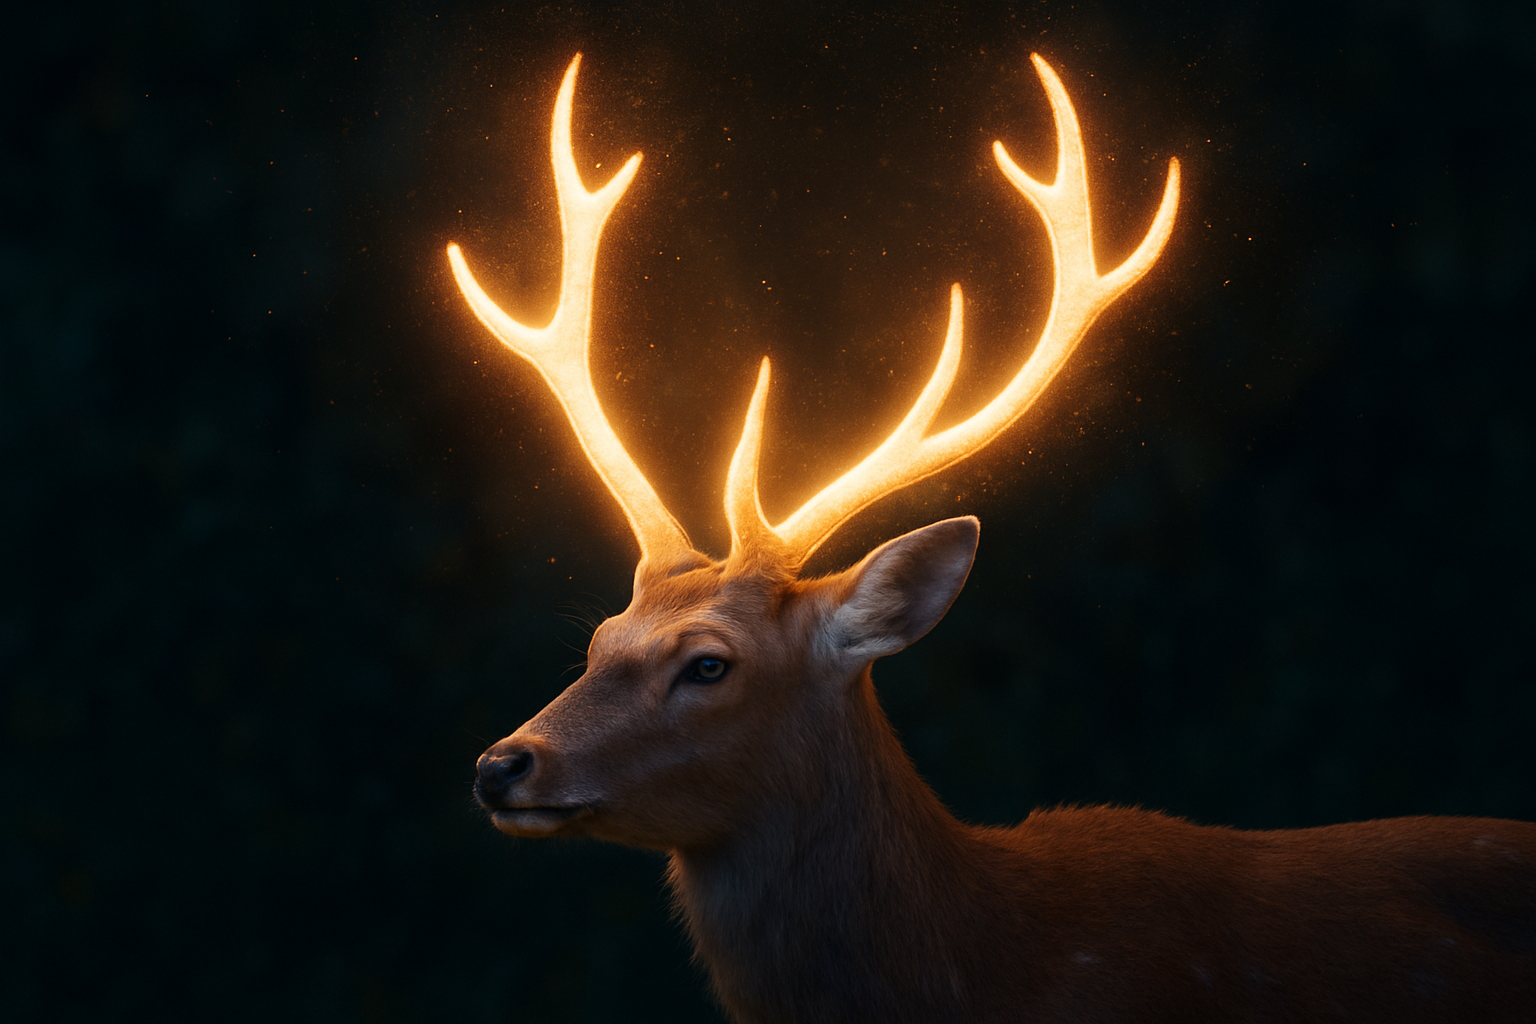
Elevate Your Photoshop Game with a Show-Stopping Glow
Have you ever gazed at an image and felt that there’s something ethereal about the glow emanating from it? Well, my friends, you’re about to discover how to create that magical aura in your own photography! Welcome to another Blue Lightning TV tutorial where we dive into the mystical world of Photoshop to conjure a mesmerizing glow effect that will make your images pop. So, if you’re ready to add a touch of mysticism to your creative portfolio, let’s get started!
Setting the Stage with Brushes and Selections
Before we dive straight into the glow magic, we need to gather our tools—specifically, two brush sets aptly named “Explosion_Brushes” and “Firefly Brushes.” These little digital helpers, available from Brusheezy, will be instrumental in crafting that enchanting aura around our subject.
Next up, selections. The foundation of any Photoshop project starts with good selection practices. For this effect, we’ll create two selections—one for those majestic antlers and another for the rest of our deer model. This dual-selection setup allows us to isolate and manipulate areas with precision, especially when adding that looming glow. Not sure how to get those selections? Fret not, quick selection tools and options like “Select Subject” have got our backs, making the process swift and efficient.
Building the Glow: The Photoshop Way
Now, to conjure up that glow. We begin by isolating the antlers on their layer, transforming them into a smart object for non-destructive editing—a little Photoshop trick of the trade. Into a designated group the antlers go, ready to host layers upon layers of luminescent charm.
Add Some Hollywood Flair with LUTs
A mystical glow isn’t just about the light; it’s about setting the mood. Enter LUTs (Look-Up Tables), which filmmakers swear by to apply a specific color grade to scenes. By selecting the “Moonlight.3DL” preset, we color our scene in an ambient, cinematic light, invoking the feeling of a forest bathed in moonshine.
Let There Be Light… and Blur
To truly reflect that shimmering glow, it’s essential to play with blur levels. Here’s where we create that soft, dispersed light effect—duplicating the antlers layer and applying successively intense Gaussian Blurs across duplicates. Layering blur levels produces varying intensities of light diffusion, simulating how light naturally softens the farther it extends.
Finally, those layered blurs are grouped and adjusted in opacity, tweaking until we nail that perfect glow balance.
The Art of Mist and Soft Light
Once we’ve mastered the glow, it makes sense to enhance the atmospheric vibe with a light mist. Using our Explosion Brushes, gently brushing in this mist will emphasize the ethereal aura. Confine this mist within the glowing antlers via a simple clipping mask, ensuring clean lines where our light ends.
Adding a Touch of Hue
To finish off our glow masterpiece, it’s time to inject some color. A Hue/Saturation adjustment layer clipped to the antlers allows us to pick hues that speak to our creative vision. Whether it’s golden yellows or cool blues, the choice is yours to make. With a few tweaks of the sliders, our antlers transform from mundane to magnetically mystical.
Highlighting Details: Glow on the Back and Head
A glow effect should be cohesive, and what better way to ensure this than by extending those highlights along the body’s contours? Lightly brush over the deer’s back, head, and ears to accentuate these areas, adding depth to the composition. A generous use of “Flow” settings on your brush helps build up light gradually—think of it as softly misting paint rather than splashing an opaque coat.
Fireflies and Final Touches
Mystical scenes aren’t complete without enigmatic companions. Sprinkle in some fireflies for added whimsy, courtesy of those Firefly Brushes. Each click creates a tiny luminescent companion fluttering among the antlers. Adjust the transparency for that subtle and ephemeral feel only fireflies can muster.
Lastly, add a larger glow spread over the antlers using a soft brush set to Overlay—a mode that blends colors for a luminous effect—and adjust the opacity to blend everything seamlessly.
Concluding the Mystical Journey
And there you have it! You’ve successfully mastered a new technique to infuse some magical realism into your everyday photography. Whether you’re designing mythical creature showcases or just want your latest forest scene to have that je ne sais quoi, the glow effect has your back.
Remember, mastering this technique takes practice, experimentation, and a touch of creative daring. The more you play with blend modes, brushes, and effects, the more you’ll discover about your own unique style.
Now go forth, sprinkle your creative light across your projects, and remember to keep innovating!





