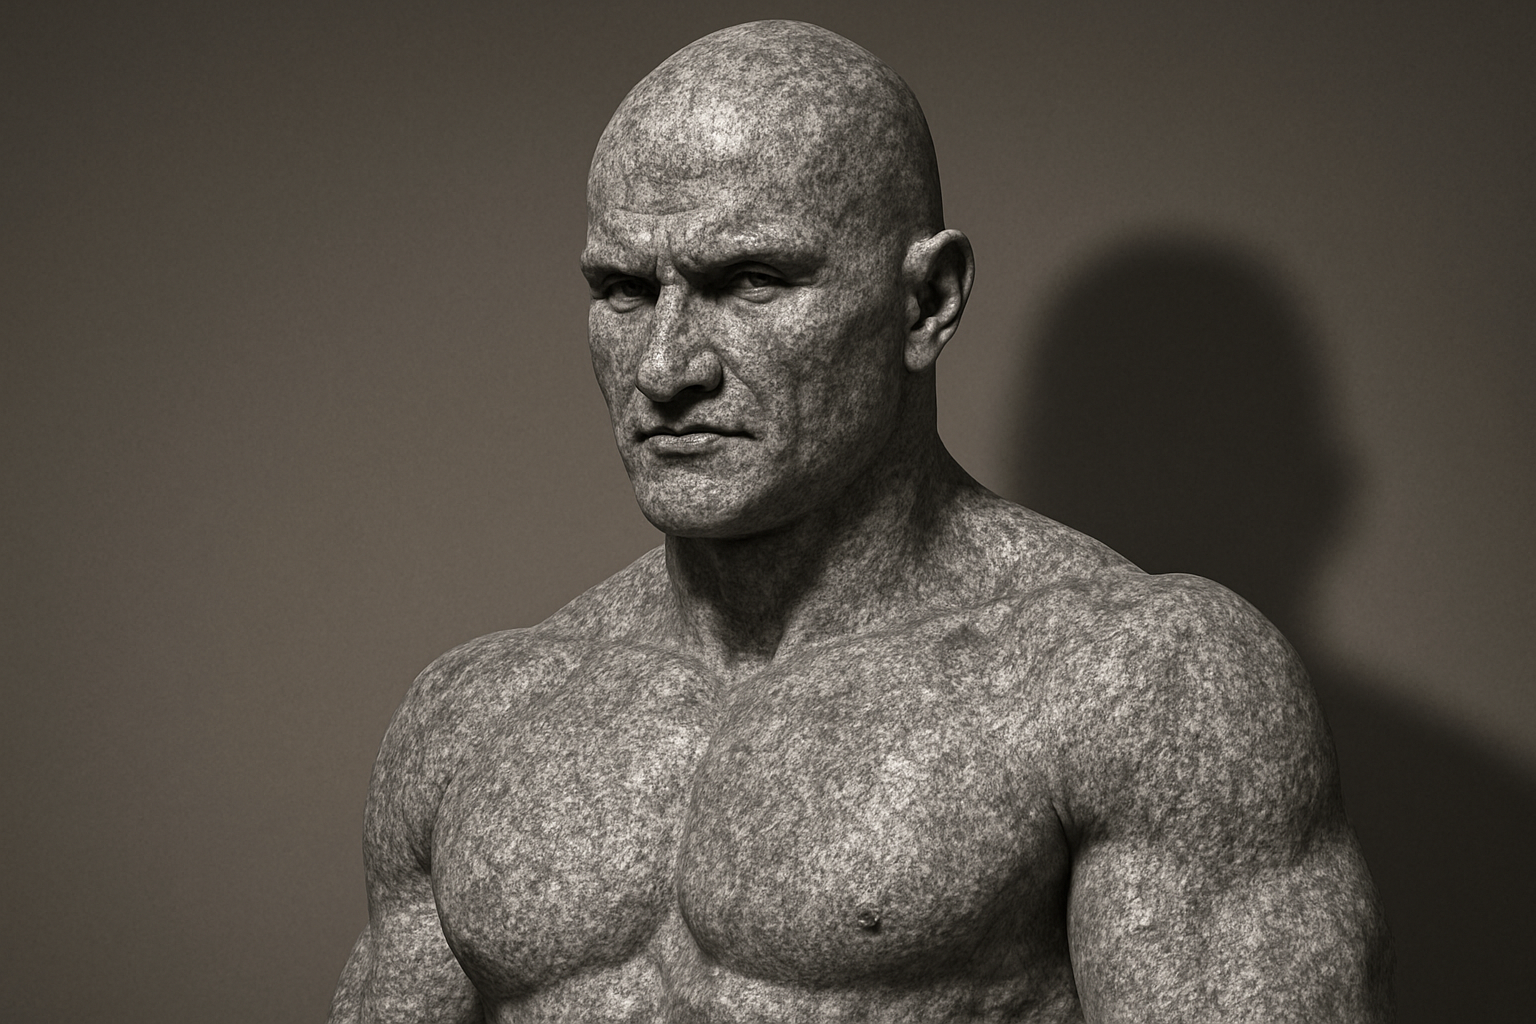
The Art of Turning People into Stone (No Magic Required)
If you’re anything like me, trapped between the realms of reality and a vivid imagination filled with amusing yet striking visuals, the prospect of transforming a person’s portrait into a granite statue might just tickle your fancy. Today, we’re diving headfirst into the ineffably cool world of Photoshop to learn how to morph an ordinary photo into a mesmerizing stone monument.
Setting the Stage — Your Creative Fortress
You may not need a chisel or countless hours, but you will need Adobe Photoshop. For this tutorial, we revolve around a knitted PSD file that gifts you with both a compelling granite texture and a fitting backdrop. Before we sculpt our masterpiece, we ensure everything is perfectly arranged. Click the subscription button on our YouTube channel to stay informed on all the latest Photoshop sorcery.
Preparing Your Subject for Transformation
Your creative odyssey begins with a chosen subject. Picture them now in motion or repose. Next, it’s worth considering whether your subject’s attire or hair is dark; in this case, brighter tones will produce optimal results. For this, create a new black and white adjustment layer and select a suitable tonal range. Use the Quick Selection Tool — it’s faster than scrolling through TikTok, I promise — and feather the edges using Select and Mask or Refine Edge, depending on your software relics.
The Statuesque Workflow
- Peel Back the Watches: Turn your subject grayscale, eliminating vibrant colors.
- Gouge Out the Vibrance: Eyes need subtle tweaks, removing irises and pupils with an appropriate shade of gray, akin to our stone canvas.
- Blur Reality: Craft a displacement map to contour your granite masterpiece around your subject’s facial topography.
Applying Texture — The All-Powerful Granite
Once your displacement map is snugly in place, move your cutout subject over the granite texture and convert the latter into a Smart Object. Delve into the realms of the “Displace” filter, aligning your granite surface with the nuanced contours beneath. Magic, right?
Lighting — Carvings in Shadow and Light
Here comes the artistry. Utilize the Internal Glow settings to finesse darkness around your subject’s extremities. This step is pivotal in achieving an ancient appearance, impacting everything from stone dragons to Downton Abbey statues.
Casting Shadows in Stone
What’s a statue without its shadow? Certainly not one to brag about. Create a shadow layer beneath your subject to establish depth and three-dimensionality. Ensuring the shadows fall in concert with the monument’s silhouette involves Gaussian blurring and precise placement to mirror a specific light source.
Final Adjustments — Crafting the Perfect Illusion
After each careful alteration, ready your masterpiece for presentation. Adjust brightness, perversely awaiting the final moment where shadows align on your canvas, climaxing your creative journey under perfectly tuned levels. Reflect on a bustling digital gallery; you’re ready to unveil your granite spectacle.
A Closing Thought
Like the revered mastodons of antiquity, our subjects transition gracefully into a stiff immobility, forever captured in the annals of Photoshop’s libraries. So whether you’re keen on showcasing this technique across social media platforms or pure creativity indulgence, one truth remains clear: no one’s safe from being statuesque.
Embrace your inner artisan, and fearlessly download the textures you need by checking out our tutorials and resources. There’s no going back once you’ve unleashed the statuesque flair imprisoned within your digital art loft.
Photoshop awaits; go sculpt some statues!


