Revive Your Photos by Transforming Dull Skies
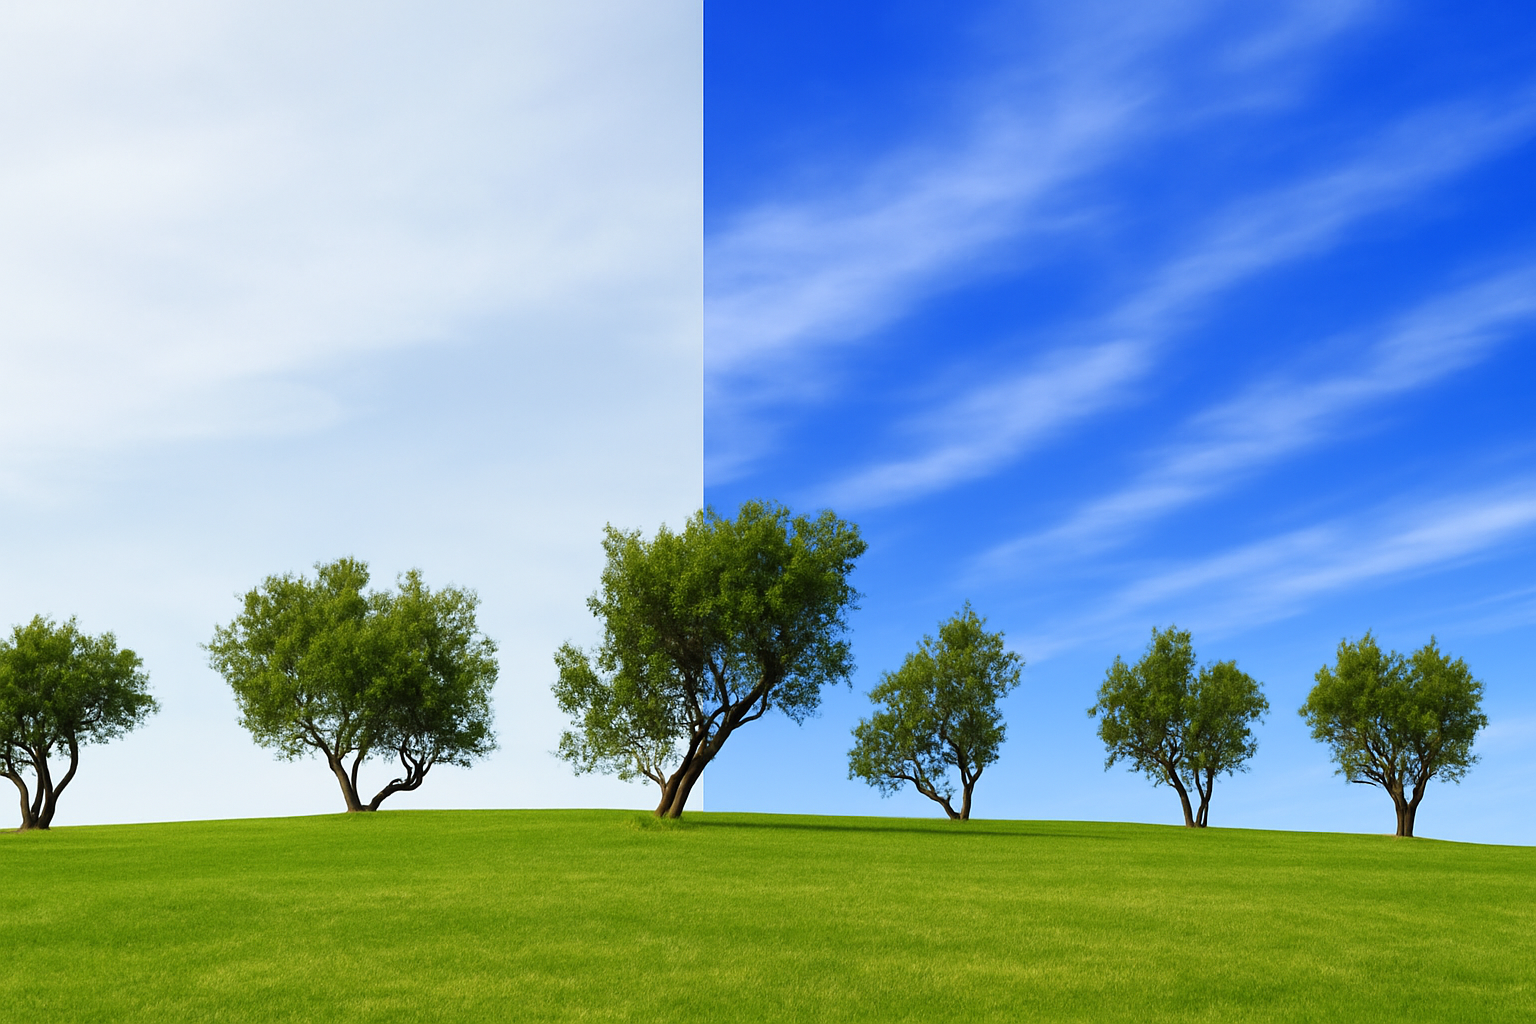
Photography has a whimsical way of capturing the world but sometimes, the skies don’t cooperate. An overcast or uninspiring sky can dampen a perfect shot. Fear not, creative adventurers! Today, we’re unraveling the mystery of transforming a drab, burnt-out sky into a breathtaking backdrop using Photoshop. Whether you’re updating photos for a client or enhancing personal memories, this technique will save the day.
Now, buckle up and enjoy this journey into the digital wild, where we swap out those blah-blah skies for the fantasy clouds of your dreams.
Step 1: Begin with Your Chosen Photo
First things first: grab a photo with a sky that’s lost its luster. Yes, feel free to use that vacation shot where the scenery is stunning, but the heavens look a bit… meh. For those who want to follow along precisely, Marty has generously provided a project file link in the video description.
Separate Sky from Land
Embark on your sky-replacement journey by dividing the sky from the rest of the photo. There are several tutorials out there, but the trusty Quick Selection Tool takes center stage in this demonstration. Setting a radius between 5 to 15 pixels is recommended for optimal performance. This tool enables you to brush over the landscape and select it magically, sparing the sky by deftly holding Alt (Option on Mac) as you glide over it.
To ensure that your selection includes every nook and cranny of your landscape, indulge in a neat Photoshop trick by pressing Q to enter Quick Mask Mode. You’ll have the chance to refine the edges shortly. Pressing Q again switches it back to a vibrant selection.
Step 2: Refine Your Selection
Depending on your Photoshop version, click Select and Mask or Refine Edge at the top. You can also find these options under the Select menu. In these spaces, navigate with Smart Radius and tweak the radius slightly. Want to redefine tool size? Just hit the bracket keys, and you’re drawing like a pro.
Once you’ve enhanced your landscape’s edges, check the Decontaminate Colors box. This removes any stray sky color that might infringe on your majestic landscape. Output the refined selection to a New Layer with Layer Mask and hit OK.
Step 3: Applying the Gradient Tool
Let’s bring some color into those dull skies. With the background visible and the upper layer active, venture over to the Gradient Tool. Make sure the Linear Gradient icon is shining and proceed to edit the gradient to define a brilliant sky hue.
Choose a Black, White preset, and adjust the stops:
– Pick the first stop and enter the hex code 0151FE in the color box.
– Move to the second one and type A7CAFF.
This motion conjures a stunning gradient from a bold blue to a soft sky hue. Now, get that cursor halfway up the image, press Shift, and drag your Gradient Tool just above the horizon, and voilà! An irresistible sky gradient is born.
Step 4: Inviting the Clouds to the Party
All right, let’s get some clouds into that dreamscape. Duplicate your masked layer, unlink the layer from the mask, and then forge clouds using the Filter menu. Hop to Filter > Render > Clouds. Mystical cloud formations will begin to appear.
Change your layer’s blend mode to Screen for a seamless transition into the new sky.
Refinement with Blend If
Fine-tuning involves working some magic with Blend If. Double-click the cloud thumbnail to open Layer Styles. In the Blend If section, split the icons and adjust to let more landscape color pass through. This nifty trick allows for less cloudy interference and enhances the blueness of your sky.
Final Adjustments
Zoom out to take in your masterpiece using Ctrl or Cmd plus the minus key. Tangled clouds stretching beyond the canvas? No worries—just crop them out. Slight tweaks to the Transform Tool will resize elements for your visitor’s eye.
And there you have it, a once somber scene transformed into a sky that would make even Zeus envious. So, the next time a pesky gray sky drags down your photos, wield your Photoshop know-how and create something extraordinary. Embrace the clouds—paint them, shape them, and let them unleash the potential of every photo you adore. Happy editing!