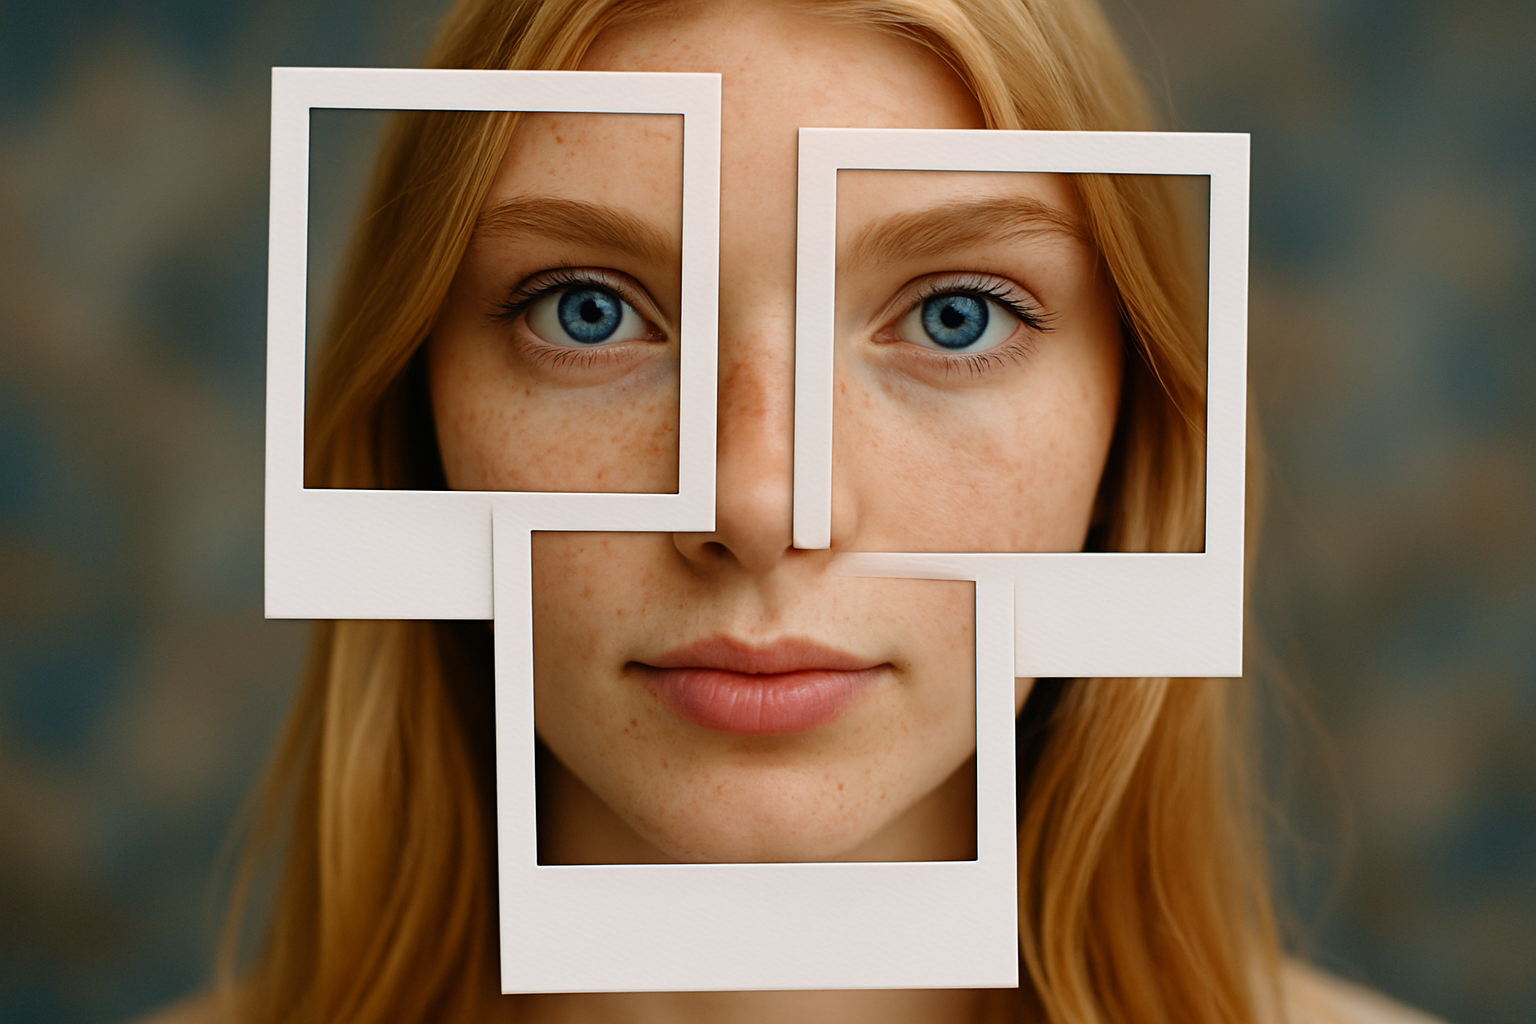
Unleash Nostalgia: Crafting a Polaroid Photo Montage
Remember those instant-developing Polaroid photos that evoke a certain nostalgic charm? Today, we’re diving into the creative world of Photoshop to recreate that iconic Polaroid photo montage look. This technique is not only fun and visually compelling, but it also brings a vintage vibe to your digital creations. Whether you’re a Photoshop veteran or a curious newbie, this step-by-step guide will help you transform your images seamlessly.
Smart Objects: The Secret Weapon
The first step in our Polaroid montage journey involves converting your chosen photo into a Smart Object. Why? Because Smart Objects allow for non-destructive modifications, meaning that your original image remains untouched while you freely apply filters, transformations, and adjustments. Simply click the icon at the upper right of the Layers panel and select “Convert to Smart Object.” If you’re still on the fence about which image to choose, Shutterstock offers a great array of options.
Applying Gaussian Blur
Next comes the moment to blur your image slightly—a technique essential for creating that dreamy Polaroid aesthetic. Duplicate your Smart Object layer (Cmd/Ctrl + J), and name this copy “Blur.” Head to Filter, then Blur, and choose Gaussian Blur. While the video suggests a radius of 8 pixels, feel free to adjust based on your image’s size and resolution.
Creating the Polaroid Frame: A Step-by-Step Guide
To start crafting the iconic Polaroid frame, we’ll use the Rectangular Marquee Tool. Hold Shift to ensure a perfect square selection and fill it with white. If you notice your foreground and background colors aren’t set to black and white, pressing “D” on your keyboard is a quick fix.
Next, we’ll add some depth to these frames using a drop shadow. Copy the newly formed layer (Cmd/Ctrl + J) and rename it “Drop Shadow.” Open the Layer Style window by double-clicking the thumbnail, navigate to “Drop Shadow,” and adjust settings, such as a 25% opacity and a 125-degree angle to your liking. Setting the Fill to zero ensures that only the shadow effect is visible while the white frame remains transparent—crafty, right?
Aligning Layers and Creating Composite Snapshots
It’s essential to keep your workspace tidy, especially as we add new Polaroid frames. Group all layers that form the Polaroid into a folder (make sure they’re all active by Shift-clicking them) and press Cmd/Ctrl + G. Not only does this reduce clutter, but it also allows easy transformation and duplication of your Polaroid.
Do you want more than one Polaroid in your montage? Simply duplicate the folder of your first Polaroid and adjust its position and angle using the Transform Tool (Cmd/Ctrl + T). Layer them in a visually appealing way for a seamless overlap. Repeat these steps to create as many Polaroids as your heart desires.
Focus and Layer Visibility
After creating three Polaroid frames, it’s time to add focus within each. CMD/Ctrl-click on the respective inside layers’ thumbnails to activate their selections. Use these selections to adjust your masking, so the frames stand out sharply against the blurred background.
Deciding which frame should be on top of the stack is a vital stylistic decision. In our example, we chose the middle Polaroid to be the base. Make a composite snapshot to keep things neat and manage layer visibility efficiently.
Final Thoughts: Merging Creativity with Nostalgia
Voilà! You have now mastered the art of creating a Polaroid photo montage using Photoshop. This technique not only feeds nostalgia but also allows you to create eye-catching designs that instantly stand out. Integrating classical aesthetics with digital tools—what’s not to love? As always, remember that practice makes perfect, and every new attempt will refine your skills further. Dive into the Polaroid process, and let your creativity flow.
Enjoy crafting your montage and making your digital gallery shine with that classic Polaroid touch. Happy editing!


