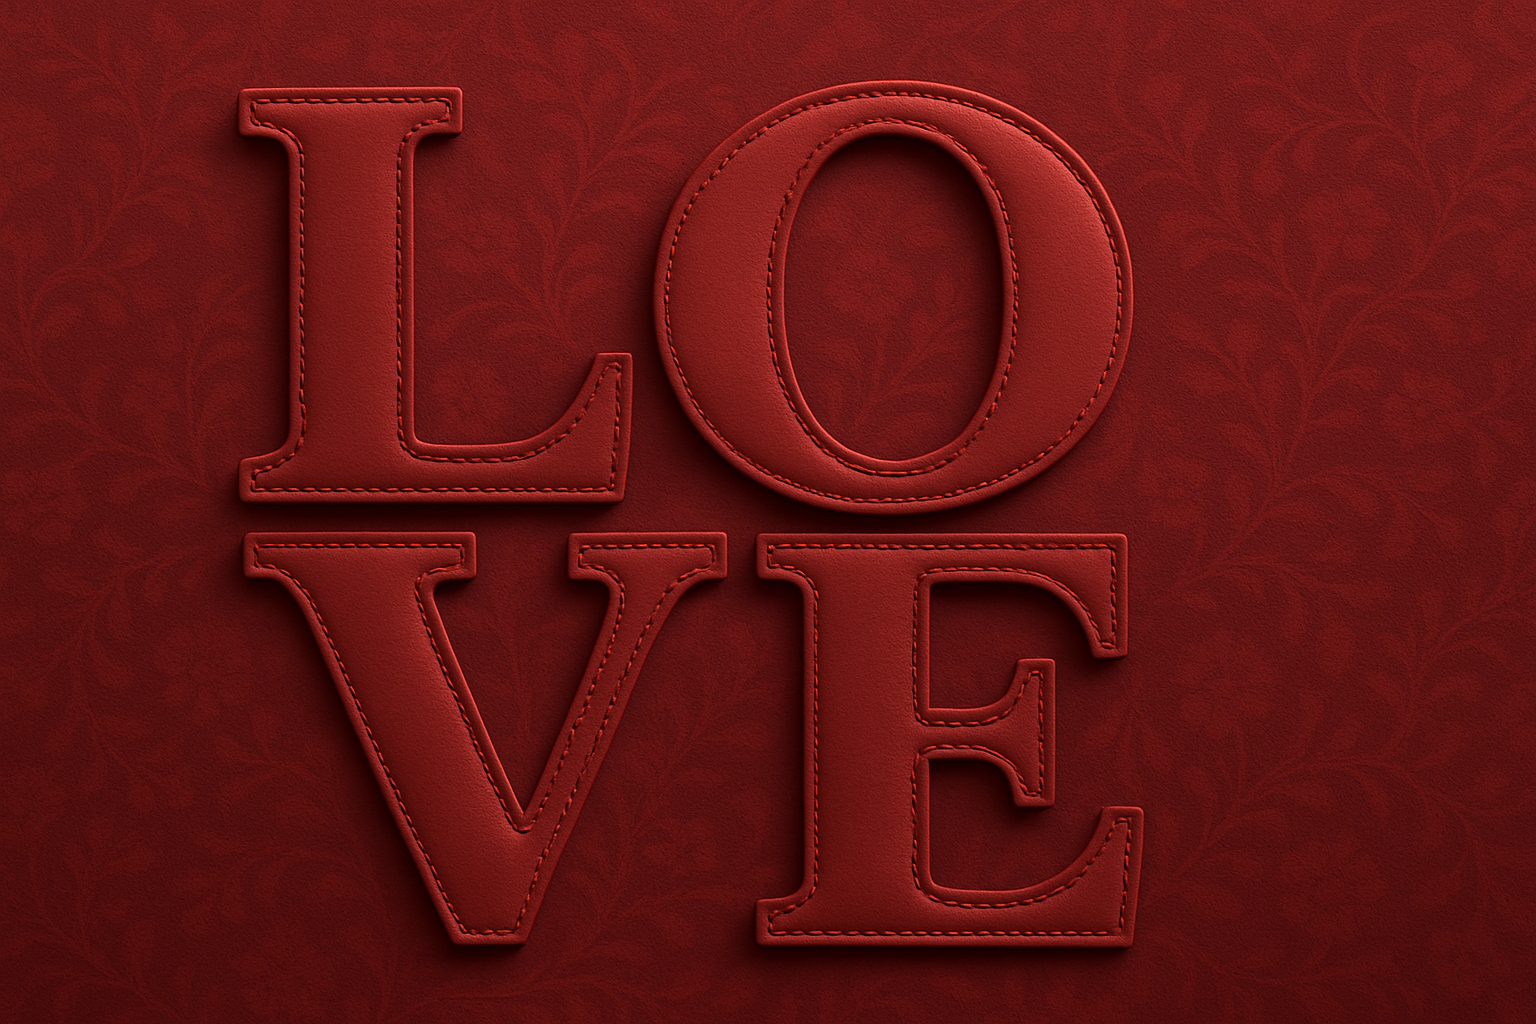
Dive Into the Creative World of Tufted Text Effects
As anyone who’s dabbled in graphic design knows, text effects can make or break your design. They’re the subtle yet impactful elements that can transform a mundane composition into something truly mesmerizing. Today, we’re diving into the world of tufted text effects—a delightful addition to any designer’s toolkit. Whether you’re crafting a birth announcement, creating a playful graphic for a child’s room, or simply want to explore a new Photoshop technique, this effect is sure to inspire.
Let’s Get Started with Tufted Text
First off, our canvas is set to a size of 1280×720 pixels at 150 pixels per inch, ideal for creating a visually stunning effect without overburdening your system. There’s also a convenient PSD file (linked in the video description) that comes with an optional fabric base background, as well as some cute baby-themed shapes if you’re going for that birth announcement vibe.
Choosing the Right Tools
- Font Selection: Use fonts that are thick and bold for the best tufted appearance. For this tutorial, we’re using the Geomancy font at a size of 68.
- Brush Preset: A custom brush preset for stitches is provided to enhance the textile feel of your text. Installing these brushes is simple, and comprehensive instructions are available here.
Crafting Your Text
- Text Tool Magic: Utilize the Type Tool in Photoshop to place your desired text. Don’t worry about choosing the perfect color right now—it won’t impact the final design.
- Align and Tweak: Adjust the letting and size for an ideal fit using the Character panel.
The real magic happens with text alignment. Whether you’re a stickler for perfect placement or just winging it, aligning your text can change everything. Use the rectangular marquee tool for perfect positioning, followed by the move tool for alignment that even Marie Kondo would envy.
Combining Layers and Effects
Now, for the pièce de résistance—layer effects. Convert your layers into a smart object to preserve editing capabilities.
- Layer Effects: Set the fill to 0% and delve into Bevel and Emboss settings for a pillow-like effect. Adjustable parameters like depth, size, and softness give you control over the final look.
- Stitching Detail: A tufted look wouldn’t be complete without stitching. Create a new layer, aptly named Stitches, and employ the custom stitch brushes on your text.
Color Customization
Fancy a pop of color? Photoshop’s Channel Mixer is your best friend for achieving any hue you desire. Simply tweak the red, green, and blue output channels to land on that perfect tone that complements your design’s purpose or aesthetic. From vibrant pinks to subtle pastels, the power is in your hands.
Endless Possibilities with Tufted Text
Whether you’re making a personalized gift, spicing up your graphic design portfolio, or just experimenting with new tricks in Photoshop, tufted text offers an exciting avenue. With a few clicks and a sprinkle of creativity, you can craft designs that are as fluffy as they are impactful.
Explore, experiment, and most importantly—enjoy the process. This unique approach to text design isn’t just about aesthetics; it’s a testament to the power of play in creative work.
And there you have it! Your very own tufted text effect, adding depth, character, and a touch of whimsy to any project. So the next time you’re in the design doldrums, remember: a little tuft can go a long way.


