Level Up Your Photoshop Skills with Text Inside Object Techniques
Let’s face it—graphic design tools are evolving so fast that it’s hard to keep up unless you’re Neo plugged into the Matrix. Today’s tutorial tackles a creative technique that’s both timeless and captivating: spelling out text inside objects. It’s an eye-catching effect that’s perfect for crafting logos, advertisements, and interactive media. Unlike trying to fix your geometry homework using Photoshop, this is a visual trick that adds depth and dimension to your designs. In this post, you’ll learn how to effectively place text inside an object in a way that is as stylish as your hipster cousin’s glasses. Whether you’re a Photoshop rookie or you could practically make your own Snapchat filter from scratch, you’ll find something valuable here.
The Art of Text Manipulation: Inside Objects Edition
Visual designers have been bending text around shapes since the days of clip art in WordPerfect (look it up, young ones). But bending text inside an object is like a high wire circus act for your eyes—a stunt that can stop people mid-scroll on their feed. Here’s the gist of how you can turn any ordinary image into a platform for stunning typographic creativity.
Step 1: Setting the Stage with Your Image
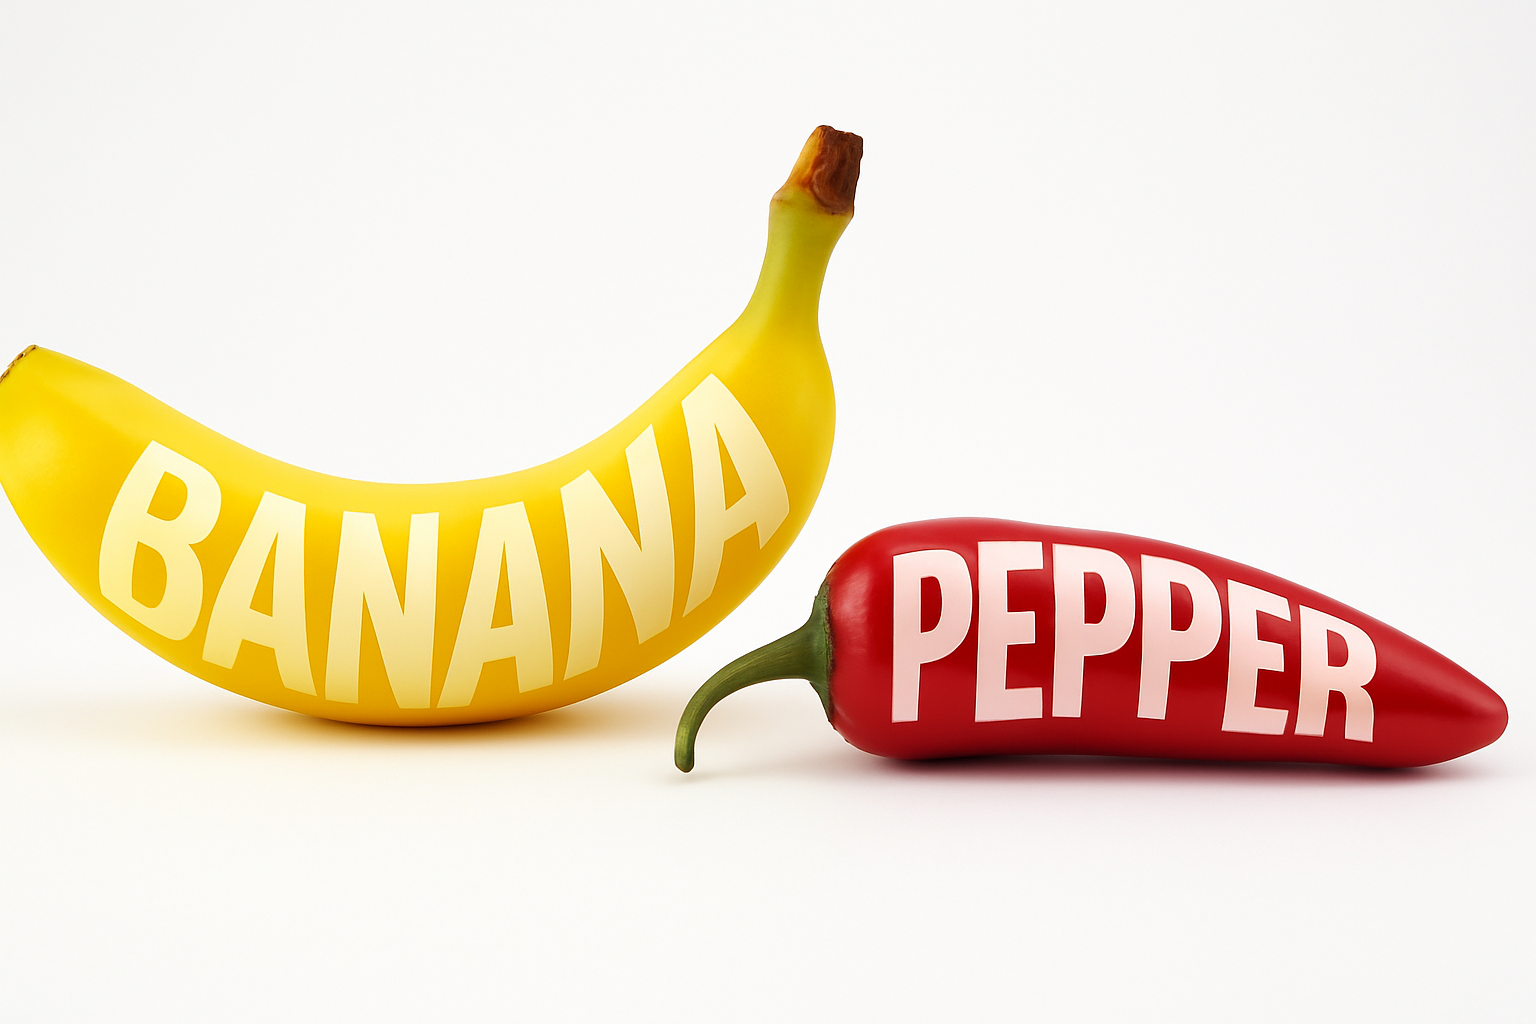
For this task, you may start with a ‘banana image’ on a white background, or perhaps you’re more of a non-conformist who wants to use an image that’s not already set up perfectly. If so, you’ll need the Quick Selection Tool to isolate your subject.
1. Select Your Subject: Use the Quick Selection Tool to elect the part of your image you want to be heroic.
2. Layer Masking: Add a Layer Mask to create that elusive interaction between your text and object.
Step 2: Crafting the Perfect Text
The next step involves choosing the perfect font. Opt for something bold and impactful to achieve a standout effect. “Bas new regular” is a solid choice, but don’t let us suppress your font freedom. Font size not tickling your fancy? Adjust it to fit your object.
1. Choose & Customize Text: Select a heavy-hitting font and customize the size and tracking (spacing between the characters) as per your mood board.
2. Smart Object Wisdom: Convert your text to a Smart Object, giving you the flexibility to tweak and perfect non-destructively.
Step 3: The Warping Wizardry Begins
Here’s where we perform optical jujitsu. By warping the text to match the curvature of your object, we unleash artistic chaos but in a good way.
1. Warp & Bend: Through Photoshop’s warp tool, adjust your text to mirror the lines of your object. It’s like bending reality to your will—artistic will.
2. Further Warping: No, you’re not hallucinating. Convert the text into another Smart Object for more transformative manipulation. Feel free to warp the text shape one additional time until it fits like Cinderella’s glass slipper.
Step 4: Bringing in the Background Brigade
Anyone who has ever tried to paint themselves out of a white background hole knows the struggle. To save yourself from such a fate, create a new layer filled with white as your background hero.
1. Reversing & Filling: Unlock the existing layers and fill the new background with white using nifty shortcut keys like a pro.
2. Layer Mask Defense: Select the text shape once again to create a reveal through the layer mask like muggle magic.
Step 5: Shady Adjustments
If our steps so far sounded like an abstract expressionist’s fever dream, adding shadows will ground your work in realism. Shadows give depth like nothing else in the photoediting kingdom.
1. Brush Tool Mastery: Use a soft round brush, sized at 400 pixels, to lovingly stroke the shadow beneath the object.
2. Control & Convert: This is the dance of transforms. Scale your shadow layer until it blushes in diffidence, sitting snugly below your object.
Step 6: Adding a Final Touch of Tint
To make the shadow swankier, add a warm color overlay. Who says shadows need to be the grim specters of grayscale? Pick a shade that adds just the right pop to your image.
And there you have it: a step-by-step guide to creating text inside objects using Photoshop. With these techniques, you can spice up everything from blog headers to your next club flyer. Go forth, designers, and let your text bend fearlessly alongside the creative objects of your choosing. After all, in the galaxy of graphic design, there are no limits!