Turn Your Photos into Cinematic Horror Portraits
Are you fascinated by the haunting aesthetic of “The Silence of the Lambs” movie poster? Well, you’re in luck! Today, we’re diving into the digital realm to recreate that chilling face portrait using Photoshop. All you need is a photo of your choice, some patience, and a sprinkle of creativity. With this guide, you’ll transform an ordinary photo into something that captures the eerie essence of the iconic movie artwork.
The Essential Prep Work
Before we dive into the special effects, let’s set up your image for success. Select a photo featuring shadows on one side of the face—preferably, the right to match the original poster. If the shadows are on the left, don’t worry. Head over to “Image” ➔ “Image Rotation” ➔ “Flip Canvas Horizontal.” Voilà! Shadows are now where they belong.
Next, bring out your inner crop master. Using the Crop Tool, set your image dimensions: 72 pixels per inch resolution and a height of 1400 pixels. Drag those crop handles until your subject’s face is rightfully centered, cropping just below the chin and halfway up the forehead.
Crafting the Shadowed Look
Our next trick is less sorcery, more smart layer management. Convert your image into a Smart Object to modify it non-destructively and easily replace it with another face later if needed. Trust me, you’ll thank yourself for this extra step when you decide to have a sequel-worthy portrait collection.
Mastering the Art of Blur and Noise
It’s time to bring on the blur! Move through the menus like a digital ninja: “Filter” ➔ “Blur” ➔ “Surface Blur.” To ensure the image’s edges stay sharp as Jack the Ripper’s knife, set the Radius to 35 pixels and the Threshold to 15 levels.
Next, sprinkle some textural spice with “Filter” ➔ “Noise” ➔ “Add Noise.” Set it to 15% and choose Uniform. This adds just the right amount of grit, making the image feel more lifelike and less manufactured.
Building the Bone-Chilling Atmosphere
No horror art is complete without a soul-shaking color palette. Create an Adjustment Layer by clicking the Color Lookup icon, selecting “Load 3D LUT,” and choosing “Bleach Bypass.look” for that washed-out, desaturated feel that horror movies adore.
For added drama, implement a Gradient Map. Change the left Stop color to black and the Location to 60, then hover over the right Stop. In the hexadecimal field, enter: 00050B. Cue the ominous music.
The Final Flourishes
Make a new layer beneath your adjustments and shade the photo artistically. Use a soft, round brush to paint black on the right and white on the left. This adds to the ominous play of light and shadow heralding the spirit of horror.
Now, let’s infuse the malevolent crimson into the eyes. Duplicate your subject layer and move it to the top. In its new splendorous position, hide the “Add Noise” filter and color the eyes with the Solid Color Adjustment Layer, typing in 830400 (a blood-red hue) and switching its Blend Mode to “Overlay.”
Detailing with Precision
Revel in the digital fountain of youth as you enhance the eyes with “Inner Glow” and “Shadows/Highlights” adjustments to make them appear more unsettling and dramatic.
It’s here where things get intense. Directly reveal your true colors, picking a vibrant red for the iris and applying an eerie “Inner Glow” effect with the Blend Mode set to Normal 70% Opacity.
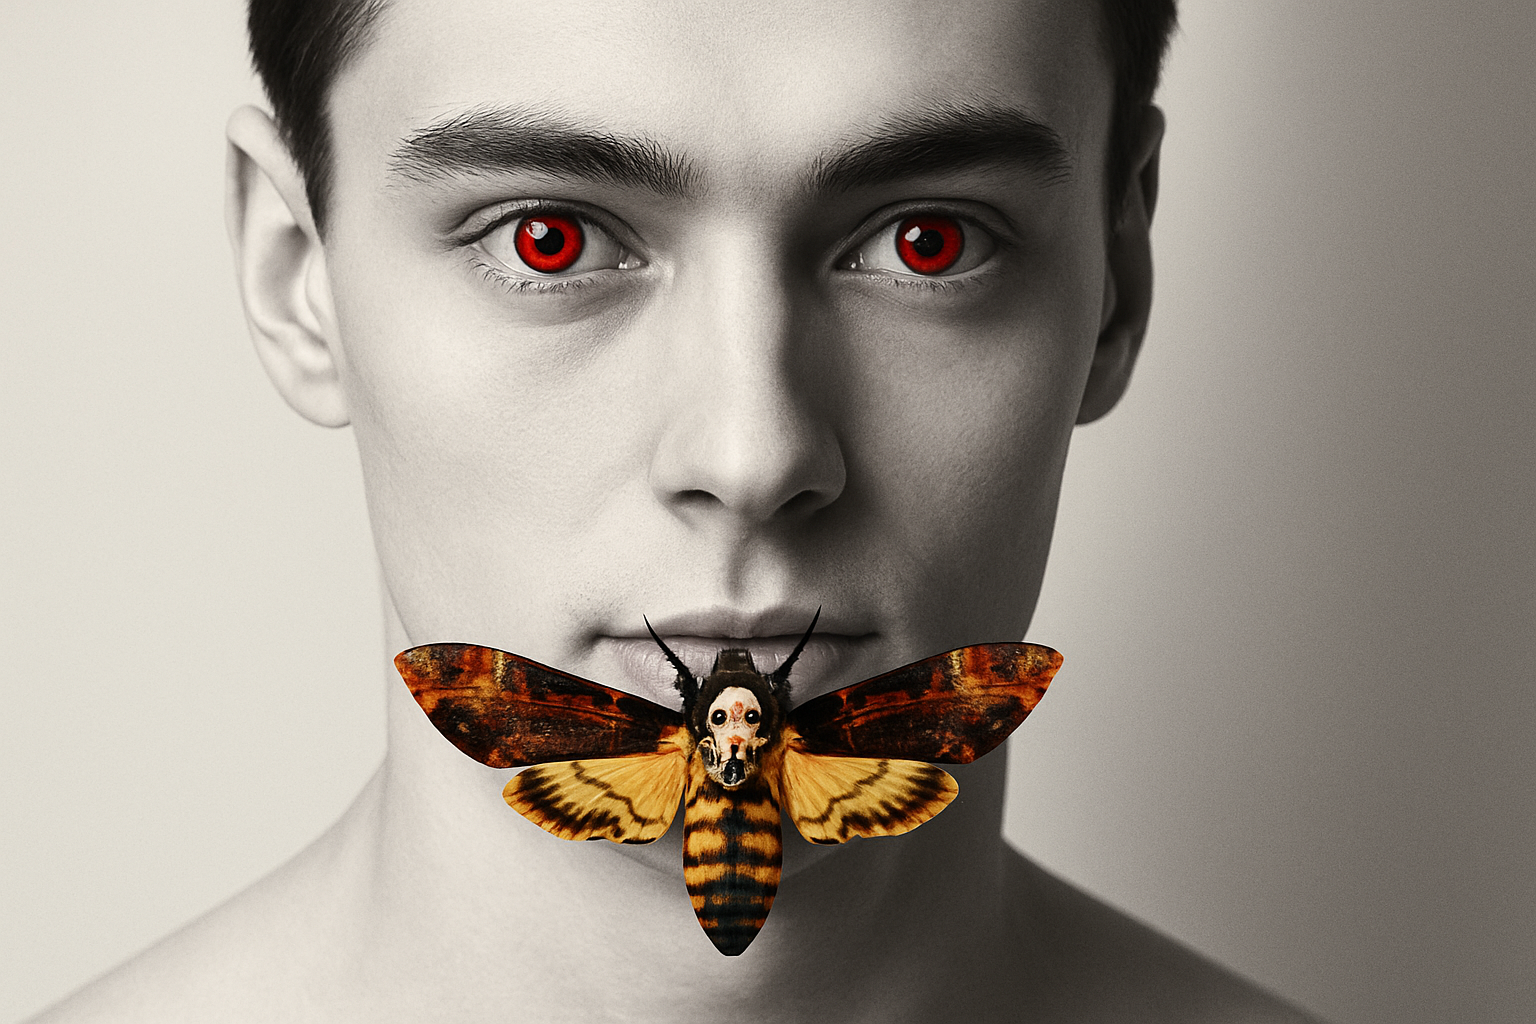
The Creepy Cherry on Top: Adding the Moth
Your portrait is disturbingly delightful, but it’s not quite complete until we add the classic Hannibal Lecter moth. Simply embed the moth image, adjust scaling, and complement it with a subtle “Drop Shadow” layer style. Keep it moody and mysterious with Linear Burn at 25% opacity.
To finish, darken the background a smidge by painting with 95% brightness in Multiply Blend Mode. Press `Alt/Option + Delete` to fill the layer with darkness—a perfect homage to the movie’s atmosphere.
And there you have it! Your own masterful recreation of “The Silence of the Lambs” movie poster, ready to send shivers down anyone’s spine. Whether you’re a Photoshop novice or a seasoned pro, this tutorial is the perfect exploration of layered techniques to add that cinematic horror flair to your digital art toolbox.


