
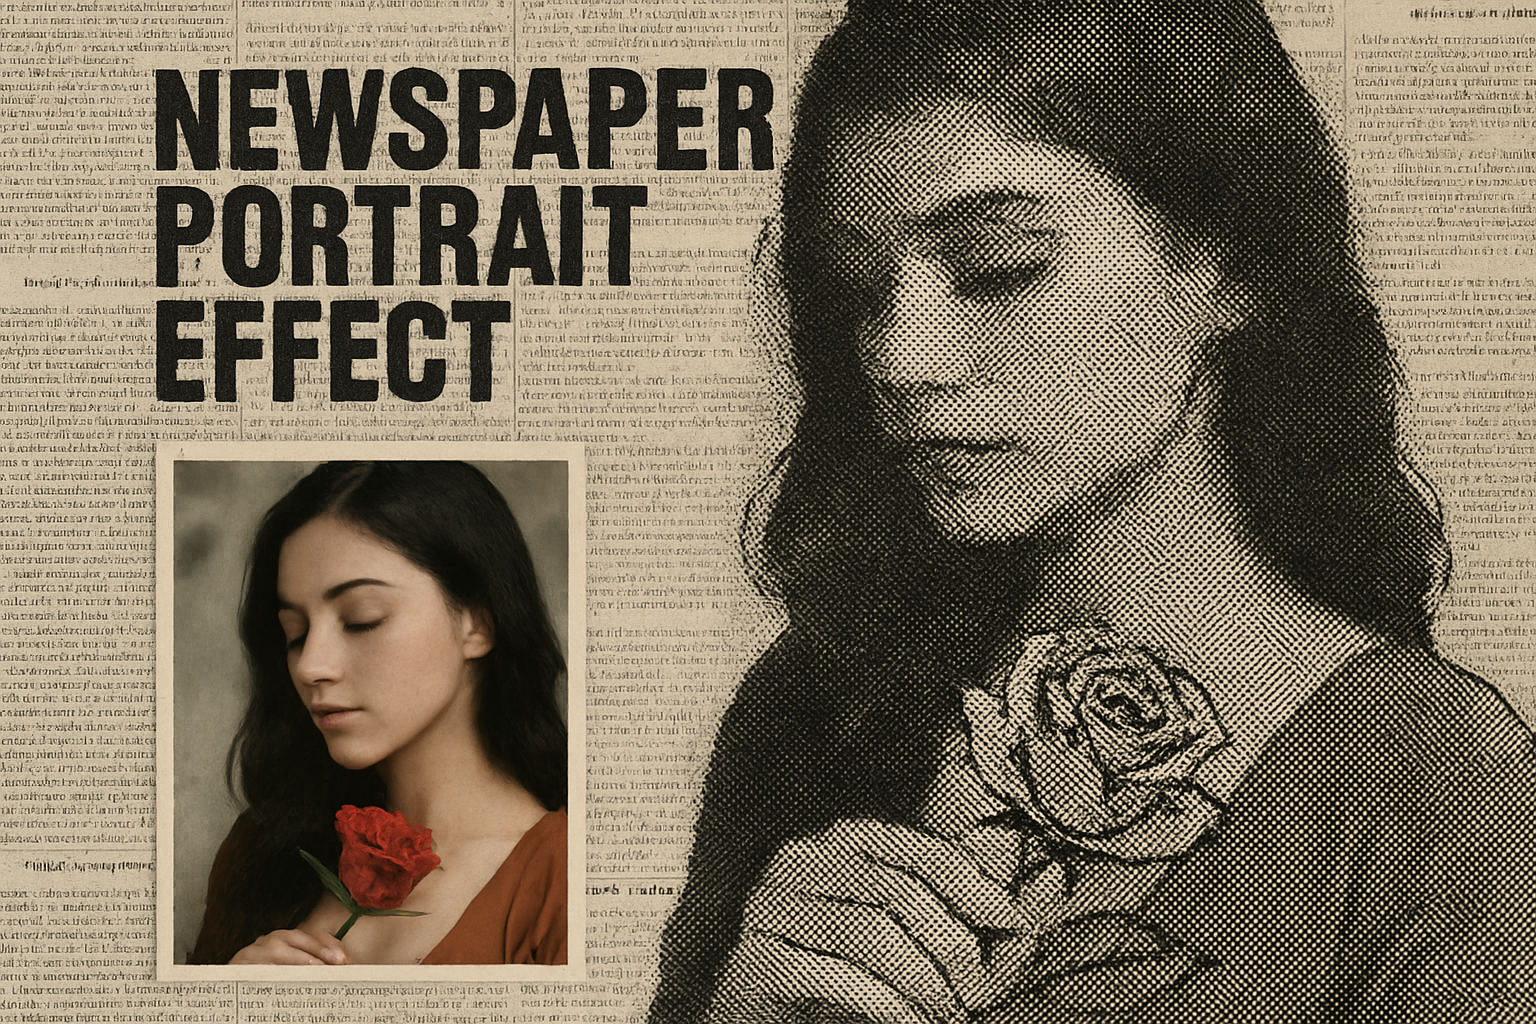
Enhance Your Photos with a Vintage Newspaper Effect!
Have you ever wanted to transform your ordinary portrait photos into compelling works of art that look like they’ve come straight out of a vintage newspaper? Today, we’re diving into the captivating world of digital editing to show you how to create those eye-catching newspaper portraits using Adobe Photoshop. Whether you’re looking to add a dash of nostalgia or a unique edge to your images, this tutorial will guide you through the process with ease and a sprinkle of snark.
First Steps: Preparing Your Canvas
To kick things off, you’ll need to choose a photo that you wish to transform into a newspaper-style masterpiece. Start by separating your subject from the background. Depending on which version of Photoshop you’re wielding, several methods could serve your purpose. For those with Photoshop CC 2020 or later, unlock the background and open the Properties panel to find the mystical ‘Remove Background’ button. Imagine Photoshop as your digital wizard, isolating the subject with a click. Kudos if you’ve been keeping your Photoshop updated!
For Those Stuck in 2018
For Photoshop CC 2018 and 2019 users, the Quick Selection Tool and the select subject button will be your trusty companions. And for the elders of the Adobe tribe, a bit more manual labor with the Quick Selection Tool may be required. Click the Layer Mask icon to isolate your subject, and you’re ready to enter the next chapter of this saga.
Overlay the Vintage Flavor
Next, we’ll blend our subject into the newspaper montage background. This is where the magic really begins. Press ‘V’ to open the Move Tool and drag your subject into the newspaper montage. Hold down the shift key to keep things centered, because who likes a wonky layout? Use ‘Ctrl + T’ (or ‘Command + T’ for our Mac using comrades) to resize your subject if necessary.
Elevate with Smart Objects
For those who like reversible decisions (because mistakes do happen), convert your subject into a Smart Object. This allows modifications without permanently altering your original image. Simply click the layers panel options and choose ‘Convert to Smart Object.’ Now, if the mood strikes, you can swap subjects without losing your styling wizardry.
From Shadows to Highlights
Is your image getting lost in shadows? Burst those details out by heading to ‘Image’ > ‘Adjustments’ > ‘Shadows/Highlights’ and tweak it to your heart’s content. Set the shadow’s amount to 50% and watch the magic happen.
Texturize and Final Touches
Create a new layer filled with 60% gray (don’t worry, we’re not painting ‘happy little trees’). Press ‘D’ to revert to default black and white, and use the foreground color brightness of 60%. Press ‘Alt + Delete’ (or ‘Option + Delete’ on Mac) to fill it with your chosen shade of gray.
Filter It Like an Expert
Here’s where it gets fun. Open the Filter Gallery via ‘Filter’ and navigate to the Sketch folder to apply the ‘Halftone Pattern’. Adjust the size, contrast, and pattern type to refine your effect. Layer the ‘Poster Edges’ from the Artistic folder for an authentic print effect. These layers give your portraits contours akin to classic newspaper styles!
Embellish with Textures
To top it all off, brighten the edges of your image, enhancing your subject and adding a dirty paper texture to the background for authenticity. Use the Inverted Layer Mask trick to selectively reveal parts of your subject and consolidate the texture’s appeal.
The Power of Brushes
Feel the craftsmanship of adding powder brushes to sublimely blend transitions, refine edges, and adorn your portrait with an organic feel. With your brush set to 2500 pixels and opacity maxed, a single click at the center will paint an alluring portrait of detail.
Making Your Mark—Final Thoughts
You’ve now mastered the art of recreating old-timey newspaper portraits with digital finesse. Switching blend modes, using Smart Objects, and artful application of textures give you control over every pixel. Each tweak and alteration accumulates to craft an inspired piece that’s uniquely yours, cementing your prowess in Photoshop sorcery.
With these steps, your photos transform into compelling portraits that are not just visual elements but conversation starters. So go on, break out your digital scalpel and capture the essence of nostalgia with a modern twist.
For an in-depth, visual walkthrough, don’t forget to check the embedded video to guide you through each step with ease! ⏭️
Happy creating, dear artists of the internet. 🎨✨





