Unlock Your Inner Polygon Whisperer
Have you ever wondered how those mesmerizing low poly art pieces are created? You know, those images that are somehow both complex and simple, abstract yet somehow capturing the very essence of a subject? Today, we’re diving into the art of low poly design using good ol’ Photoshop. Warning: you might enter a black hole of creativity from which there’s no return—but hey, it’ll be worth it.
Bringing Geometry to Life in Photoshop
Low poly art is like origami for the eyes. By converting an image into a series of polygons, it transforms simple photos into fascinating, digital sculptures. This technique has been the darling of modern aesthetics—embraced in everything from graphic design to video game landscapes.
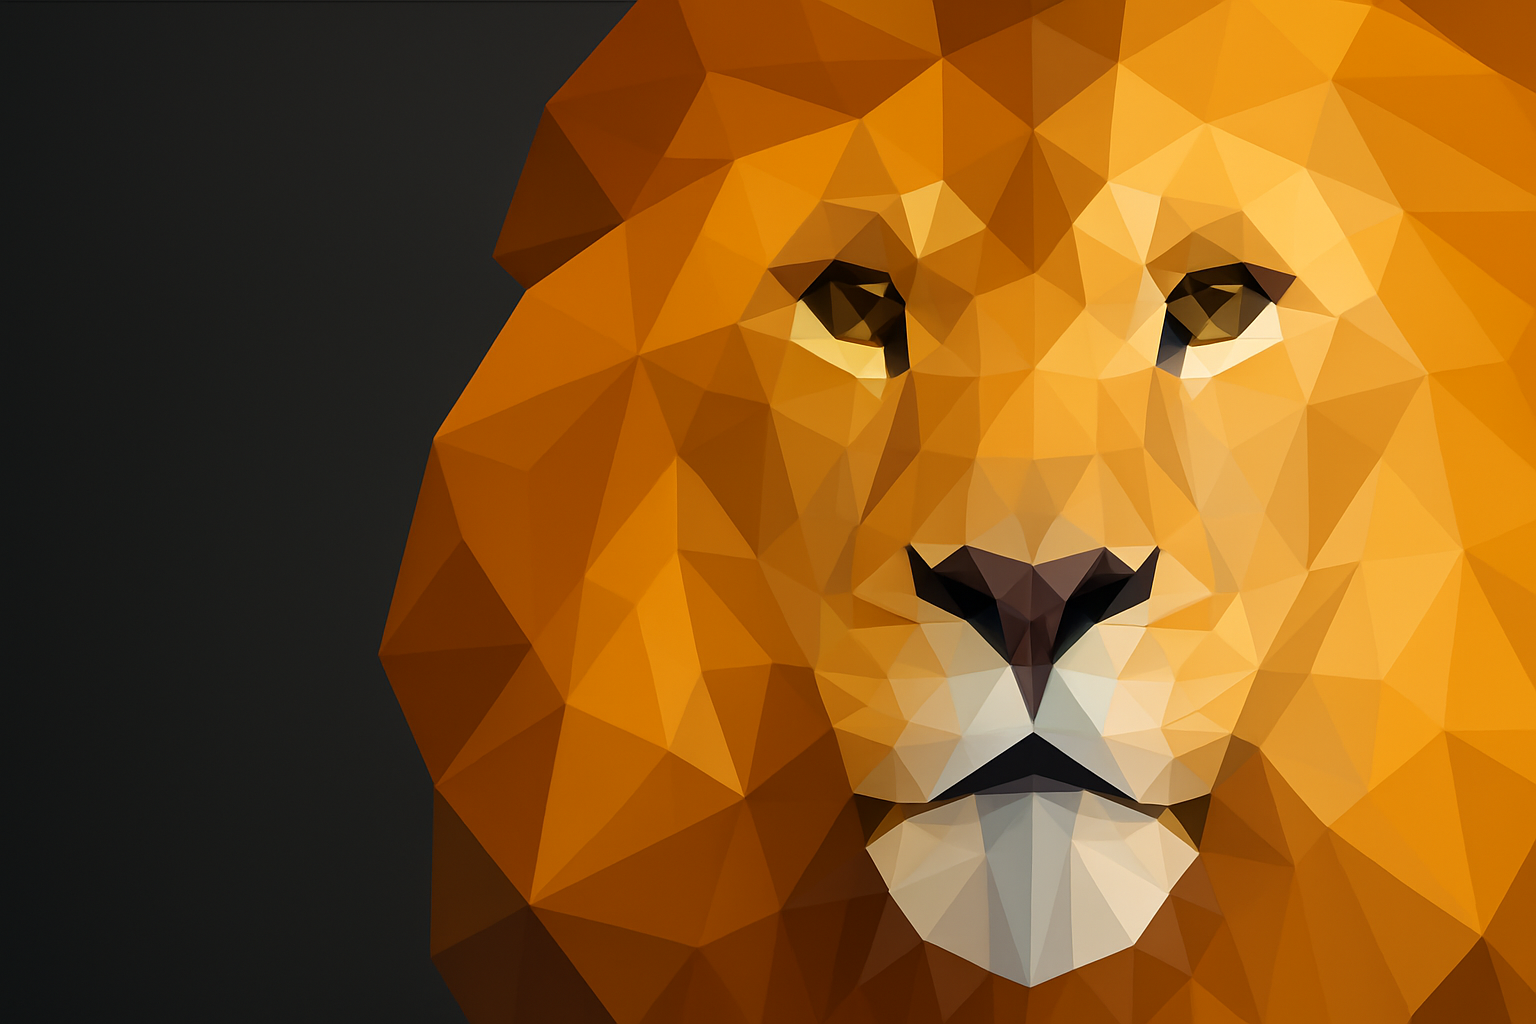
For this tutorial, we’re going to walk through the creation of a low poly lion. But don’t worry if felines aren’t your thing; this process works with any image as long as the face is front-facing. That would save you a lot of headache in terms of symmetry.
### Starting with Simplicity: Symmetrical Faces
We’ll kick things off by employing a bit of Photoshop wizardry—copying one side of the face, flipping it, and merging it with the other side. Voilà—a perfectly symmetrical face, which not only is aesthetic but also cuts your polygon-placing workload in half. Yes, you can thank me later.
Making Use of Grids: Setting the Stage
Next up, it’s time to gridify! A grid helps you snap your polygons precisely, ensuring crisp lines without having to squint and strain your eyes. Make it visible via the ‘View’ menu, and in the gridding process, opt for dots over lines or dashes. Unless you love playing ‘hide and seek’ with your layers, dots are clearly the superhero here.
Set gridlines between 20-25 pixels and keep subdivisions at 1. Whether you prefer dots or dashes, make sure you’ve enabled ‘Snap’ to ensure accuracy when placing your polygons.
### Zooming In: The Detail Dance
Hold onto your Wacom stylus as you zoom into the image like a Photoshop maestro. Do this with the Zoom Tool, focusing especially on critical detail areas like the eyes or any place with intricate details. If the grid seems misplaced, adjust the image until all aligns in blissful harmony.
### Spin a Web of Polygons
Welcome to the beautiful madness. Using the Polygonal Lasso Tool, you’ll start plotting triangles—big and small. Pro tip: a mix of polygon sizes offers a delightful blend of detail and abstraction, making the art pop! The tool helps you lay down shapes that record the light, shade, and color information of your image.
After crafting that first polygon, navigate to `Filter > Blur > Average` to fill it with an averaged color tone, mimicking a more stylized look. Your polygons will transform into abstract representations of the character they overlay, capturing the heart of your subject with geometric flair.
Fast Tracking with Actions & Automations
Before you chuck your mouse through the screen in polygon frustration, hear me out. Automate the repeated actions with Photoshop’s “Action” feature. Record the steps and replay them for every polygon you add. Sure, there are automated tools like DMesh and PolyGen, but trust the human touch for that personal pizzazz.
### The Finishing Touches: Levels, Shadows, and Beyond
As you wind down, it’s time to perfect your masterpiece. Hide your grid to behold the full glory of your work by pressing `Ctrl` or `Cmd + H`. Much like a magician’s grand reveal, the simplicity of those little triangles combined showcases a detailed portrait.
From vibrant strokes to subtle shadows, embrace adjustment layers with open arms. They’ll help in idealizing that left-right balance, saturating those vibrant tones, and getting the shading game on point. Ensure these adjustments apply solely to the desired layers by using the clipping mask feature.
For those final panache points, convert your layers to a Smart Object. This will allow for non-destructive edits—an artist’s best friend. Sprinkle on some Gaussian Blur and modify shadows for added depth.
### Show Us Your Skills
That’s a wrap on crafting your own low poly art! As your image takes on new life, you’ll find satisfaction in every polygon carefully laid and every detail delicately captured. Each point, each path, contributes to a pixel sculpture that breaths an artistic new life into a once-simple photo.
Eager to show off your new skills? Share your creations and tag us so we can revel in the low poly magic together. Get ready to turn any face into a geometric masterpiece with just a few clicks, a lot of patience, and an eye for detail!
Low poly art is more than just a technique—it’s a form of expression that celebrates the beauty of geometry. It’s abstract, modern, and, most importantly, a lot of fun. So, fire up Photoshop and give your artistic side the polygon treatment it deserves. Happy creating!


