
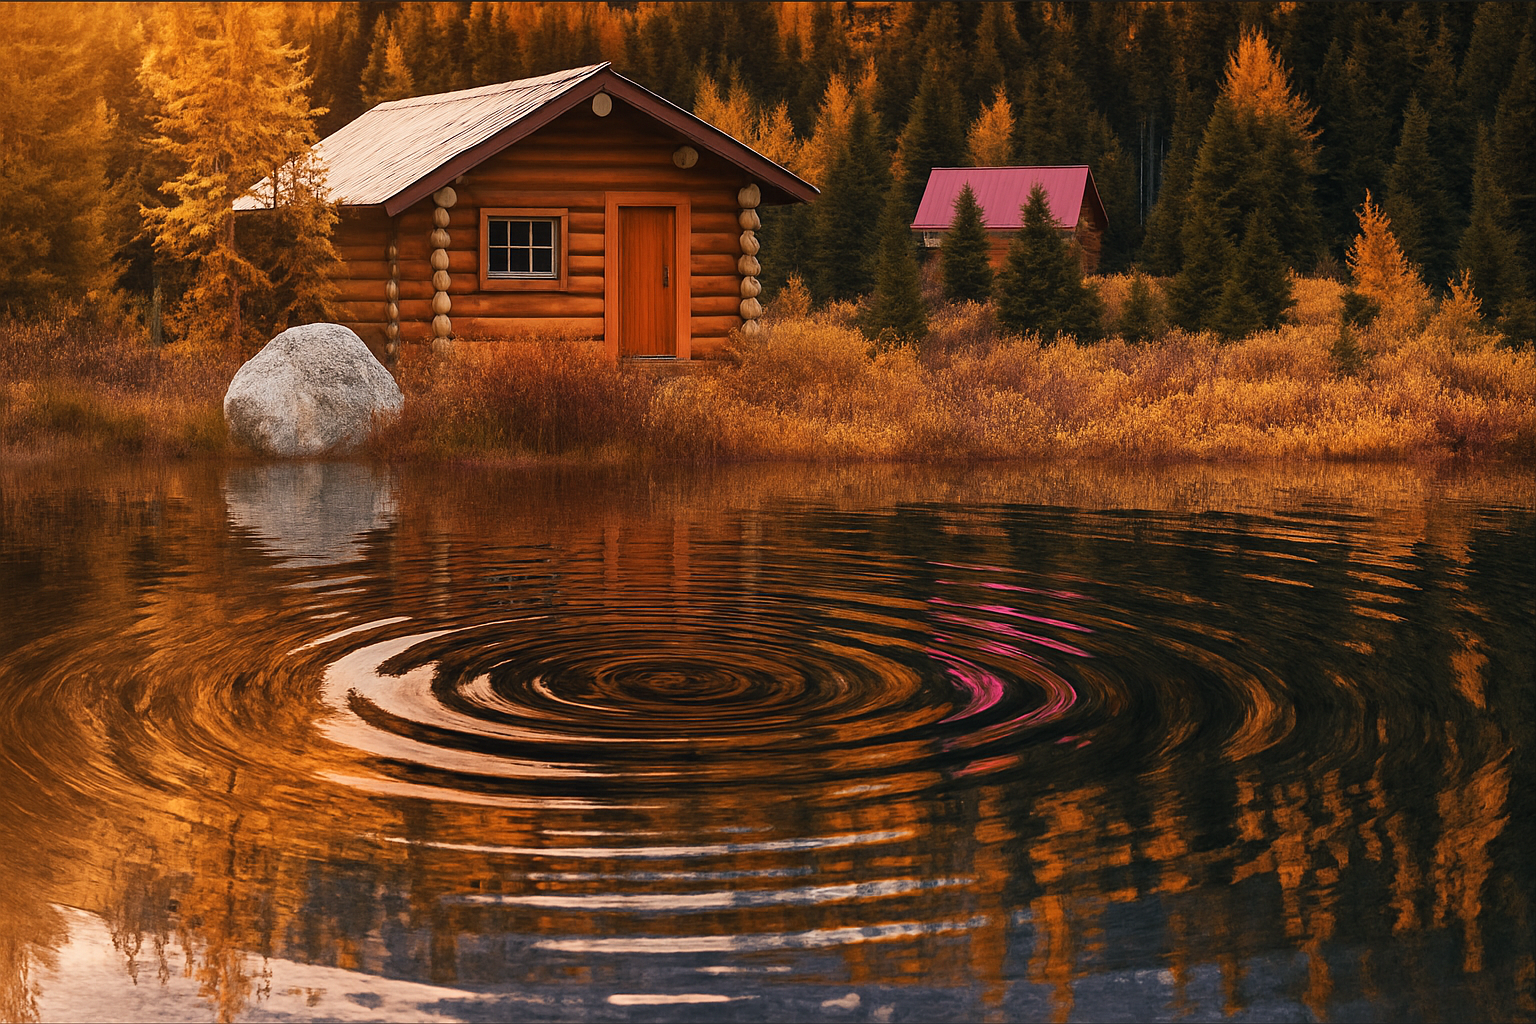
Transform Your Scenic Photos with a Lake Effect
Creating the illusion of a gentle, rippling reflection on a serene body of water can add a touch of magic to your scenic photos. Imagine your landscape bordered by a clear, calm lake or pond, capturing a tranquil moment straight out of a dream. This tutorial revisits and updates a classic technique, showing you how to achieve this effect using modern tools in Adobe Photoshop. Whether you’re enhancing a travel photograph or crafting a digital work of art, mastering this skill can elevate your creative projects to new heights.
Selecting the Perfect Image
To begin your adventure in crafting a digital lake, you’ll need a scenic photo that lends itself beautifully to having a water border. Platforms like Shutterstock offer a wealth of options to choose from. Once you have your image, the journey of transformation begins with a simple but crucial step: cropping.
Preparing and Cropping the Image
Open the Crop Tool in Photoshop and hit that ‘Clear’ button—this eradicates any preset dimensions, allowing you to focus solely on composition. By setting the resolution to 150 pixels per inch and leaving the width and height field empty, you can slice and dice your image to tease out the ideal layout. The bottom edge here is your compass—it guides the intersection of earth and your soon-to-be lake.
Once you’re satisfied with the cut, ensure ‘Delete Crop Pixels’ is checked, and move forward with confidence! Engaging the ‘Canvas Size’ will now extend the lower part of your canvas by 200%, setting the stage for the underwater world you’ve yet to create.
Guiding Your Creativity
Creating a guide at 50% height splits your canvas perfectly in two—one part land, the other, water. Remember to activate ‘Snap’ under the ‘View’ menu, ensuring precision as you lay the foundations for your reflective wonderland with the Rectangular Marquee Tool. By duplicating your selected area twice, you’re building layers upon which ripples will cascade.
Unlocking the Power of Layers
Layers are your playground. Unlock the background layer, bid it farewell, and welcome an atmosphere ripe for transformation. The real magic begins with the top layer. Pressing Ctrl or Cmd + T activates the Transform Tool, enabling you to replicate reality’s laws of reflection by flipping this layer over the middle guide line.
Crafting the Ripple Effect
Now, the pièce de résistance: crafting the gentle ripple. Initiate a new layer, and let’s fill it with the pure tones of black or white. This becomes the genesis of your Displacement Map. The next step? Add dynamic, cloud-like textures via Filter > Render > Clouds, followed by a transformation journey through layers of Twirl, ZigZag, and Gaussian Blur. Each filter step adds a nuance, a whisper of reality, to the illusion.
Shaping Perspective
Using the Transform Tool again and stretching the bottom edge of your displacement map further simulates realistic perspective, letting the image breathe and echo the vastness of a body of water.
Displacing Reality
With your displacement map primed, it’s time to alter perception. Convert the reflection layer into a Smart Object to maintain editing versatility. By navigating through Filter > Distort > Displace, you paint reality with values: 10 for horizontal and 150 for vertical scales. Ensure it stretches to fit and repeats those edges because we’re here for continuity, not chaos. Watch as the reflection acquires those coveted ripples, merging art and reality.
Adding Depth and Cool Tones
To further enhance the authenticity of your reflection, introduce a subtle gradient of darkness beneath the reflected land. This depth is achieved with the Gradient Tool set to black-to-transparent. Adjust opacity to 50%, adding a mystique akin to a moonlit night.
Finish your serene scene by layering a cooling photo filter—experiment and find the blue hue that whispers tranquility. Set its density to a soft 20% to balance the scene, preserving luminosity for that crisp, refreshing look.
Final Touches and Polishes
As your masterpiece nears completion, soften the sharp edge separating land from water with the Blur Tool. A deliberate swipe ensures the blend is gentle, yet seamless. For the final flourish, crop away any reflection excess using the Rectangular Marquee Tool, wrapping up your piece in an aesthetic bow that balances earth and water.
This technique, though just a digital reflection, can transform your images and bring infinite creativity to your projects. Turn any photo into a dreamy landscape for everyone to marvel—reflecting reality anew with every ripple!





