
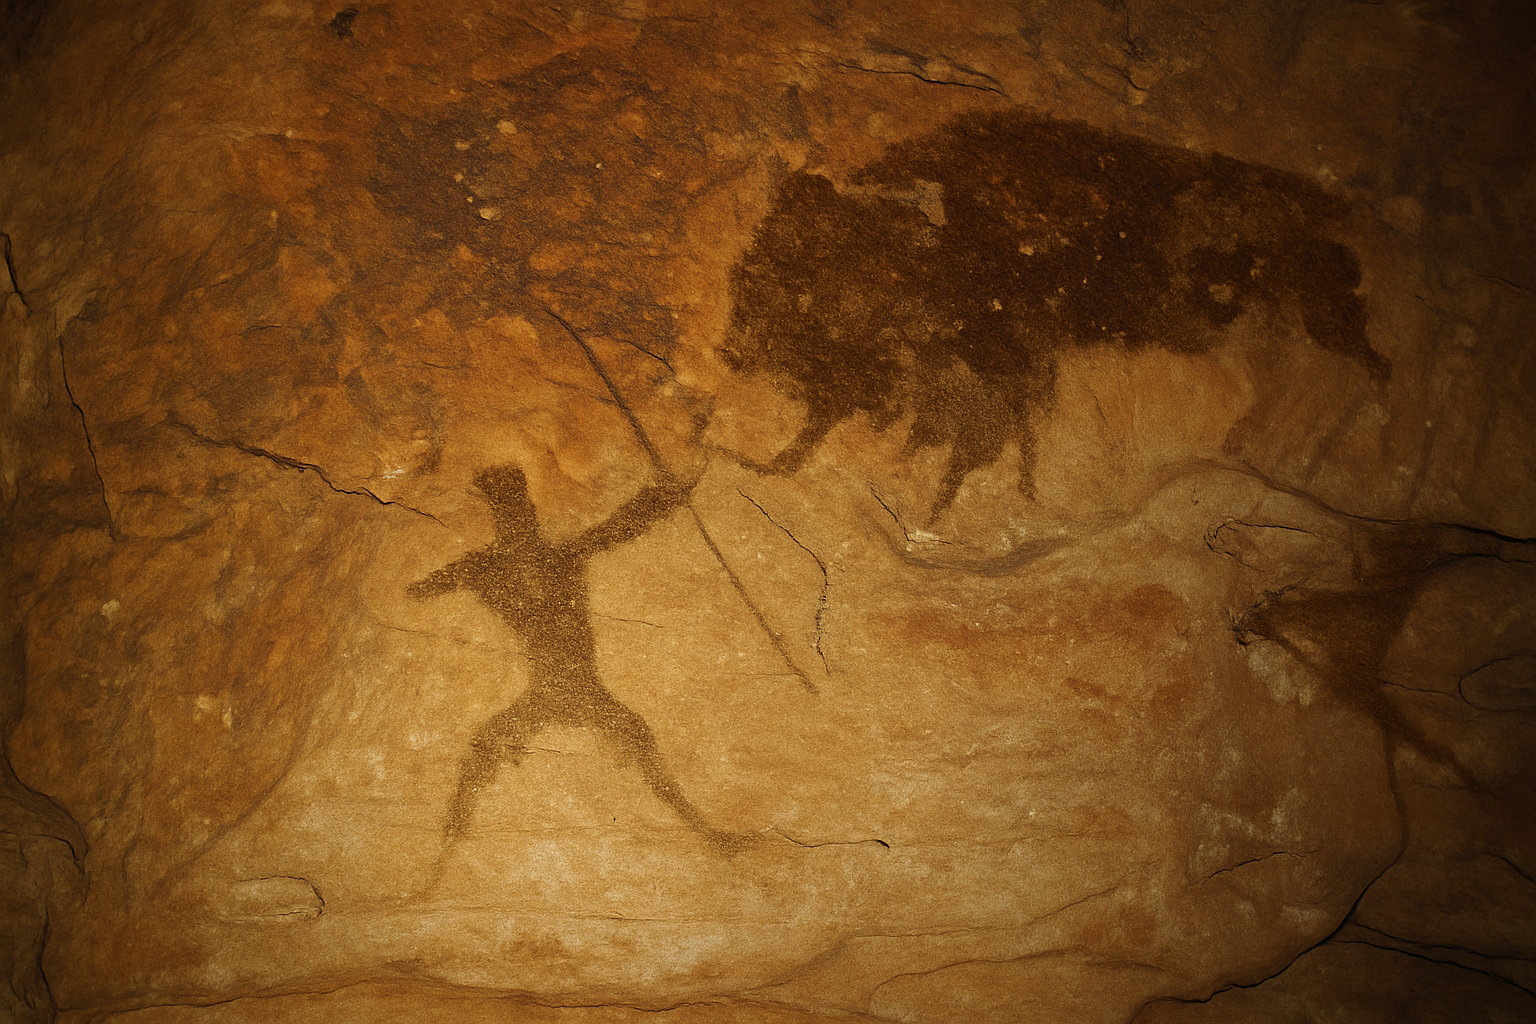
Explore the Hidden Mystery of Cave Art with Photoshop
Imagine unlocking the secrets of ancient artistry just by using Adobe Photoshop. That’s what we’re talking about today—recreating the timeless look of ancient cave drawings with a modern twist. We’re not just playing around—although that’s a big part of the fun. We’re diving deep into the heart of both art history and digital artistry to breathe the old world into new life on your digital canvas. Ready? Let’s go spelunking through Photoshop’s layers and filters.
Gathering Your Tools: The Basics
Before we venture too far into the dark, let’s gather our tools. For this digital excavation, you’ll need a few key images— a textured cave wall, a couple of primitive black and white graphics, and an image of a bison. These serve as the foundational elements in our Photoshop project, firmly rooting the digital in the ancient. You can find these images linked in the original video’s description, or if you’re feeling adventurous, use your own images to put a unique spin on the tutorial.
Displacement Map Magic
The first thing on our agenda is creating a displacement map from the cave wall texture. Think of this like setting the scene. Displacement maps warp our images in a way that makes them hug the natural contours of the background, like our drawings were really scraped onto stone centuries ago.
Here’s the quick rundown:
1. Duplicate the Cave Wall Layer: Go to your layer panel, click the top right, and select “Duplicate Layer.”
2. Desaturate and Blur: Press Ctrl or Cmd + Shift + U to drain out the color. Then, use Gaussian Blur with a 3-pixel radius. This softens the rough edges.
3. Save as PSD: This step lets your displacement map work its magic when it’s layered with the drawings.
Bring in the Beast: Crafting the Bison
Our age-old narrative won’t be complete without its star, the majestic bison. Here’s the process for isolating and preparing this critical character:
- Use Quick Selection Tool to isolate the bison from its background. Photoshop CC 2018 users and above can simply click “Select Subject” to automate most of this task.
- Convert your festive bison into an ancient silhouette with a rich, earthy color (
#3B1E0F). UseAlt or Option + Deleteto fill your selection with this hue. - Smart Objects and Filters: Convert the bison into a Smart Object for non-destructive editing, and apply a gentle Gaussian blur of 2 pixels.
Time Travel with Maximum Filter
To mimic the primitive strokes of real cave drawings, use the Maximum filter to distort the bison’s outline. Set the radius to 9 pixels for that authentic chiseled look.
It’s All About the Details: Blending and Distortion
At this point, you might be curious about how we ensure the artwork doesn’t just stick out like a synthetic sore thumb. It’s all about blending. Use the Blend If feature in the Layer Style window to merge the drawing gracefully into the cave wall. Adjusting the sliders softens the blend by allowing only portions of the image that meet certain luminosity criteria to show through, making it appear as part of the wall itself.
Story in Outline: Adding More Elements
Now, let’s bring in the other graphics, like the archer. You’ll want to follow similar steps: use the Magic Wand Tool to capture the silhouette, convert to Smart Object, and then impose your color. But here’s the trick: make sure none of the design’s lines are too thin, or you risk them disappearing when the Maximum filter is applied.
- Copy Smart Filters: Save time by dragging Smart Filters from the bison to your new archer layer while holding
Alt or Option. It’s a like casting a magical spell of consistency across your elements.
Conclusion: Finishing Touches to Amalgamate History with Pixels
As you finalize your masterpiece, wrap up each layer as a folder. Grouping them neater will not only save space in your panel but also streamline the entire creative process. Label each cohesive element with names like “Archer” to keep track of your artistic narrative as you play with Blend Modes and opacity settings.
With these steps in hand, you’re equipped to bring ancient cave art to life in a way digital archaeologists from the future might swoon over. Experiment freely, let your imagination run wild, and who knows? You might just discover the next big twist in digital artistry while paying homage to the sinewy tales told by our ancestors’ earliest drawings.
So there you have it—an introduction to curating prehistory with pixels! Ready to etch your own fresco on the digital wall of fame? Grab your stylus, pop open Photoshop, and let the artful adventure begin!





