Turn Your Summer Memories into Winter Magic
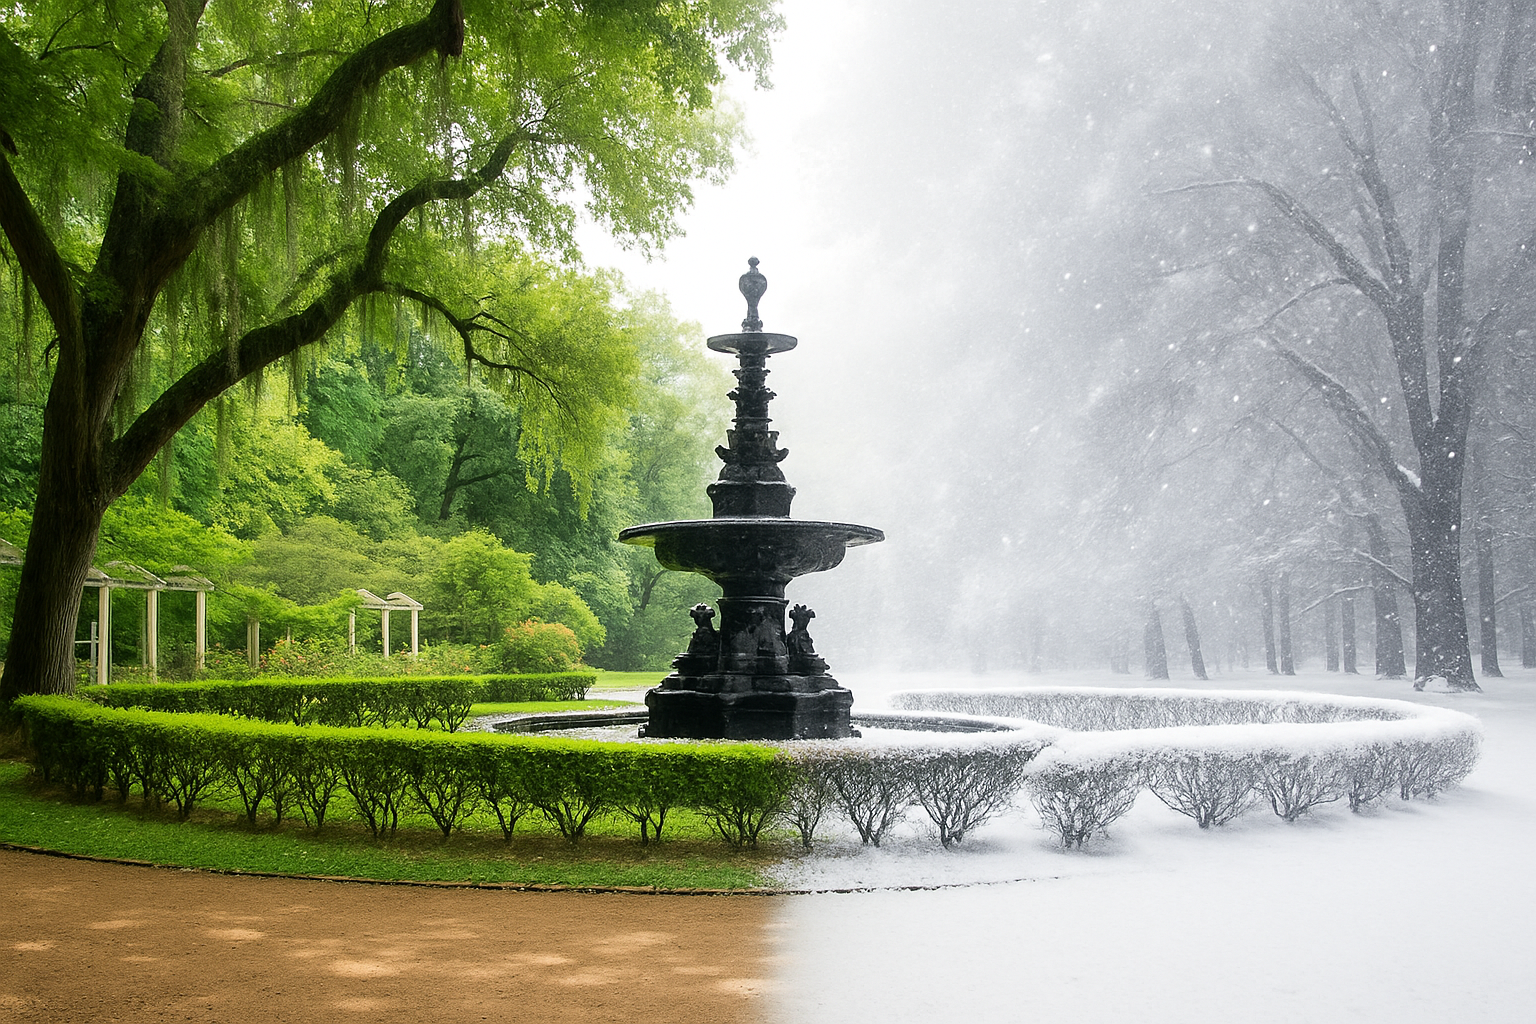
Ah, the charm of a picturesque snowy day! If only we could bottle up that serene winter beauty and sprinkle it all over any photo at will. Well, get ready to make that dream a reality. Today, we’re uncovering the secret to transforming any ordinary summer photo into a wintry masterpiece using the artistic wizardry of Adobe Photoshop. Unleash your creativity and turn vibrant green landscapes into snowy wonderlands—no snowstorm required!
Step Into Winter: The Quick and Easy Way
Whether it’s a photo from last summer’s road trip or a lovely garden scene, converting lush summer foliage into frosty scenes is both thrilling and fun. Using the power of Photoshop, you can effortlessly switch seasons and add a sprinkle of snow to your favorite memories.
Begin by selecting an exterior photo bursting with greenery. Stop by Shutterstock if you’re in need of some visual supplies. Got your image? Perfect.
Smart Objects: Non-Destructive Mastery
First things first—make your image a Smart Object. Why? It allows you to edit non-destructively, which means the original photo stays pristine while you craft your masterpiece. A quick click on the Layers panel (right top corner) and selecting Convert to Smart Object will do the trick.
Before you dive in, check that your photo’s resolution is set to 72 pixels per inch. Not sure? Head over to Image > Image Size in the menu to verify. Adjust if necessary.
The Magic of Channels
Now, let’s talk about Channels. Journey over to the Channels panel. If it’s playing hide and seek, just pop open the Window menu and find Channels. Once there, click the Green channel—it’s where the winter magic starts.
Pasting a New Dimension
Select all using Ctrl/Cmd + A, and copy with Ctrl/Cmd + C. Return to the world of layers, create a new layer, then paste (Ctrl/Cmd + V) your copied green channel into it. Make that layer another Smart Object because we’re all about making quick, flexible changes.
Applying the Snow Glow Effect
Navigate to the Filter Gallery, and in the Distort folder, select Diffuse Glow. Experiment with the slider settings. For my image, the Graininess sat at 7, while Glow and Clear were both on 8. Don’t hesitate to wander through the settings to tailor the look exactly for your image.
For that authentic winter feel, lower the opacity of your layer to 90%. This softens the glow and marries the winter hues with your summer colors.
It’s Snowing in Photoshop!
Time to create those stunning falling snowflakes. Start by generating a new layer again, flooding it with black. If color palettes aren’t set to black and white, a quick tap on D should fix that. By filling it with black using Alt/Option + Delete, you’re set for the snowstorm.
Head to Filter > Noise > Add Noise, setting the Amount to 100%, with both the Gaussian and Monochromatic options checked—it’s all in the details. Follow up with a subtle Gaussian Blur of a 1-pixel radius to hint at those delicate snow-setting conditions.
Press Ctrl/Cmd + L to open Levels, then set the input black level at 140 and the white level at 142. Just like that, your image breathes winter.
Revisit some blurring with another Gaussian Blur to a slim 0.5 pixels, then swap the layer blend mode to Screen. That’s how we coax out snow from the abyss.
Double the Snow, Double the Fun
Why stop at just one snow layer? Duplicate your snowy atmosphere with Ctrl/Cmd + J for an added layer of dynamic snowfall. Settle its opacity to 50% for that staggering snowfall cascade in your picture. A final flourish of rotation to 180 degrees from Edit > Transform adds dimension to the flake choreography.
Voilà—your journey from summer smile to winter wonder is complete! Celebrate moments in frosty fashion, and let’s tiptoe through snowy paths without saying goodbye to the sunshine. Thanks to Photoshop, imagination can dance through any season all year round.
Remember, there are no limits to creativity, just endless possibilities with each image you transform. Stay curious, explore, and keep crafting those magical stories—one season-defying photo at a time!


