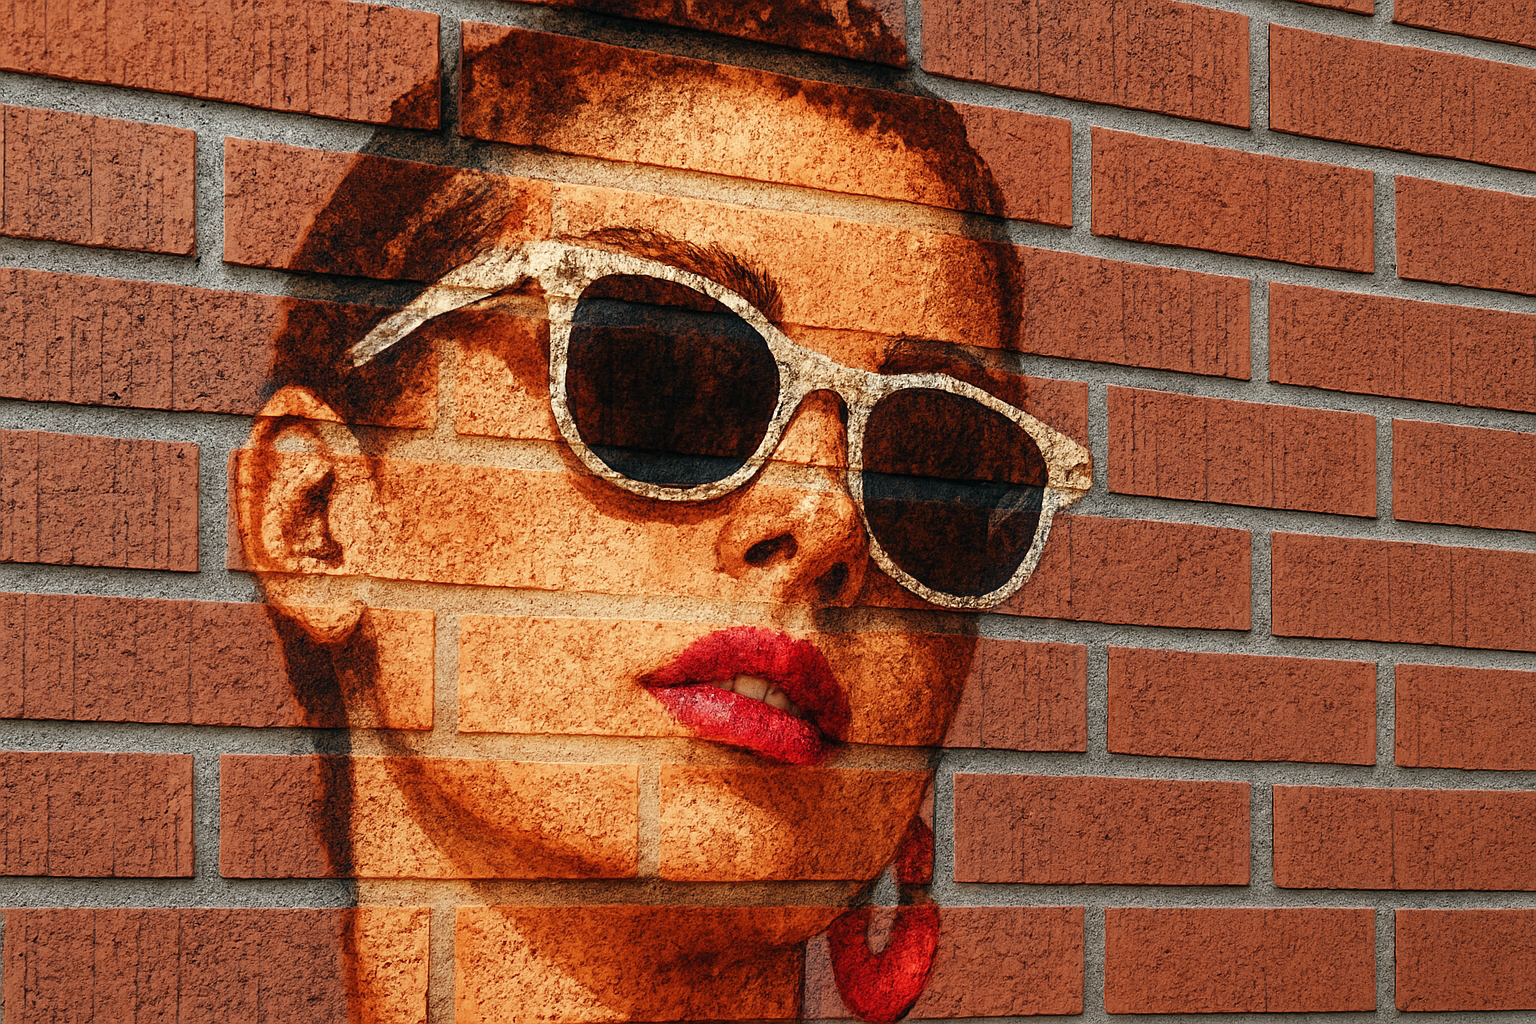
Unleashing Creativity: Transform Photos into Stunning Brick Wall Art
Imagine turning an ordinary photo into a jaw-dropping piece of art that’s as gritty as it is glamorous. Today, we’re diving into the artistic realm where digital meets the tactile, and I’ll guide you through the fascinating process of painting a portrait onto a brick wall using Photoshop. If you’ve ever wanted to see how digital art can wrap itself around the textured reality of a brick surface, you’re in for a treat.
Step 1: Brick Wall Texture – Your Creative Canvas
Before diving into the artistry, we need a canvas. Not just any canvas, but a brick wall texture. Websites like GraphicStock.com offer a plethora of textures and images you can download to serve as your background. These textures will be essential for creating an epic backdrop that matches your creative vision.
Creating the Displacement Map
To ensure that your portrait naturally hugs the contours of the brick wall, we convert the wall texture into a displacement map. Start by duplicating the brick wall layer by selecting the option “Duplicate Layer” in Photoshop. With a new document named “Displacement,” we can introduce subtle blur to the image using the Gaussian Blur filter. This step ensures a smooth and seamless transition when your portrait morphs into the brick texture. Oh, and don’t forget to desaturate the image using Ctrl or Cmd + Shift + U to remove all colors and keep it grayscale, which works best for displacement effects.
Step 2: Selecting and Preparing Your Portrait
Open the photo that you plan to transform into art. Tools like the Quick Selection Tool are perfect for isolating the person in your image from its backdrop. This selection sets the stage for placing your subject over our brick background. So, if your muse came straight from Shutterstock.com, roll up your Photoshop sleeves because this is where things get exciting.
Crafting the Perfect Cutout
With your subject poised on its own layer, it’s all about refining edges and creating depth. Utilize the Move Tool to position your subject over the brick background. Using commands like Ctrl or Cmd + T makes adjusting the size second nature. And, you’re not just resizing for aesthetics here; it’s about finding that perfect fit where art meets reality.
Step 3: Add Some Artistic Flair
Once the portrait is perfectly perched atop the bricks, it’s time for some creative flair. Convert your image into a Smart Object to safeguard your original work while enabling versatility. Experiment with stroke effects and dive into Photoshop’s “Filter Gallery” to try filters like Fresco or Poster Edges. Each filter offers unique possibilities — from softening edges to adding a hand-drawn touch that screams “Hey, this was crafted with love!”
Smoothing Out the Rough Edges
With any gritty portrait venture, spots or blemishes might rear their sneaky heads. And for spots that threaten your masterpiece, the Eraser Tool is your best friend. Simply mask, erase, and let your creativity roll uninterrupted. Adjust blend modes to “Overlay” and play with opacity to bring depth and life to your digital mural.
Step 4: Warping Reality with Displacement
The pièce de résistance of painting on bricks lies in conforming the layers. This is where the Displacement filter lets your picture drink in every crevice and nook of the textured background. With the horizontal and vertical scales within your control, this step transforms digital art into a tactile sensation.
Angling for Perfection
Sticking to the status quo is so last season. By using Perspective and Transform tools, give your wall art the angled realism that tricks and delights the eye. You’re not just an artist but a digital architect reshaping perspectives.
Step 5: Adding Depth and Dimension
Ever noticed how art pops more with depth? By adding gradients, blending modes, and adjusting opacities, you enhance the visual drama. Let a gradient tool manipulate shadows in service of realism. Opt for Linear Burn mode and dial back opacity. The result? A brick wall painting that blurs the line between digital whimsy and tangible reality.
By embracing these bold Photoshop techniques, you take a humble photograph and elevate it to the grand stage of artistic brilliance. Whether you’re designing for personal pleasure or adding an eye-catching piece to your portfolio, this tutorial puts you in control, guiding you to explore layers of digital creativity. Once past that finish line, remember — it’s your vision set in stone (or in this case, brick).
So go forth! Marvel at the bold and brave juxtaposition of pixel and paint, and perhaps consider this the start of your own collage of visual triumphs. Because art, whether born on brick or canvas, is always in style.
Happy Photoshopping!


