
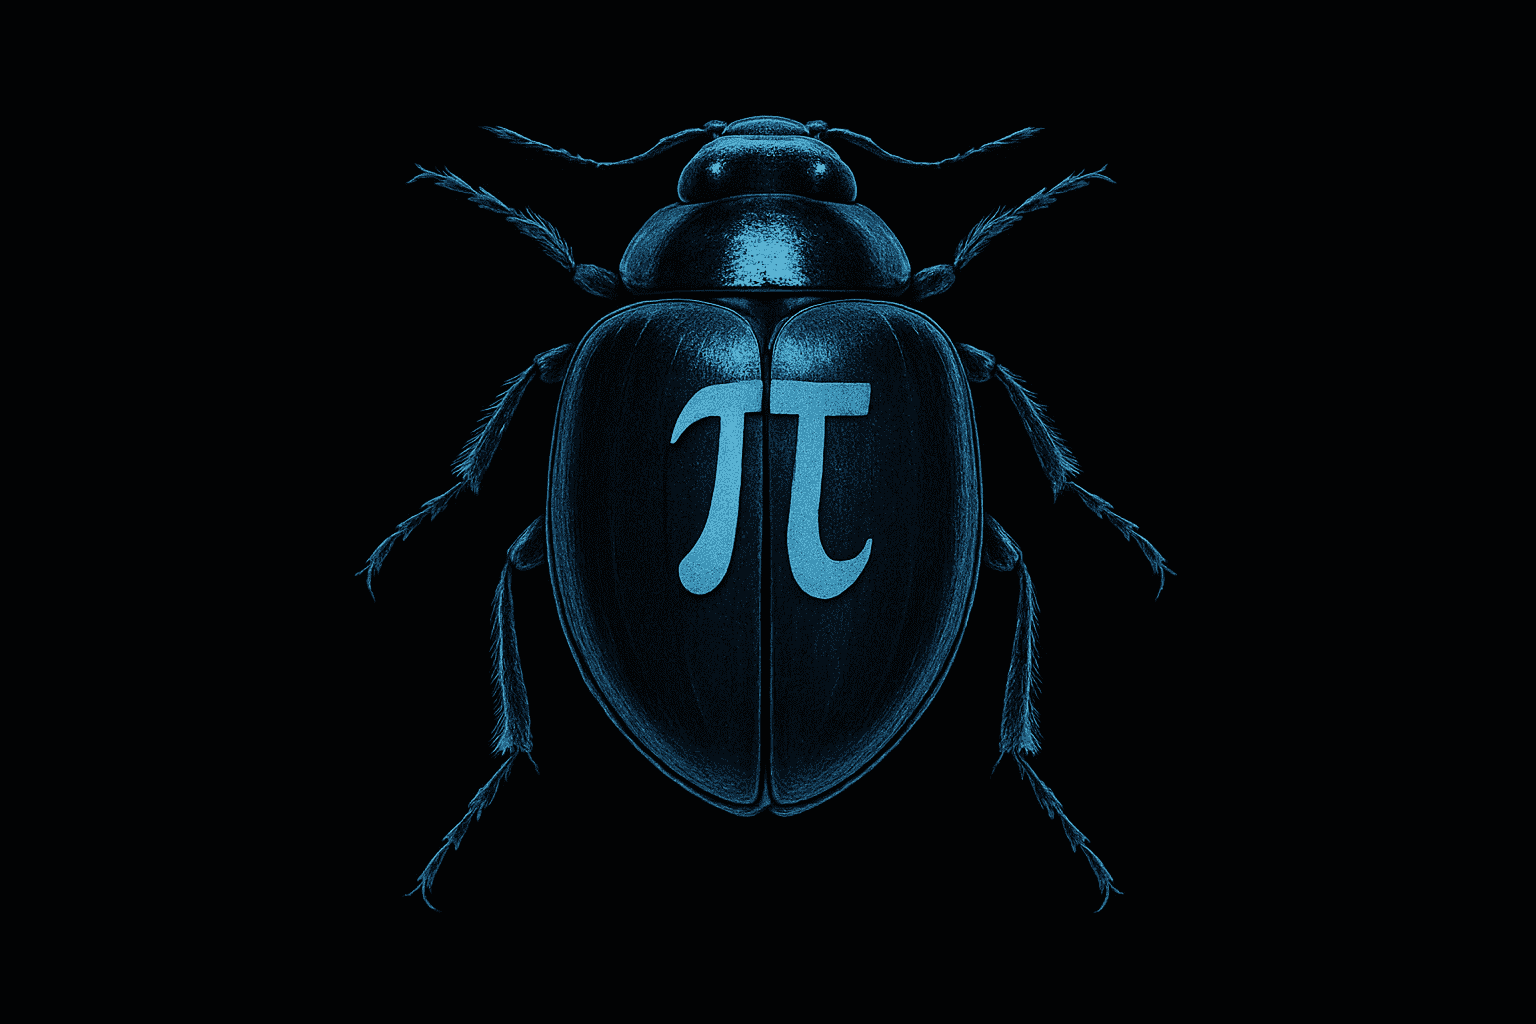
Unveiling the Mystique: Fringe-Inspired Digital Art
Imagine merging the intrigue of television series aesthetics with your flair for digital art. Think Fringe, the popular series with its uniquely surreal images gracing the screen just before commercial breaks. These visuals often incorporate subtle, mind-bending elements within otherwise mundane objects, leaving viewers both intrigued and inspired. Today, we dive into crafting a similar, surrealist image using Photoshop. But hold onto your creativity hats; this is a journey through hues, highlights, and hidden symbols, as we render an unsuspecting beetle into a piece of art worthy of Fringe.
From Ordinary to Extraordinary: Starting Your Beetle Creation
For this project, we’re starting with an 8×10 inch document in Photoshop, working at a resolution of 72 pixels per inch—a modest canvas by today’s high-res standards, but perfect for online display. We embark on this creative journey by selecting and manipulating our beetle image, emphasizing its defining features using various selection and masking techniques in Photoshop.
Kick things off by visiting the “Select” menu and choosing “Color Range.” Target the highlight reflection on our beetle’s back, increasing fuzziness to capture the desired selection area. Transform this selection into a quick mask by pressing ‘Q’, allowing for precise painting around the reflection.
The Magic of Highlight Isolation
We dive deeper into creating our Fringe-inspired piece by isolating the reflection highlight on the beetle’s back. Grab that brush tool, and start painting the elements around the highlighted area. Once satisfied, switch back the mask into a selection with another tap on ‘Q’. Save this progression by visiting “Select” > “Save Selection,” giving our creation longevity by naming it aptly as “highlight” for future reference.
Dark Desires: Perfecting the Background and Beetle
Place your beetle layer onto a new canvas, making a duplicate with the trusty Ctrl/Command + J. Now, with your digital clone in place, it’s time for extensive cosmetic concoction using the Clone Stamp Tool, easing light areas over the beetle’s existing dark markings. Why? To create ample space for infusing the mystical symbol of Pi onto our beetle’s back, because math deserves a moment in the artistic limelight.
Now let’s proceed to cut that beetle out from its milky white prison. With CS5’s Quick Selection Tool adjusted to three pixels, traverse the beetle, subtract unnecessary selections with Alt/Option for finesse. Further refinements are crafted using the Brush Tool on missed areas, ensuring the beetle stands out.
Once isolated, shift your document to Greyscale via “Image” > “Mode” > “Grayscale”, preparing to embrace the duo-toned palette that gets you one step closer to the Fringe universe.
Coloring Outside the Lines: Shading, Shades, and Pantones
No Fringe visual would be complete without capturing that iconic color tone. We switch hues using “Image” > “Mode” > “Duotone” with Pantone 2915 C. This chosen hue bathes our beetle in an aura that hums with mystery and allure.
Now for mid-tone magic. Use the Curves Tool (“Image” > “Adjustments” > “Curves”) to adjust brightness, targeting the beetle’s shell for added intrigue. This step is key in ensuring our symbols and shadows play harmoniously once brought together.
Symbolism in Surrealism: Pi’s Grand Entrance
Summoning our mathematical muse, it’s time to introduce the symbol of Pi. Summon your Magic Wand Tool and capture the Pi symbol, placing it on its singular layer through the majestic shortcut Ctrl/Command + J. Transfer this mystic symbol onto your beetle document by dragging and dropping it (or nestling it gently with Ctrl/Command + T for precise resizing).
Distort with care under “Filter” > “Distort” > “Pinch”, and watch 54% of wizardry warp reality. Further fine-tune with transforming tools, ensuring the symbol sits perfectly upon the beetle’s back.
A Touch of Glow: Completing the Fringe-Inspired Illusion
Our surreal masterpiece edges closer to the finish line with the addition of an ethereal glow. Back within the Layers Panel, add an Inner Glow effect to our newly minted “Beetle Pi” layer. Choose Screen in blend mode and an opacity level of 75%, increasing size to 6 pixels to let that light spill softly beyond the edges.
Lastly, enrich the scene with a subtle wash of fringe-inspired glows, layering opaque undertones that don’t scream but rather whisper of otherworldly origins.
And there you have it—a beetle reborn with all the shadow and light that pays homage to the sci-fi mystery of Fringe. Whether or not you plan to mesmerize your viewers with a collection worthy of an inter-dimensional series, the skills practiced here can branch into your future Photoshop endeavors. Until your next creation, stay curious and keep those pixels clicking!
Should you wish to dive deeper into the world of digital crafting, have a look at our other tutorials on Blue Lightning TV, where creativity knows no bounds.





