Elevate Your Creative Projects with this Stunning Photo-to-Engraving Technique
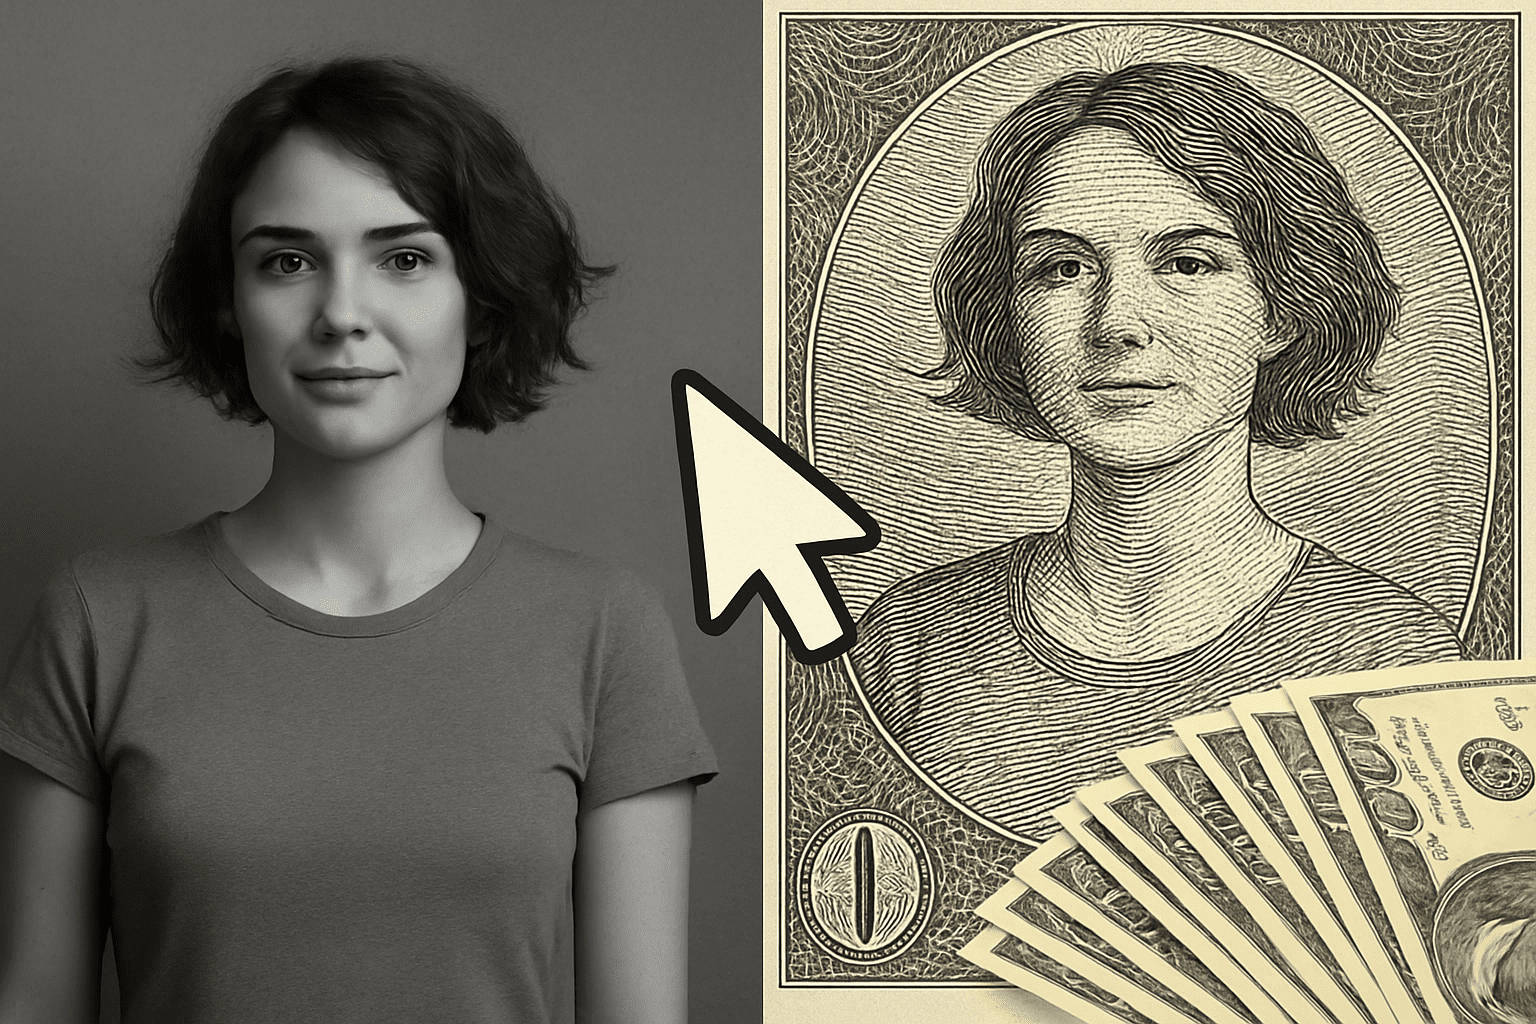
Imagine transforming an ordinary photo into a piece of art that resembles the intricate engravings found on paper currency. That’s right; we’re not talking about switching your day job, but adding a bit of creative flair to your Photoshop skills. Here’s how to wield the tools you already have in Photoshop to create a money engraving effect, turning any photograph into a grand design worthy of a hundred-dollar bill.
The Photoshop Process: Turning Photos into Engravings
If you’ve been scrolling social media and stumbled upon a photo that seemed worthy of framing on the front cover of Monopoly money, you’ve probably thought that only pros with high-end, expensive third-party plugins could pull off such a feat. Not so fast! Here’s a cost-effective method using Adobe’s favorite design toy – Photoshop.
Why It’s Cool: This process isn’t just time-saving, given no additional plugins; it’s an excellent exercise to stretch your Photoshop muscles. Plus, you’ll get to impress your folks with an engraving of your pet cat on a make-believe $10,000 bill.
Preparing Your Image
- First things first: find a suitable subject for honor – like Zach Galifianakis or, you know, your own delightful self. The key is to use a high-contrast, black-and-white photo. If you’re starting off with a color photo, make it monochrome by hitting
Ctrl + U(orCommand + Uon a Mac) and reduce the saturation to zero. - Once that’s done, zoom in for the nitty-gritty of this technique. Utilize the Elliptical Marquee Tool to make a selection of the area you wish to convert. Think of it like fitting into the frame of a snazzy passport photo but vintage-style.
Creating the Frame Effect
Oval Frame Creation: Center your selection as best you can. If you need to adjust, hold the space bar while you move your selection. This helps in isolating the area where the magic will happen.
Fill this selected frame area with a color sampled from your reference currency photo. The happy accidents are kept to a minimum when you use Photoshop’s Eyedropper Tool.
Achieving the Texture
To bring out that antiquated paper texture, employ a mix of filters and noise, rendering and blurring your way to a seamless blend. This is when you’re allowed to go rogue and play around with layering effects and opacity until it mimics the real deal setting.
You’ll want your image to have clouds and noise before dialing back the opacity to around 50%. This gives a grainy veneer, a touch similar to paper money art.
Creating an Engraving Look
Now for the pièce de résistance: Zach’s, or your subject’s, face in the engraver’s hands. After marching through a barrage of illusions and transfigurations, you’ll use wave and line effects to simulate detailed engravings. By adjusting the wave filter settings in Photoshop (try five generators and play with wavelengths), you’ll create an intricate line-art effect.
The Grand Finale
Once everything’s set, it’s time to take a step back and behold your creation. Swap over to Multiply blend mode for the engraving layers to give it that crisp overlay look. Now, introduce lettering by using a fun font like ‘Legal Tender’—available for free over at UrbanFonts.
Want that signature curved banner beloved by banknotes? The Warp Text tool allows for such trickery, giving you a fully customizable twist to your digital currency.
Why This Matters
Not only does this project fill the yearning to create art for art’s sake, but it is downright fun. You offer yourself a chance to develop precision and mastery over Photoshop and then perhaps, gift a masterpiece to unsuspecting family members. (Imagine their surprise being immortalized on an imaginary currency!)
While this might not exactly pay the rent, except perhaps in a future where Monopoly becomes legal tender, it’s certainly a delightful escapade within the digital realm where creativity meets technique.
So go forth, and let those creative dollars roll in… metaphorically, anyway. Who knew making money could be this enjoyable?
Happy Photoshopping!


