Turn Your Photos into Mesmerizing Wintery Scenes
Ah, snow globes—a charming staple of holiday decor that always manages to evoke nostalgia and a sense of peace. But what if we told you that you could transform any of your favorite images into snow globe scenes, right from the cozy comfort of your digital workstation? That’s right, no actual snow required. In this tutorial, we’ll take you through a Photoshop journey to create a faux snow globe and dress any object in your photo in frosty winter fashion.
But first, grab a cup of cocoa and check out this video tutorial for a step-by-step walk-through:
Getting Started: The Template Files
Before diving into the details, let’s lay down the foundations. We’ve got a downloadable Photoshop template designed to streamline this process, complete with a snow globe stand and glass layers. These templates come with handy alpha channel shapes—the keys to sculpting your snow globe with precision. Make sure you have this file from the video’s description or project files.
Inside the file, you’ll discover:
- Background Layer: Integrating the snow globe stand and glass globe, a crucial backdrop for your masterpiece.
- Alpha Channels: Architect essentials that highlight different areas of the globe, supporting your artistic liberty within Photoshop.
Spend some time exploring the template’s structure before plunging in. Consider it akin to understanding your tools before crafting a snow sculpture—just much less chilly!
Warmer on Photoshop Versions and Techniques
Not all mountains are the same, and the same goes for Photoshop—each version reveals its quirks. When it comes to selecting sim-specific features, the path you take depends on whether you’re riding the latest software update or navigating the nuances of an older iteration. Today’s Pick: Use the “channels panel” for quick access.
Snow Globe Scene Construction
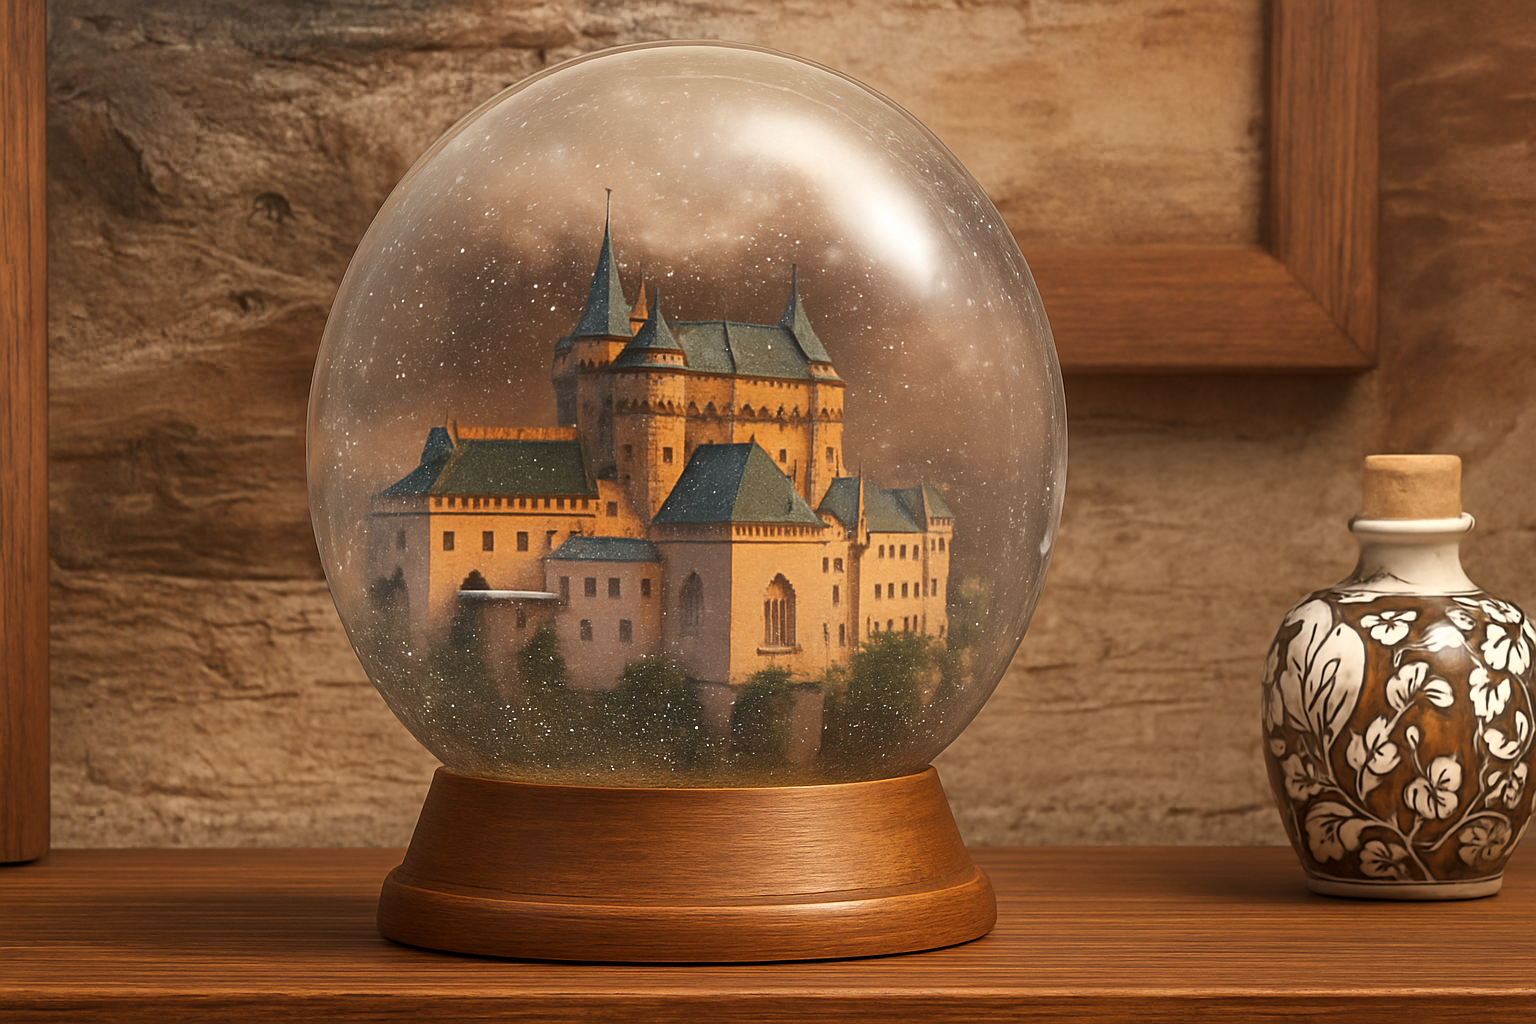
The key to our snow globe sorcery is isolating your chosen image, turning complexity into simplicity with alpha selections. Feel free to replace our castle image with any-photo you fancy—snap away and let your creativity bloom.
Steps to Isolation:
- Selection and Layering: Begin with a selection of your image’s subject.
Once marked out, use Photoshop features like ‘Refine Edge’ or the ‘Quick Selection Tool’ to isolate it from its background. - Drag and Drop: With your selection seasoned to perfection, it’s time to introduce it to the snow globe template.
Utilize the ‘Move Tool’ to transport your object into the designated workspace. - Defringe Like a Pro: Abolish any pixelated ghosts with the ‘Defringe’ feature, smoothly integrating your object into its new wintery home.
Size Matters: Scaling Down for Authenticity
Scaling isn’t just for climbers—Photoshop veterans know that resizing is crucial. Transform Tool is your friend here. Condensing your image to a snug 62% mimics a true snow globe scenario without leaving your object towering over the picturesque powder.
The Art of Layering and Smart Objects
Remember Legos? Just like those colorful bricks, smart layers in Photoshop let you dismantle and reassemble at will—non-destructively, of course. Transform your layered image component into a smart object for seamless adjustments and magical tweaks.
Lens Effects: From Reality to Dreamlike
A fun part is applying a lens correction to invoke a fish-eye style wrap, distorting the image to fit snugly within the curves of our globe. This step ensures your photo bewitches viewers with a fantastical perspective, just like real snow globes do.
Here’s How:
- Navigate to ‘Filter’, select ‘Lens Correction’, and bring a new dimension to your image with a negative distortion adjustment.
Sharpen Your Vision with Blur Tools
Blur effects are akin to setting the mood music at just the right time. Smart Blur and Gaussian Blur are pivotal for weaving a radio-fuzzy winter scene. These filters help heighten the focus on the snow globe’s object while adding whimsical haze.
- Smart Blur: Apply it with a radius of 25 and a threshold of 30 percent. Quality? We’re playing it low.
- Gaussian Blur: Softens edges by one pixel yet adds powerful depth continuity throughout your scene.
Snowfall Magic: Creating the Snowflake Fantasy
Crafting snowfall is where the real magic happens, but fear not—a little noise goes a long way! Begin by scattering tiny specks of noise across a fresh layer and following up with layered adjustments:
- Noise Layer: This establishes a snowy groundwork by cranking the noise up to 100%.
- Levels Adjustment: These parameters are the architects, letting you sculpt snowflake brilliance to an optimal visual threshold.
Add the Finishing Touches
For that picture-perfect snow globe finish, let’s sweeten the spectrum with some blur and an artistic flourish. Add a subtle 5-pixel Gaussian Blur to the snow layer to embody that genuine wintery scene—it’s all about creating lifelike wonder.
And voilà! A sparkling faux snow globe embracing your treasured photo, with a sprinkle of creativity and a dash of Photoshop-fueled magic. Celebrate your digital snow globe, now forever encapsulated in picturesque peace and snowy serenity.
No need to worry about climate change—it’ll stay wintry forever.
Keep experimenting and let us know your favorite transformations. Until next time, stay creative!


