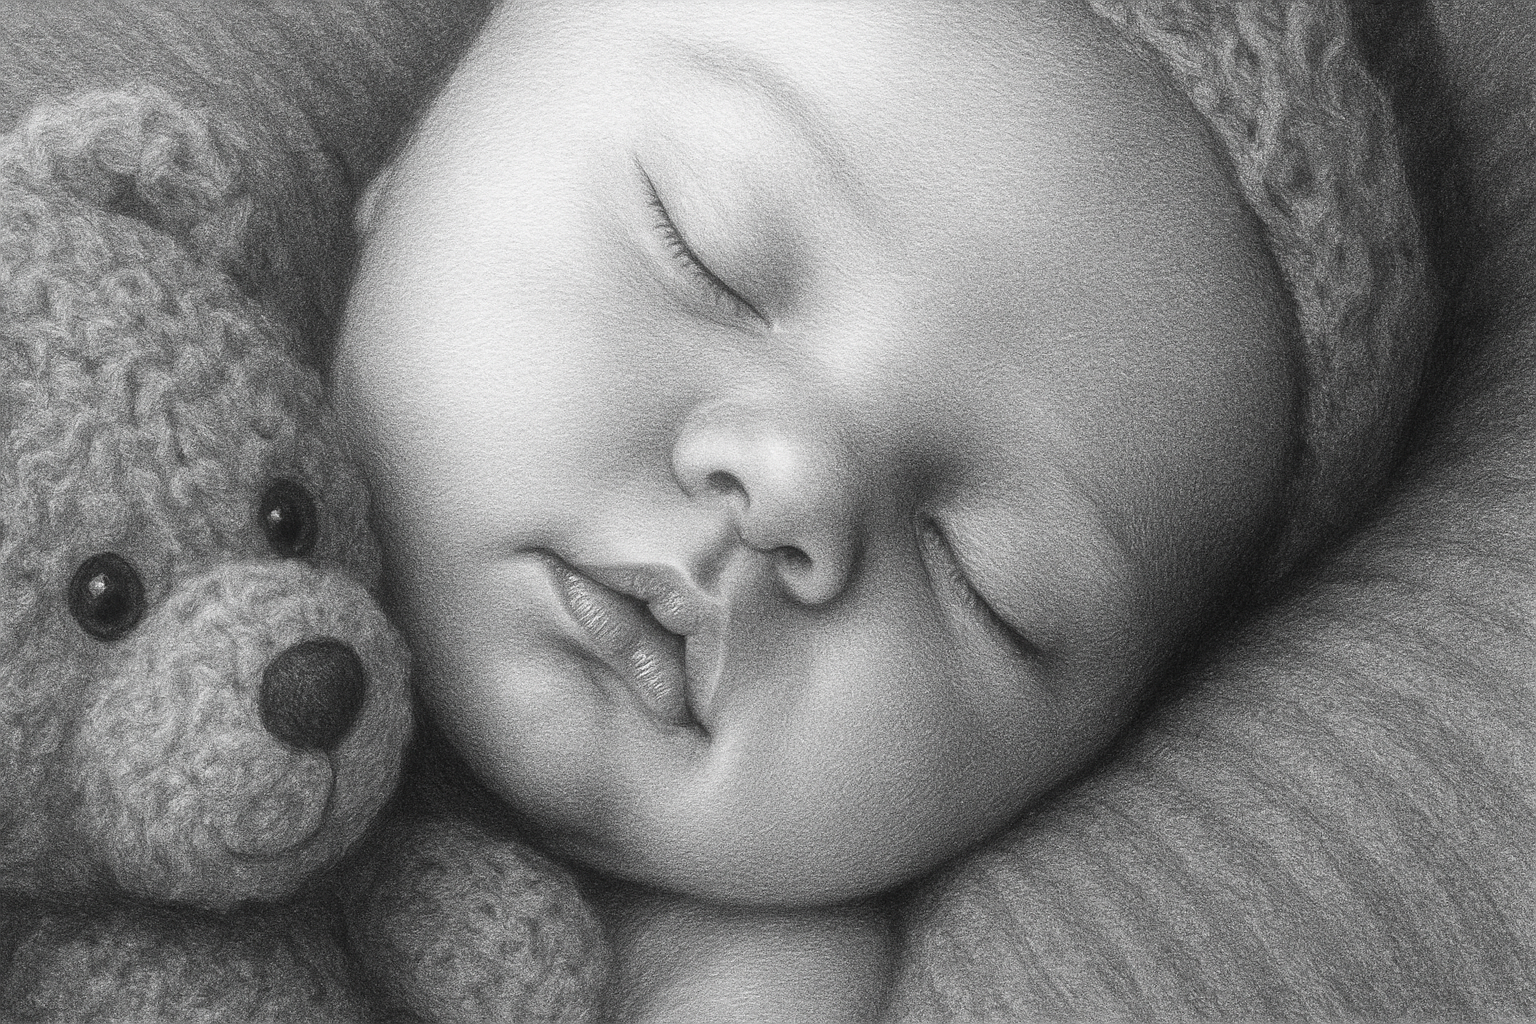
Unlock the Artistic Potential of Your Photos with This Simple Photoshop Technique
Have you ever dreamed of creating intricate pencil sketches from your cherished photos, resembling the work of a seasoned artist? Well, you’re in luck. This method not only elevates your images but also enhances your Photoshop skills. Stick around and learn how to produce nuanced, pencil-drawing artworks using your favorite photos.
Preparing Your Image
Before you dive into the fun part, start by selecting the photo you want to transform into a pencil drawing. It’s important to check the image size and resolution to ensure compatibility with this tutorial. Aim for a width and height of around 1000 pixels, or give or take a few hundred. The icing on the cake? A resolution of 150 pixels per inch for optimal detailing.
You’ll want to convert your image into a Smart Object to allow for non-destructive editing. This is like a failsafe if you decide to switch out photos later.
Desaturating the Image
To get that authentic pencil-drawn look, you’ll need to remove the colors from your image. Click on the adjustment layer icon and select Black and White. This step neutralizes the colors and provides a grayscale base for your masterpiece.
Applying Filters for the Sketch Effect
Now, the magic happens. Let’s start with the Diffuse Glow filter. This is where you’ll add a soft, ambient glow that mimics the imperfections found in traditional drawings. Set the graininess to 10, the glow to 5, and the clear amount to 7. Each of these parameters contributes to the organic texture of pencil sketches.
Next up is the Texturizer. By choosing a sandstone texture, you’ll add depth to your image—this is the type of nuance that gives the illusion of paper. Set the scaling to 100%, the relief to 4, and the light source from the top for the most realistic effect.
Enhancing Details with Glowing Edges
You’ll want to highlight the outlines to give that definitive pencil sketch clarity. Go back to the Filter Gallery, hide the previous filters, and click on Glowing Edges under the stylize folder. Make the edge width 2, brightness 20, and smoothness 15. These settings will help you draw out the essential outlines magically.
Tweaking the Details
It’s time to dig into the nitty-gritty. Use an adjustment layer to invert the colors, flipping the glowing edges from white to black, more akin to a pencil’s contrast. Use Clipping Masks (Alt Ctrl G on Windows or Option Command G on Mac) to ensure this effect only applies to the edge layer, maintaining the image’s integrity.
Switch the blending mode to Linear Burn. This will darken the outlines further, so they mesh smoothly into your grayscale image. You might find reducing the layer’s opacity to around 50% softens the sketch lines just the right amount.
Final Adjustments and Finishing Touches
It wouldn’t be a true sketch without the ability to adjust the shading to fit your artistic vision. If the mid-tones appear too light, make them darker using the Levels adjustment layer. This simple step crafts a more profound tone range, setting the stage for a more vivid sketch outcome.
Should any pencil lines seem overpowering, you have the power to introduce subtlety. Use a soft round brush with opacity set to 35% and flow to 100% to paint over the areas you’d like to soften. This technique gives you full control over the density and strength of your pencil lines.
Unleash Your Creative Potential
By mastering these techniques, you’re not just generating an impressive pencil sketch effect—you’re opening a gateway to endless creativity. Whether you’re prepping a unique gift, spicing up your digital portfolio, or just looking for new avenues to explore in Photoshop, this tutorial has equipped you with the skills to transform mundane photos into captivating works of art. Now go forth and create!
Remember, the mastery of Photoshop comes through play and exploration. So, keep experimenting and pushing those digital boundaries!