Dive into the Spooky World of Ghostly Digital Art
Creating a ghostly apparition might sound like the stuff of horror movies—or just an excellent way to get creative with digital art. Thanks to the wonders of Photoshop, you don’t need to hire Hollywood’s top SFX team to bring an eerie, spectral vibe to your images. We’ll take you through a step-by-step process to transform anyone into a ghoulish ghost that’s both spooky and spectacular. So, grab your digital “Ouija Board” (aka Photoshop), and let’s get our ghostly groove on.
Get Your Image and Background Ready
The first step in bringing your ghost to life—or rather, afterlife—is having the right components on hand: a suitable image of someone you’d like to ghostify and a nice, dark background. Trust us, the darker the background, the better the ethereal effect. While you can use any background of your choosing, a pre-provided one can simplify matters.
If you’re looking to download images, platforms like Shutterstock often have a vast selection. Choose an image, and let’s talk about separating your future phantom from the background.
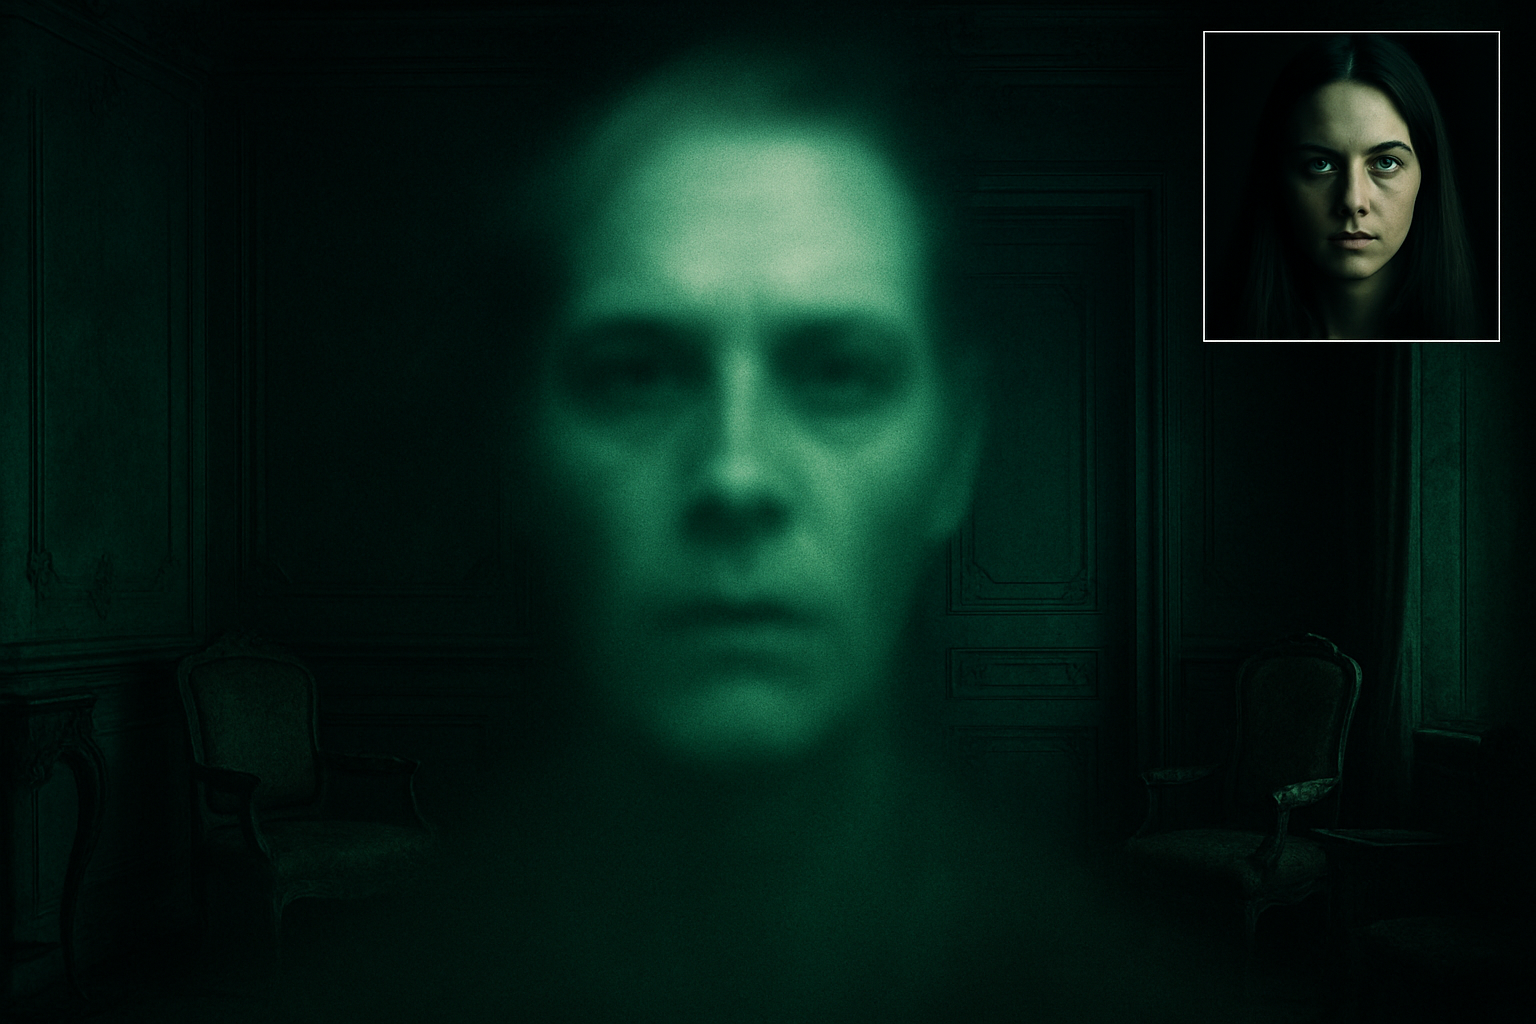
Mastering the Art of Separation
To make them float rather than blend with their surroundings, you’ll need to cut out your subject. Photoshop offers no shortage of ways to do this. Use a method you’re comfortable with—easy paths make happy ghosts. Once selected, hitting Ctrl or Cmd + J is your shortcut to freedom, separating your subject onto its own layer.
The magic begins when we convert this layer into a Smart Object, which allows for non-destructive editing. Click that little icon at the upper-right, and voila! A Smart Object beckons you toward your spectral creation.
Crafting Your Ghost’s Appearance
Now that you’ve got a handle on the basic ghost framework, it’s time to get spectral.
- Placement & Size: Position your figure against the dark background using the Move Tool, then strike a pose with the Transform Tool (Ctrl or Cmd + T) to fix size and location.
- Desaturation & Smart Objects: Add a Black & White Adjustment Layer to drain life from your ghoul, before once again turning it into a Smart Object.
- Curving for Spookiness: With the original subject active (not the duplicate, yet!), we crank things up. The Curves Adjustment might sound like something out of a rollercoaster manual, but it essentially lets you refine contrast and brightness selectively. Clip it to just the subject, so your ghoul gets all the spectral spotlight.
Breathe Life (or Un-life) into Those Eyes!
With your subject prepped, it’s time to delve into the eyes. Use your layer masks to ensure your curves effect highlights only this feature. With a soft, round brush, unveil the whites of the eyes on your masked Curves layer. Spooky, right?
The Final Ghostly Touches
Now that we’ve got a good chunk of the ghostly basics, it’s time to let your creativity truly loose. Add motion blurs, paint over some areas to enhance focal points, and adjust opacity as needed to get that perfect haunting look.
- Distort & Color: If you’ve got an artistic S-O-S signal going off, Liquify is your life-saver for warping facial features. And as for an eerie hue—a mix of green or a custom hex color like
#176A23set to Soft Light blend mode can take it from creepy to creatively paranormal. - Diffuse Glow & Blending: Applying diffuse glow filters and changing blend modes like Screen or even Color Dodge can boost your apparition’s otherworldly aura to a place where it looks ready to haunt a remote Gothic castle—or your next art show.
Unleash Your Inner (Digital) Ghost Whisperer
Transforming the ordinary into the spectral is just one Photoshop adventure awaiting you. There are endless ways you can tweak the recipe to suit your creative muse. Want a little more opacity here? A splash more distortion there? It’s all about experimenting and having a few digital laughs along the way.
Happy haunting, and may your photo manipulations be spooky yet artistically fulfilling.


