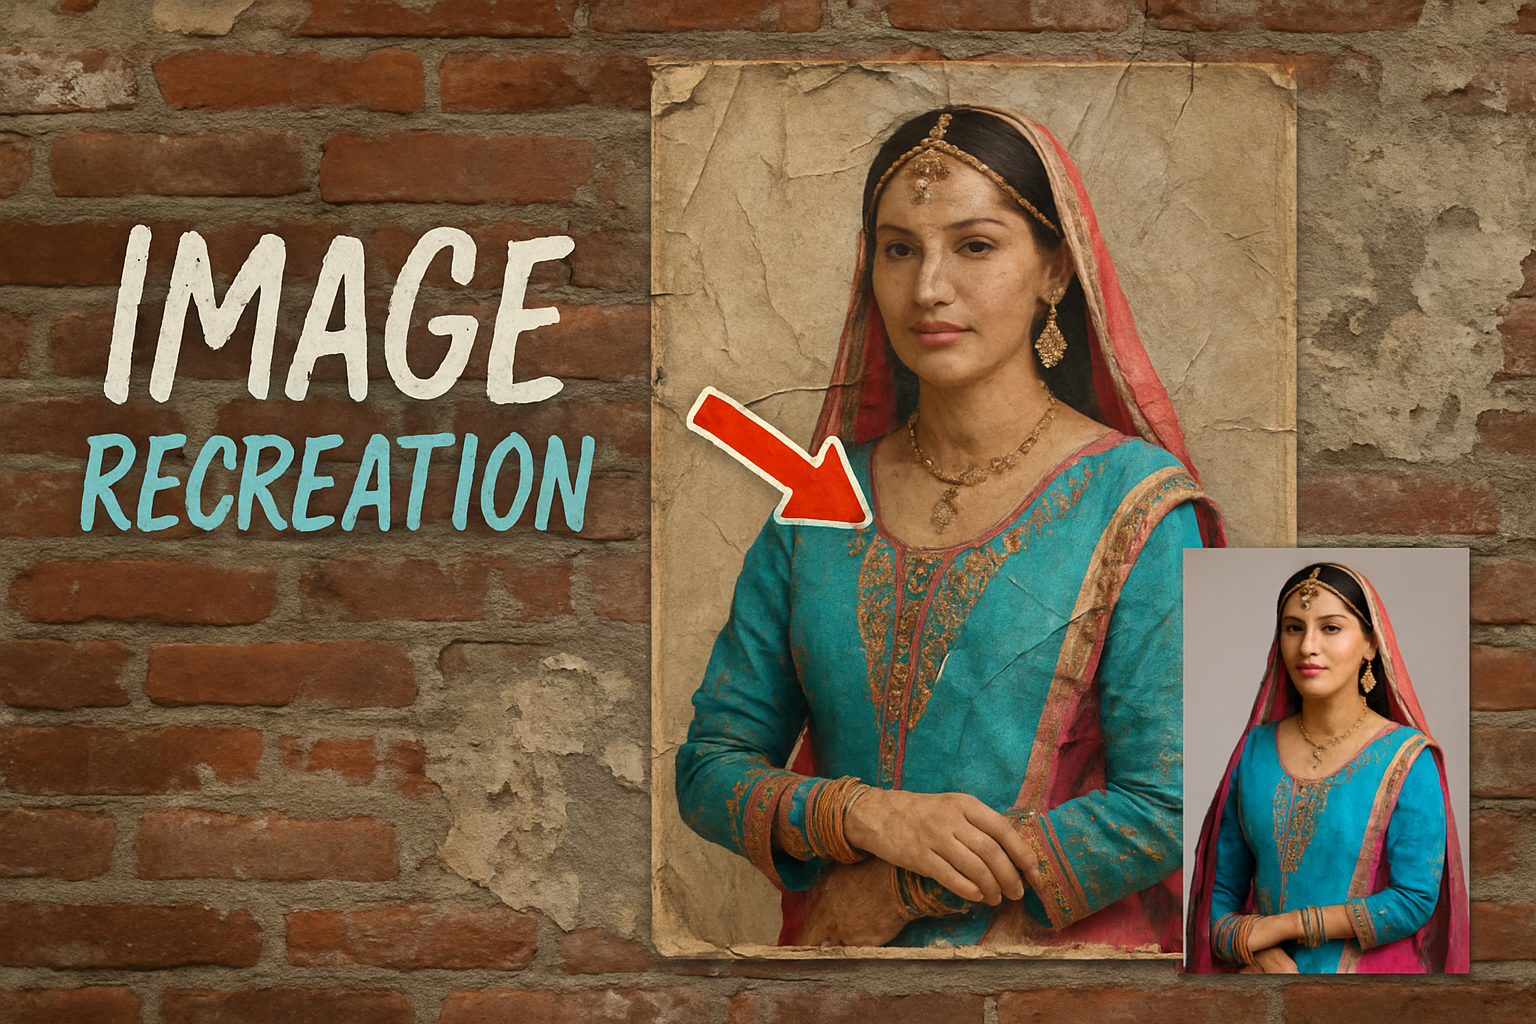
Learn to Create a Classic Weathered Poster Look Using Photoshop Techniques
Have you ever glanced at those iconic weathered posters glued to urban walls that seem almost alive, telling tales of history, culture, and aesthetics? If you've ever wondered how to replicate that unique look for your artwork, well, today's your lucky day! This guide will take you step-by-step through the process of transforming any image into a stunning, weathered outdoor poster using Adobe Photoshop. Read on and get ready to add a vintage vibe to your visuals with just a few clever tweaks.
The Building Blocks: Photoshop Templates and Custom Brushes
Before jumping into the nitty-gritty of Photoshop, it's crucial to gather the essential materials. Lucky for you, in his video tutorial series on Blue Lightning TV, our guide generously provides a Photoshop template. This template includes two layers: a gritty urban brick-and-stucco wall and a glued plain paper image. Check out the description on the YouTube video for the template and brush set links!
These specially provided resources are the cornerstone of your design, helping you achieve that realistic aged and weathered appearance.
Crafting the Foundation: Creating a Displacement Map
A displacement map is a crucial tool for making your photo appear as though it's been adhered to an uneven surface. The first step requires you to duplicate the glued paper layer from your template and apply a gentle Gaussian blur to it. This blurred layer forms the base of our displacement map.
- Make sure the glued paper layer is selected.
- Press
CtrlorCommand + Jto duplicate. - Go to
Filter > Blur > Gaussian Blurand set it to 2 pixels. - Save this layer as a PSD file on your desktop for easy access, naming it “Displacement”.
Remove the duplicate layer afterward, as it's no longer needed once saved.
Placing and Adjusting Your Image
Select the image that screams creativity and drag it into the template.
- Ensure the Move Tool is active.
- Drag your image onto the poster template tab, drop it down and release it.
Next, it's time to fit and frame your masterpiece:
- Use
CtrlorCommand + Tto activate the Transform Tool. - Resize, rotate, and reposition your image.
Consider converting your photo into a Smart Object for non-destructive editing. Temporarily remove the layer mask, transform it into a smart object, and then add back the mask by selecting the glued paper shape.
Achieving the Perfect Distressed Look
Time to apply our crafted displacement map:
- Change the blend mode of the photo layer to Multiply.
- Head to
Filter > Distort > Displace. - Use a horizontal and vertical scale of 10 each and open your saved displacement map.
This action allows your image to conform to the glued paper's subtle contours, giving an authentic aged-paper look.
Tweaking Colors and Vibes
A truly vintage poster will have its colors faded and altered over time. We mimic this through a series of color adjustments in Photoshop:
- Levels Adjustment: Adjust to brighten the highlights with an input of 215 and lighten tones with an output of 30.
- Selective Color Adjustment: Reduce the black value in reds and yellows to fade those hues.
- Vibrance Adjustment: Set vibrance to -50, or according to your photo's starting tone.
These adjustments ensure your photo fits the classic weathered, slightly washed-out style indicative of neglected outdoor posters.
Adding Character: Achieve the Torn and Weathered Effect
Finally, it's time to take advantage of the custom brushes. By applying various brushes, you introduce tears and abrasions, enhancing the authenticity of your vintage poster:
- Press
Xto swap to black as the foreground color. - Use the brushes from the “SG dry brush Strokes” folder.
- Select sizes, stamp around, and transform your brushes until satisfied.
For that truly battered look, press X to alternate between black and white brushes, simulating different abrasions and fades.
Final Touches: Reviewing Your Masterpiece
After manipulating and distressing with brushes, take one final look to finesse your work. Mix up methods until you've wrapped up a faded, tattered, and delightfully vintage work of art reminiscent of a storied forgotten past.
By utilizing these Photoshop techniques, you've mastered an essential style trick, perfect for digital artists and content creators looking to add depth and history to their imagery. So, go forth, and may your art project nostalgia in the richest, most weathered way possible!


