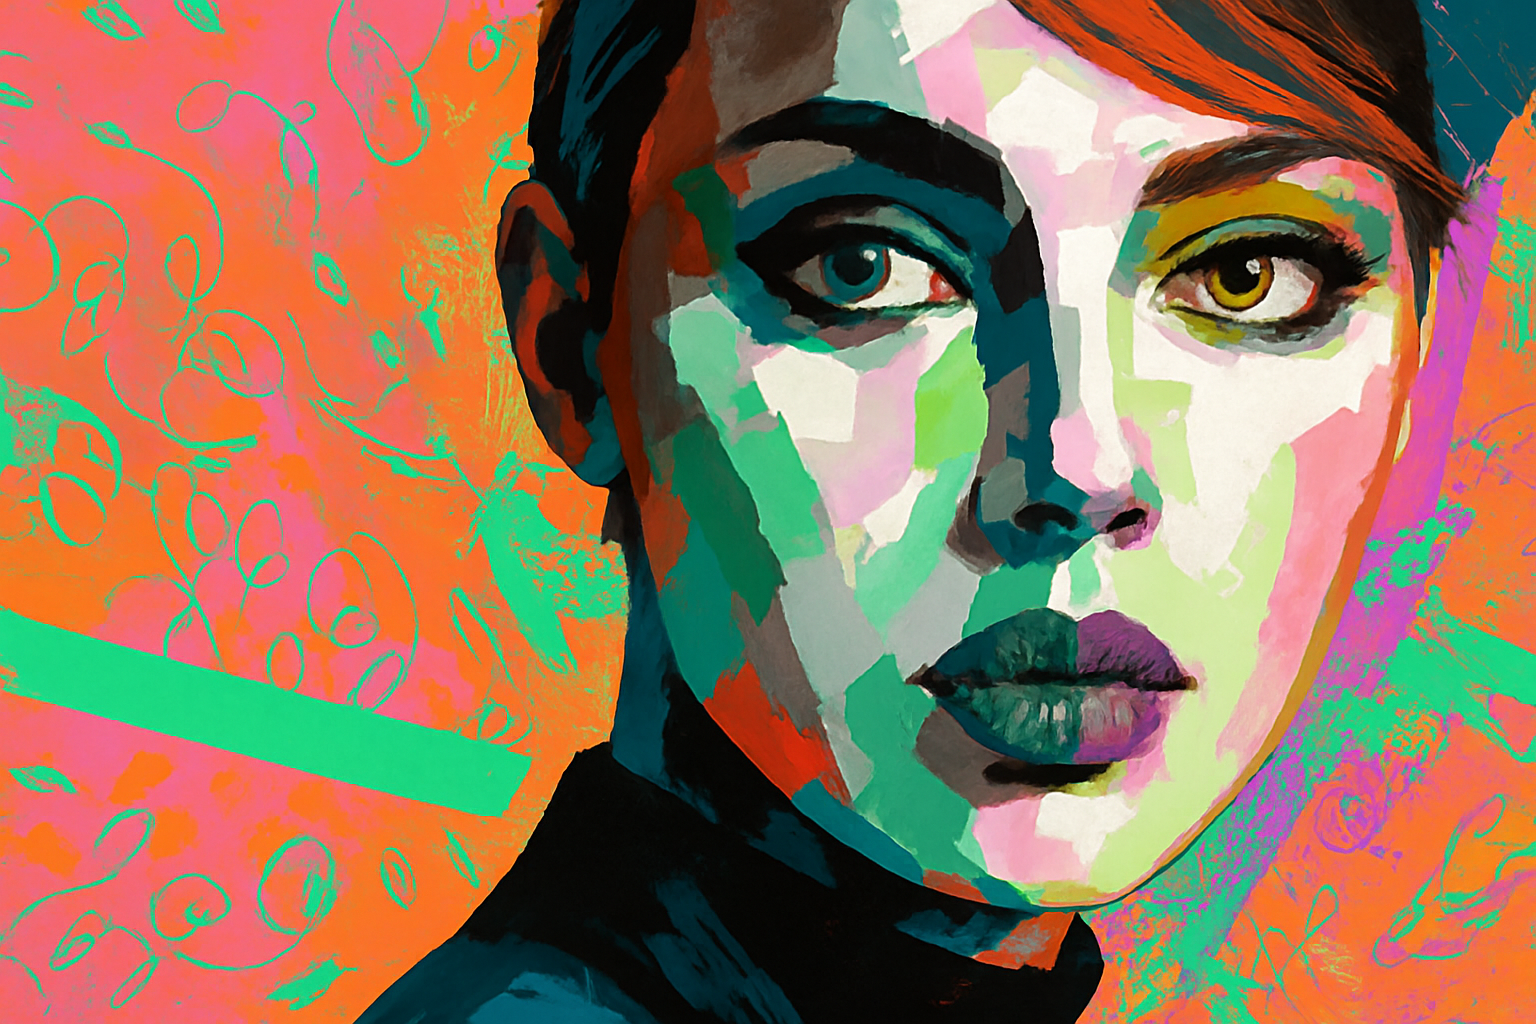
Unleashing Your Inner Abstract Artist with Photoshop
Ever looked at an abstract expressionist painting and thought about the power and emotion emanating from the bold strokes and vivid colors? Traditional methods may leave you intimidated, but Photoshop makes creating such rich and dynamic artwork surprisingly accessible—even if your only skill is knowing how to click a mouse. Let’s dive into turning ordinary portraits into paintings that would make even Picasso proud.
Setting the Stage: Choose Your Photo and Prepped Textures
You’ll need a good starting photo. Whether you snap your own or grab one from stock websites like Shutterstock, ensure the image packs a punch with lighting and composition. For this project, textures are your new best friends. I already took the liberty of gathering a set of 10 textures, sourced from Brusheezy, and they are available in the project files linked in the video description.
Preparing the Canvas: The Crop and Resolution Fundamentals
Your first task is cropping your image aesthetically. Open the Crop Tool in Photoshop and set your desired dimensions. Here’s a neat trick—if you need uniform filter applications later on, make sure the resolution is set to 150 pixels per inch. This standardizes the filter settings you’ll apply, allowing for predictable results across various projects.
Cutting to the Core: Isolating Your Subject
Separate your subject from the background’s confines using the Quick Selection Tool and the “Select Subject” feature—a magical shortcut introduced in Adobe’s CC 2018 version. For earlier iterations, manual selection is the way to go. Simply select and then cut-copy your figure onto a new layer.
Prepping the Subject: Gradient Into Grayscale and Sharpening
Desaturate your isolated subject by hitting Ctrl + Shift + U. This step sets the stage for a sharper, high-contrast figure using the Unsharp Mask filter. Set the Amount to 100%, Radius to 10 pixels, and Threshold to 10 levels—let’s make that face pop!
Artistic Layers: Entering The World of Oil Paints and Posterize
Filters are the magic wands in this creative process. First, go the “Filter” menu, then “Stylize,” and choose “Oil Paint.” Set the following: Stylization at 4, Cleanliness at 2, Scale at 10, and Bristle Detail at 10, while ensuring “Lighting” is unchecked. Follow this by posterizing the image to 4 levels. Voilà, you’re already seeing an art piece in the making!
The Art of Stratification: Layering Colors to Shape
Now, onto one of the coolest parts—you’ll create multiple stratified copies of layers. Title these “Black,” “Dark,” “Medium,” and “White.” In the coming steps, each layer will host a specific color hue, just like an artist might use different shades for depth and dynamism.
Texture Me Crazy: Draping Textures Over Tones
Select textures for each layer, starting with the darkest—our “Black” layer—and incorporating a variety of abstract patterns. Clip these textures to their respective layers and allow a burst of creativity. Feel free to work with Adjustment Layers to tweak and play with levels of brightness and color balance, ensuring the texture resonates with your expressionist vision.
Final Flourish: Texturing the Background
Texture isn’t just limited to your main subject; it extends to the background, completing your masterpiece. By grouping the layers corresponding to the “White” shades and focusing attention on the background, embellish the canvas one last time with a robust pattern. Make sure the overall balance of color, tone, and saturation screams “you.”
Now, all layered up and textured down, your abstract expressionist portrait painting is ready to leave its mark. From picking the right image, preparing its canvas, separating and sharpening its core, through strategic layering and texturization—you’ve transformed regular photos into a melodious visual composition.
In this venture of slapping art onto reality, remember that the process is as much about experimentation as it is precision. This is a playground, not an examination hall: feel free to tweak settings, switch textures, and let your artistic spirit unfurl. You might not break into the MoMA just yet, but you’ve undoubtedly taken a huge step towards mastering the art of expression with Photoshop.


