
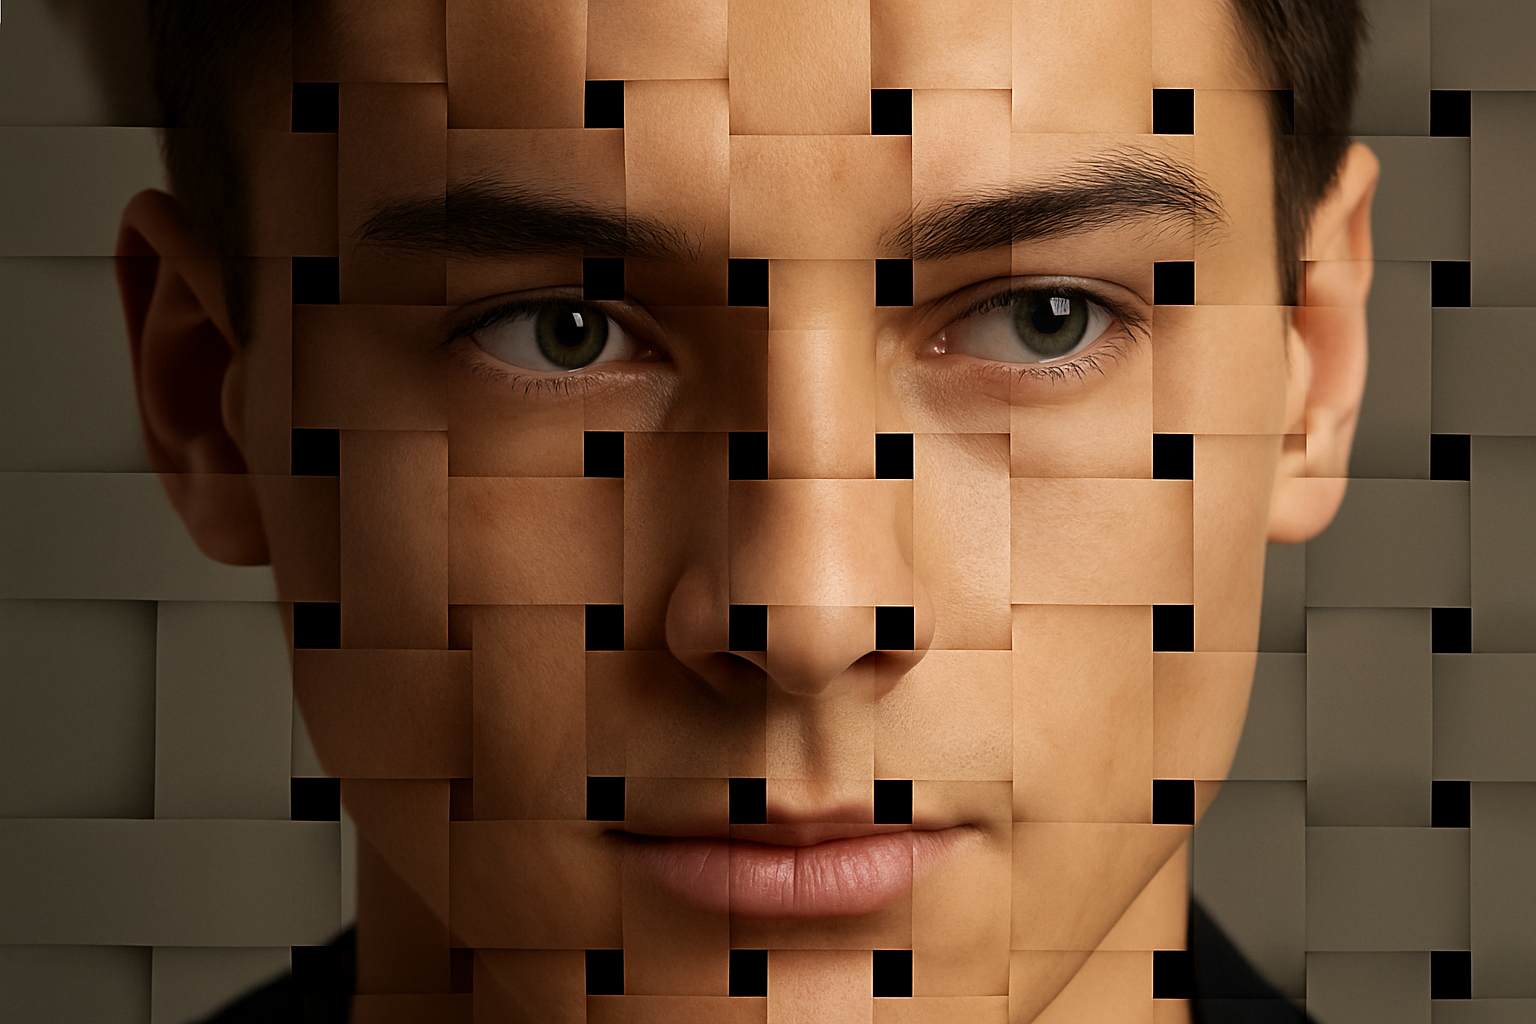
Turning Your Portraits Into Intricate Basket Weaves
Who said Photoshop is only for subtle enhancements and digital makeovers? In a world where standing out is key, we’re going bold with an arresting basket weave portrait effect. This tutorial is aimed at turning an ordinary close-up photo into a mesmerizing piece of art, all while keeping the process (mostly) non-destructive and allowing for colorful changes on the fly. Let’s dive into how to create this eye-catching effect using Adobe Photoshop CC and later versions.
Step One: Prepare Your Photo
Choose a close-up photo of someone’s face (because faces are way more fun to transform into art). You might want to check out Shutterstock for professional-grade images if you’re fresh out of portraits. Once selected, open the image and let’s get cropping.
1. Crop for Perfection: Open the Crop Tool and set the preset to ‘Width x Height x Resolution’. Enter 1000 pixels for both the width and height fields, with a resolution set at 150 pixels per inch.
Drag the corners till your subject’s face is prominently cropped. If it’s not fingers-in-nose close, you’re not quite there yet!
2. Embrace the Smart Object: Converting your image into a Smart Object is key—this ensures you can apply non-destructive edits.
So, make sure to do this before anything else to save yourself potential tears down the line.
Step Two: Establish Your Guidelines
To create a basket weave effect, having clear guidelines is like having a map when you’re utterly lost in the woods. Here’s the lowdown:
- Go to View > New Guide Layout. Set the number of rows and columns to 8, and gutters to 0.2 inches (or 0.5 centimeters for those who like metrics).
We’ll be duplicating the image a few times so buckle up—this is about to get methodical.
Step Three: Crafting the Basket Weave
Now, it’s time to put on your basket-weaving hat, virtually:
1. Multiply the Layers: Duplicate your main layer four times.
Hold your breath and press Ctrl (Cmd) + J four times (or until your finger gets tired).
2. Make It Snappy: Ensure ‘Snap’ is checked under the View menu.
This will help your selection snap to the guide lines, making the beautiful weave you’re creating less of a hot mess and more precise art.
3. Mask It Up: Use the Rectangular Marquee tool to select alternating columns and rows.
For the bottom layer, mask the wide columns and for the subsequent layers, alternate between rows and columns.
Use layer masks to hide/unhide sections—the holy grail of this pattern play.
Step Four: Add Depth and Texture
Let’s add some drama, because why not?
- Outer Glow & Effects: Go creative with some layer styles. Add ‘Outer Glow’ under layer styles to create dimension and shadows. Be subtle for best effects—a night club glitter vibe this isn’t.
- Bevel and Emboss: The pièce de résistance! This gives your weave some oomph by adding an inner bevel and smoothening out the rough edges. Tinker with the angles and altitudes to find your perfect weave aesthetics.
- Texturize It: More texture feels like a good idea, right? So, run wild in the Filter Gallery and slap on a Sandstone effect. This creates a tactile feel—even if it’s just virtual.
Final Touches: Finishing with Style
What’s a masterpiece without a signature touch of flair? Adjust the blend mode to linear burn and set the opacity to 50 percent to allow the texture underneath to complement your intricate work. This is where creative instinct meets technique, and you can tweak the settings till you hit that sweet spot, or until your eyes cross—whichever comes first.
This artistic journey transforms the mundane into the mesmerizing and turns photos into conversation starters. So, go forth and weave your portraits into the fabric of creativity. Happy Photoshopping!





