
Unleash the Power of Photoshop to Create Otherworldly Art
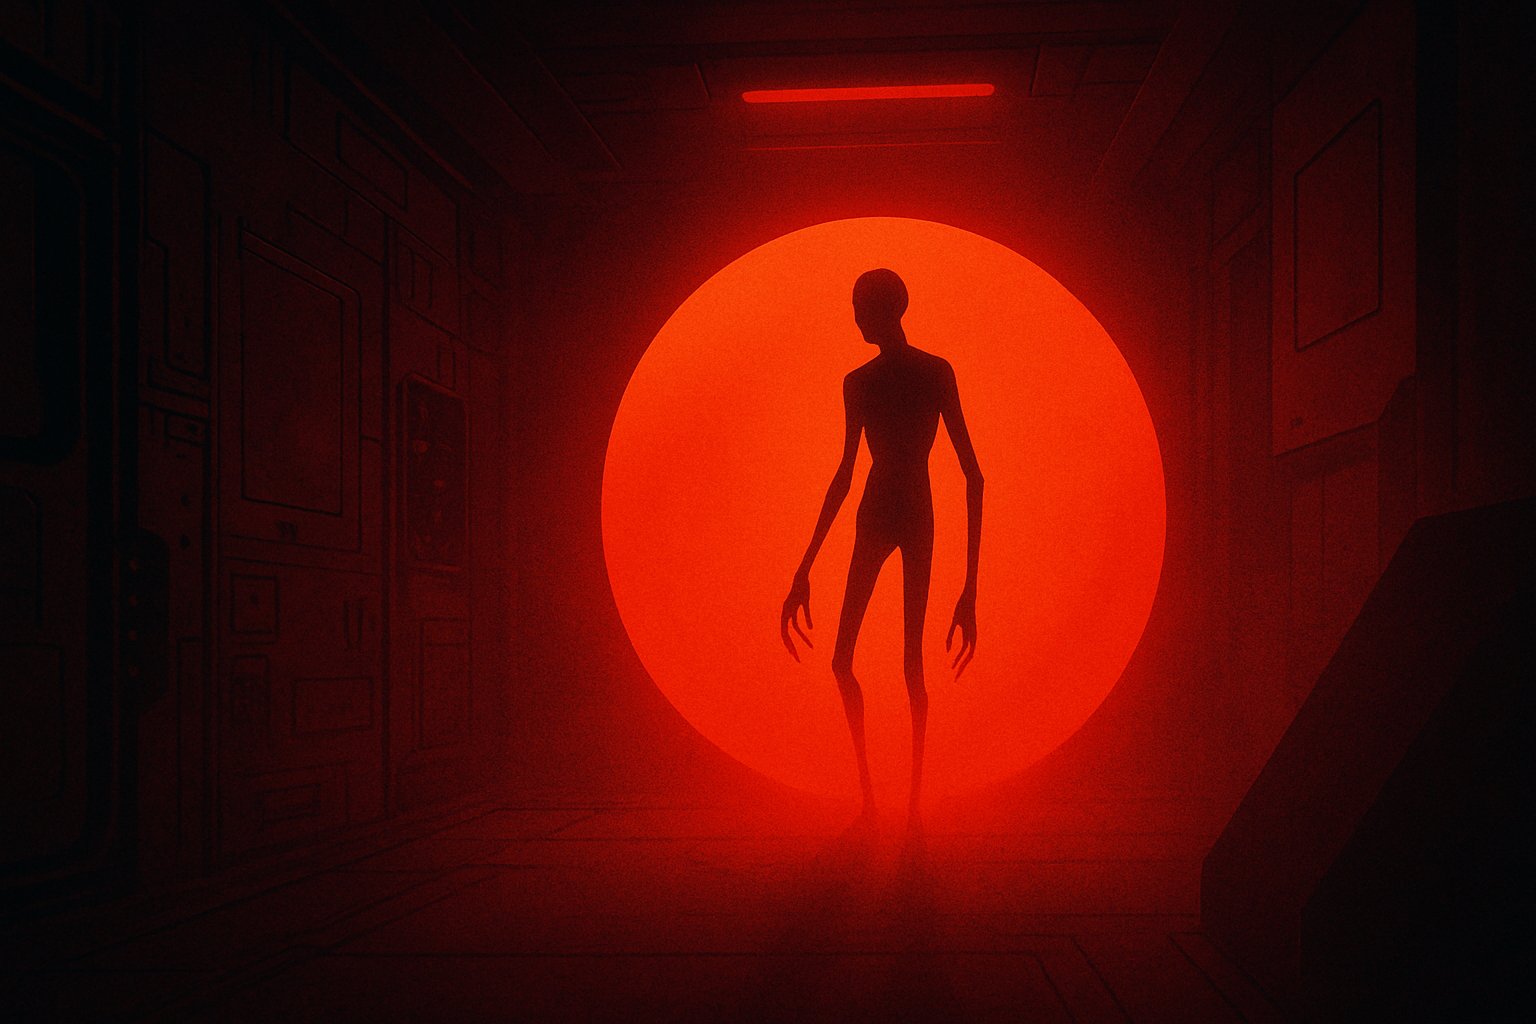
Imagine if you could combine the creativity of an alien mind with the power of Adobe Photoshop to create surreal, otherworldly images. Well, strap in because we’re about to take a cosmic journey—not through space, but rather through the digital dimension of design. In this post, we’ll uncover the secrets of creating an extraterrestrial alien engulfed in a shimmering cocoon of light. Prepare to enlighten your Photoshop skills and craft an awe-inspiring piece of digital art.
Starting Your Cosmic Adventure
Let’s set the stage by preparing your canvas. First, grab the Photoshop document provided in the video’s description, which structurally resembles a classic alien encounter: three layers including a black base, a translucent orb, and a silhouette figure. Add in a spacecraft interior as your background—a must-have for any self-respecting galactic being.
Getting Rid of the Ghostly Fringes
Your first task is to make the silhouette figure come alive by removing the stubbornly persistent white background. Activate the silhouette layer and wield your magical wand tool with precision. Selecting the white area, press delete, and bid adieu to any remnants by deselecting (Ctrl or Cmd+D). To banish the white fringe clinging to your figure like an astral barnacle, you’ll turn to Layer > Matting > Defringe. Set the width to 1 pixel, give your figure some elbow room, and voila!
Mastering the Smart Way of Non-Destructive Editing
In the realm of image editing, the smart object reigns supreme. By converting your silhouette figure into a smart object, you gain the flexibility to make future adjustments with the finesse of a ninja. Click the little icon at the top-right and select Convert to Smart Object, then unshackle your creativity with some well-applied Filter magic.
Blur, Choke and Glow
It’s time to channel your inner visionary and apply a Gaussian blur (Filter > Blur > Gaussian Blur) to your figure, softening its edges with a blur of 6 pixels. Following this, employ the Maximum filter (Filter > Other > Maximum) to spread out the white areas, adding complexity to its shape. This is where you infuse your creation with a spectral glow: open the Layer Style window, delve into Outer Glow, and let there be light with 100% opacity and a size of 250 pixels.
Stretching into the Alien Frontier
Onward to the transformational stage, where your silhouette becomes an elongated alien shape. Summon the Transform tool (Ctrl or Cmd+T), and be prepared for some smart filter wizardry. Stretch vertically from the top anchor point, compress slightly horizontally, and remember: it’s all about finding that perfect extraterrestrial physique.
Crafting an Orb that Captivates
With your alien protagonist taking shape, it’s time to focus on its shimmering cocoon. Activate the orb layer, transform it into an oblong vessel of light, and switch its blend mode to Screen for a translucent projection. By utilizing the Blend If feature, you’ll skillfully remove any unwanted midtones while accentuating highlights. It’s like sculpting with light—and this is but the beginning.
Adding Color to a Celestial Cocoon
Elevate your orb to new dimensions by adjusting its Hue/Saturation—a light hue of 30 and saturation of 100 will set the stage, while a strategic adjustment in the Layer Style window will gift your orb with a dark reddish glow. Remember, this cocoon is your canvas; you hold the divine brush.
Illuminating with a Soft Touch
Now that your orb is glowing, aspire to even greater luminosity. Create a new layer, and using a soft round brush of 700 pixels, craft a soft white shape at the orb’s center. Use your Transform tool to refine this shape into an oblong glow—a gentle caress of light for your alien companion.
Grounded in Glow
The final touch lies at your alien’s feet. Duplicate the soft shape, adjusting its opacity for a gentle ground illumination. This creates an anchor, rooting your creation within its cosmic environment. For a cherry on top, sprinkle in a lens flare, a harmonious marriage of light and shadow that crowns your creation.
Experimenting with Backgrounds
With your alien figure ready to probe new worlds, feel free to experiment with lucky backgrounds to find that perfect intergalactic setting. Customize the brightness and contrast to suit your composition, ensuring your alien emerges from the canvas with unparalleled grandeur.
As you embark on this journey, remember—Photoshop is your starship, and creativity is your guiding star. Each blend, each layer, each brushstroke sets you closer to a universe limited only by imagination. So, go forth and may your Photoshop endeavors be truly out of this world!
Whether you’re hunting for creative inspirations for alien encounters or simply honing your Photoshop skills, the cosmic canvas is yours to shape. Happy editing! 🌌





