
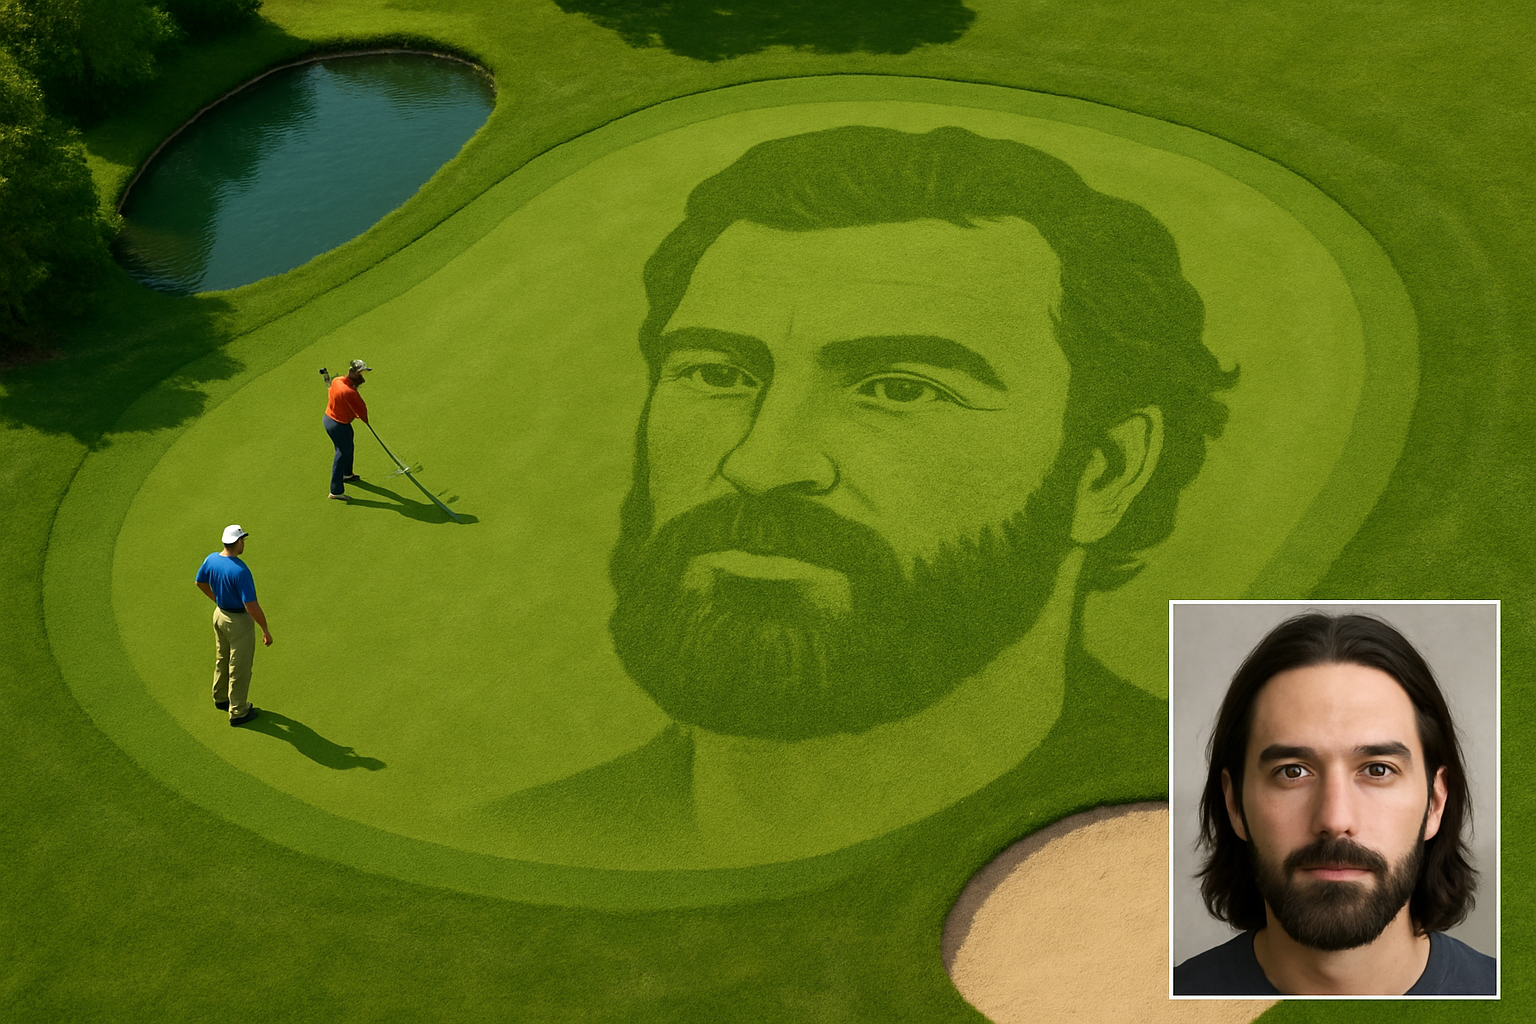
Fore! Transform Your Face into a Golf Course in No Time
Imagine this: it’s a sunny day, birds are chirping, and you’re all set on the putting green, except, wait—what’s that? It’s your face, seamlessly blended into the lush landscape! This whimsical Photoshop project lets you turn your visage into part of a golf course putting green. Whether it’s to prank your friends or showcase your creativity, this tutorial has your back!
Getting Started: Tools & Images Required
First things first, to follow along with this tutorial, you’ll need Adobe Photoshop and a couple of images: a photo of a golf course putting green, a texture of golf course grass, and of course, a charming portrait of yourself or an unsuspecting friend willing to get digitalized onto nature.
Image Selection & Preparation
1. Select the Face Image: Open a high-resolution image of someone’s face. This foundational step ensures your transformation looks as smooth as during a Tiger Woods putt.
2. Making a Selection: Using tools like the Quick Selection Tool often does wonders for isolating subjects. If your portrait’s background contrasts sharply (like a solid white), the Magic Wand Tool can expedite the process with just one click.
3. Advanced Selection Techniques: Adobe added a ‘Select Subject’ button in version CC 2020 that automatically analyzes and selects subjects—saving creatives from tedious manual work. Bask in this luxury if your Adobe version permits!
Layered Creativity: Building the Base
Once you have your subject’s selection set, encase it within a layer mask. This allows you to manipulate parts of your image non-destructively. Perform some magic by filling a new layer with white as your base before blending more textures.
To keep artistic integrity—using layers converted to smart objects will empower you to edit freely, without regret, much like a professional golfer switching clubs for precision.
Adding Depth with Filters
Explore the world of blurs and thresholds. Applying a Gaussian Blur of about 10 pixels softens features, while the Threshold adjustability sharpens for bold contrasts—necessary for creating that grass-and-dimpled outlook.
Layer Mask Exploit: Refining the Face
Understanding Photoshop’s layer mask is pivotal. Think of masks as conceal-and-reveal tools. Alt-click or Option-click a mask to hide data. This wonderful discretion allows you to modify parts selectively with tools like the Pencil Tool, tweaking opacities and shapes to perfection.
Finessing Facial Features
Perhaps the mustache looks a bit bushy, or the eyebrows a tad too arched? Tweak to your heart’s content by crafting delicate shadows or bold textures. Remember, beauty is fleeting, but Photoshop is forever.
Creating Illusions: Placing the Golf Course Face
Press the Move Tool and position that face onto the putting green. The mysteries of scale, perspective, and position are your next quest. Resizing and transformation tools here are the keys to intertwining the man-made with nature’s wonder.
Playing with Textures and Effects
Utilize the darker grass texture, overlay it onto the facial silhouette, and work that into the landscape seamlessly. Layers and styles like Bevel & Emboss can give a realistic, texturized feel meant to mimic nature’s subtle intricacies.
Final Touches: Adding Shadows and Perspective
For added realism, consider the time of day. The sun doesn’t shine the same at dawn as it does mid-day. Use drop shadows and altitudes to reflect this feeling.
Before ending your project, to truly thread the needle, use the perspective transform to ensure the proportions align with the laid-back angle of the putting course.
Revel in this unconventional art form—digitally golf your face! Whether it’s for fun, digital prowess practice, or just a twisted personalization idea, this tutorial encourages you to see the world (and your face) from a grassier perspective. Let creativity put a clever spin on the everyday, much like sinking an improbable hole-in-one with the family!





