Unlocking the Art of Portrait Poster Designs: A Photoshop Guide
Nothing says creativity quite like integrating a portrait within the bold typography of a name. This dynamic composition lends itself to everything from personalized gifts to eye-catching marketing materials. Let’s dive into how you can create a captivating portrait poster design using simple Photoshop techniques.
Create Your Canvas
First things first: you’ll need a high-resolution photo as the starting point for your portrait poster. Websites like Shutterstock provide great quality images to download. Once you have your image ready, you’ll need to set up a new document in Photoshop. Here’s how:
- Set the width and height to 1200 pixels each.
- Choose a resolution of 150 pixels per inch.
- Ensure the color mode is RGB with 8 bits per channel.
- Select black for the background.
This setup ensures you have a crisp and clear canvas to work with, perfect for any text-based design.
The Font of Infinite Potential
Your text will be the star of the show, so select a font that’s bold and makes a statement. Consider Franklin Gothic Heavy or another thick, heavy font. This will add impact and ensure your portrait can be clearly seen within the letters.
- Set the font size to 300 points.
- Make sure the font color is white for clear visibility against the black background.
- Align the text to the left and set aliasing to sharp for the best visual quality.
Character Crafting
Start typing the first letter of your subject’s name on your canvas. To create the complete name, you’ll need to meticulously copy each letter layer:
- Create duplicates by dragging each letter layer to the new layer icon.
- Double-click on the ‘T’ of each new layer to edit, typing the subsequent character of the name.
- Continue until the name is fully displayed letter by letter.
Mastering the Arrangement
With your Move Tool at the ready, focus on arranging the letters:
- Utilize the ‘Auto-Select’ option to easily grab and adjust each letter.
- Overlap the letters just enough to maintain a cohesive look but also ensure legibility.
Once arrangements are satisfactory, make sure to deactivate ‘Auto-Select’ to prevent accidental layer shifts.
Smart Object Savvy
Combine your meticulous lettering into one smart object. This useful feature allows you to manipulate the entire name design cohesively or replace it without losing any applied effects:
- Highlight all letter layers and convert them into a smart object.
Having your text as a smart object opens the door to endless creative possibilities without redoing your foundational work.
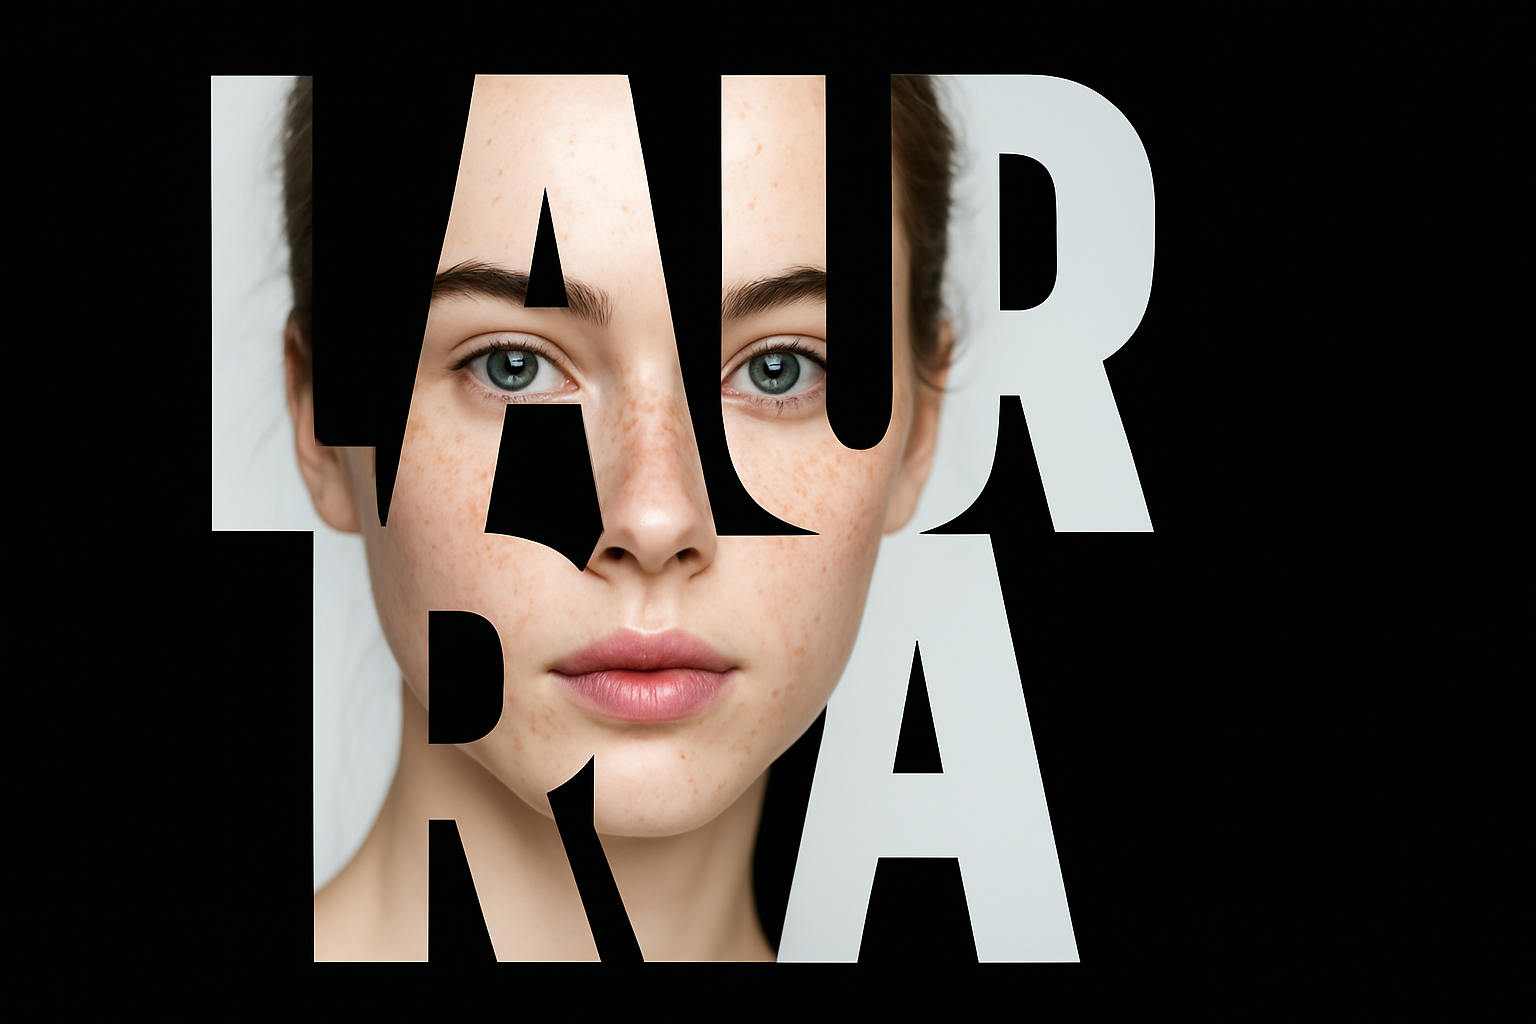
Picture-Perfect Integration
Now for the magic—integrating the photo into your text design:
- Drag your photo into the document containing your name design.
- Transform it into a clipping mask by pressing `Alt + Ctrl + G` on Windows or `Option + Command + G` on a Mac.
This technique nests your image within the letters, allowing your portrait to become the design’s core visual element.
Adding Depth and Style
It’s time to enrich your design using layer styles, giving your text elements depth and definition:
- Apply an inner shadow to the base name layer for dimension.
- Set color to black, blend mode to multiply, and opacity to 35%.
- Adjust angles and size for the desired shadow effect.
- Make the duplicate layer visible with a zero percent fill to retain effect visibility.
- Add a white stroke around the text for prominence.
- Consider using an outer glow to select colors directly from your subject’s photo for harmony.
Final Touches
A thin outline around your entire design ties it all together:
- Set the stroke to black with a size of 25 pixels inside the layer.
- Use an inner glow to add a touch of color reminiscent of the text border for an artistic finish.
Fine-tuning these effects is what transforms a decent design into a stunning masterpiece, allowing you to adapt and evolve your artwork.
Now it’s your turn to create something bespoke and beautiful. Whether it’s an unforgettable gift or an attention-grabbing promotional piece, you’ve got the tools to craft designs that speak volumes. Enjoy the process—and who knows? You might just design your next masterpiece.


