Enter the World of Attention-Grabbing Text Effects
Are you ready to continue on your creative journey to craft a classic military dog tag? In this blog post, adapted from a Blue Lightning TV video tutorial, we’re diving into the meticulous art of adding text effects to your dog tag design using Adobe Photoshop. This isn’t just about typing words—it’s about mastering the subtle details that make your design stand out. Let’s dig into it and see how you can elevate your Photoshop prowess!
Step-by-Step Guide to Adding Text Effects
Now that you’ve set up the base for your dog tag from Part 1, it’s time to focus on the textual elements. First things first, open your Horizontal Type Tool. The choice of font is crucial; here, we’re rolling with “Another Typewriter.” Regular fonts can be a good fit, lending a classic and rugged feel. Remember, the font size is set to 33 points, with sharp anti-aliasing and left alignment. It’s important to have your text blend aesthetically yet distinctly.
Choosing the Right Font and Color
- Font Setup: Start with a font that has a classic and simple style. If you’re using “Another Typewriter,” you’ll find the project files linked in the YouTube video’s description.
- Color Choice: Open your Color Picker, and in the brightness field, input 70%. This makes the text have enough contrast to stand out, while still subtly integrating into the overall dog tag design.
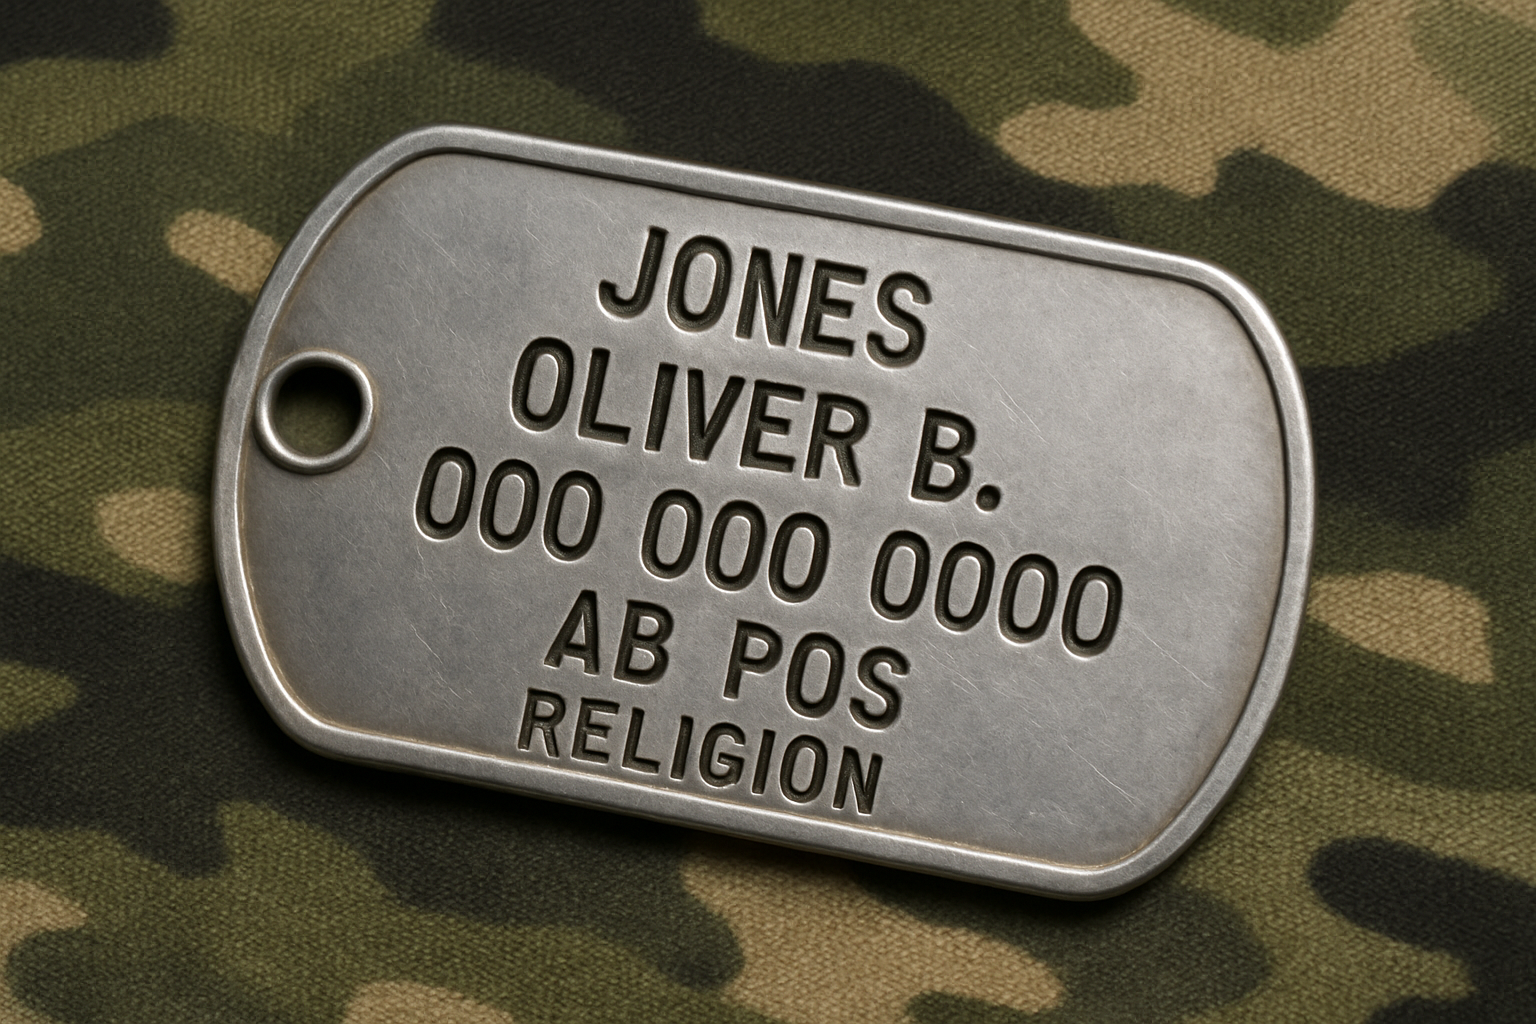
Structuring Your Text Like a Pro
In traditional military style, text on a dog tag includes specific information: last name, first name, middle initial, social security number, blood type, and religion. While you can type whatever you want for personal projects, adhering to this format can enhance the authenticity of your design.
Mastering Text Layers
Once you’ve got your text in place, it’s time to finesse it with layers for additional effects. Rasterizing and renaming your layers keeps things organized and manageable—essential when experimenting with different effects. Here’s how you can break it down:
- Create Text Duplicates: After typing out your initial text, make two duplicates to work with multiple effects. You’ll rename these layers as Text 1, Text 2, and Text 3.
- Stroke Effects: Select the text layer, and within the Layer Style window, apply stroke effects using the settings—2 pixels size, and color brightness at 70%. This adds depth to the text.
- Bevel and Emboss: Differentiate each text layer by applying bevel and emboss effects with varied sizes and gloss contours. Experiment with outer bevel styles on some, and modify angles and altitudes for others to create a realistic engraved look.
Get Your Shine On with Highlight and Shadow Effects
Effects like Vivid Light and Linear Burn enhance your text substantially.
- Outer Glow and Shadows: Choose black for the glow color and adjust to a spread of 40% and size of 12 pixels with opacity at 18%. Incorporate light and shadows to your text using the Drop Shadow option, determining distance and size to match the perspective and light source of your design.
- Finessing Visibility: Dial down the fill to 0% to make the text invisible and allow the effects to become the main focus.
Bringing Your Text to Life with Skillful Detailing
The final phase involves combining all these elements into a coherent and eye-catching design. Text 3 will add the last touch of detailing with a bevel and emboss effect, setting sizes and contours for how light interacts with the text surface. This layering and variety give your tag an authentic, nuanced look worthy of a pro!
Creating a military dog tag in Photoshop is more than just applying random settings. It’s a dance of details where each choice, from the type of font to the angle of light, plays a critical part in telling a story through design. So, fire up Photoshop and indulge in some creative magic while mastering the art of text effects. You’ll find that every pixel can transform into a stroke of genius with the right touch!


