Unlocking Your Creativity with Google’s Simple Design Technique
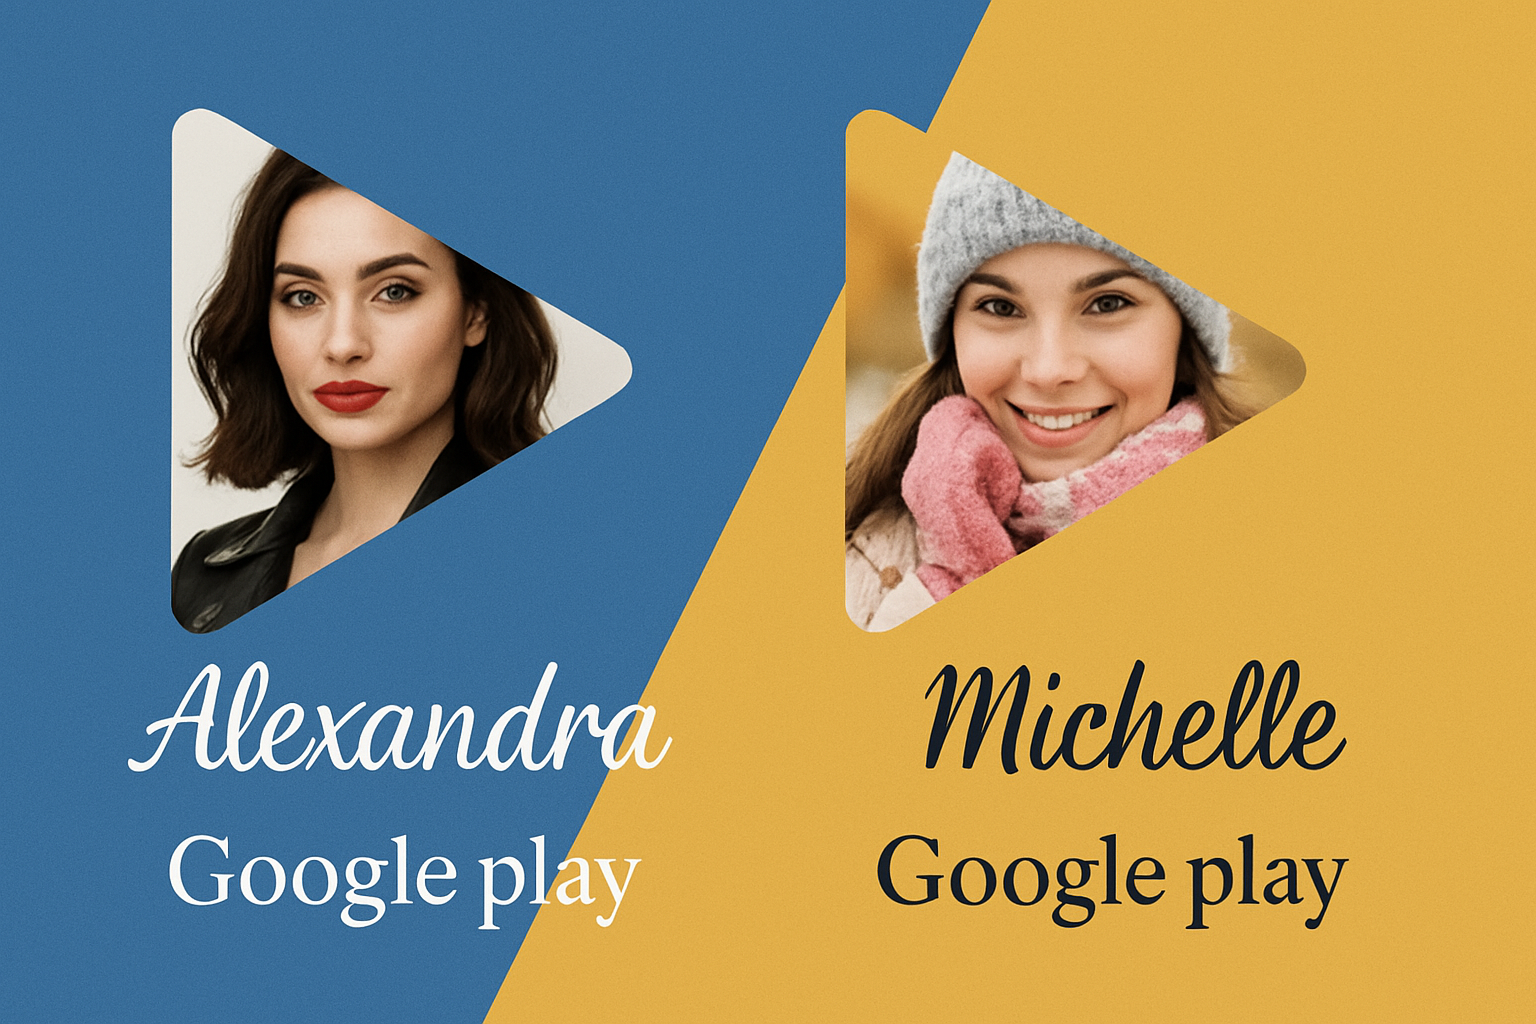
Have you ever admired a design so simple yet so effective that it made you wonder, “How did they do that?” That’s exactly the kind of awe-inspiring design Google Play’s advertising campaign evokes—a thrilling blend of a simple rounded triangle logo infused with celebrity allure. And guess what? You can recreate this captivating visual even if your only claim to fame is an uncanny resemblance to your neighbor’s cat. So, whether you’re wielding Photoshop like a pro or dabbling in it between binge-watching sessions of the latest viral show, prepare to dive into the world of minimalist elegance with this Google Play-inspired design tutorial.
Setting Up Your Canvas
To recreate this masterpiece, you’ll first need the portrait of someone—possibly you, a friend, or that one celebrity photo you downloaded “accidentally.” Begin by opening up a new document in Photoshop and set both its height and width to 870 pixels. Pixelation is a retro vibe, after all—remember, we’re planting easter eggs for the internet nostalgia lovers out there. With a resolution of 150 pixels per inch, you’re all set to paint your canvas blue.
Playing with Gradients and Polygons
Here’s where things get visually spicy. Imagine your canvas as the night sky and your gradient tool as a cosmic paintbrush. First up, select a linear gradient. This isn’t just a run-of-the-mill gradient; think of it as the cinematic fade-to-black that sets the mood. For a splash of color, input #208BC8 for your first stop and #005B9B for your second stop. Voilà! The rich blue palette is now set.
- Once your base is rockin’, hit the New Layer icon and select your Polygon tool.
- Type ‘3’, and boom—instantly you’re wielding a triumvirate of geometric power, also known as a triangle.
- Want smooth corners? Just refine the edges using the Filter and Minimum options, rounding them to about 15-20 pixels.
- It’s like adding a retro filter to your food photo, minus the calories.
Incorporating Your Portrait
The magic moment we’ve all been waiting for—dragging in that portrait of yours (or some random celeb). There must be a rule that states a head should preferably be in focus, so adjust using the Transform Tool to frame everything like a true artist. Press Ctrl/Cmd + T, resize, rotate, and position! Perfect fit? Check. Remember: the head stays just a smidge outside the triangle for that quintessential Google Play flair.
If you have an unfocused background, no worries—Photoshop’s Focus Area tool in CC 2014 does the heavy lifting. Let the software think it over, refine the subjects, and step into the world of polished digital editing where robots do the boring chores like dodging and burning.
The Finesse of Details
Great design is all in the details, they say. Once your artistic juggernaut is ready, make sure those pesky fringes don’t overshadow your masterpiece. Simple clicks can deselect unwanted layers, while reducing photo opacity can help align elements with ninja-like precision.
It’s All in the Text
Your canvas isn’t complete without renowned fonts complementing your design. Load up the Catull Regular font—Google’s understated typeface pick. If you’re rolling your eyes thinking, not another font!—think again. Typeface game is serious fame.
For your signature, Jenna Sue Regular is at your service! Customize text with colors picked off your image, making it the ultimate personal signature. And if you’re missing lots of quaint bloggy fonts, fear not! The wonders of Arial will save your day, providing a mishmash of modern, minimalist font love.
And there it is, your creative Google Play-inspired piece stands completed. Remember, Photoshop is your canvas; everything else is purely subjective. Now, go ahead, show off that slick design on your socials and bask in those double-tap glories.
Fun. New. You. 🎨✨
Shutterstock: Your source for stock images if you’re not in the mood for selfies.


