Unleash Your Inner Pharaoh: Crafting Hieroglyphics with Photoshop
Have you ever found yourself wandering through a museum, enchanted by the mystique of ancient Egyptian hieroglyphics etched onto timeworn stone? Maybe you’ve dreamt of recreating that captivating feel in your digital artwork. Fear not, fellow creative—Photoshop is your chisel, and we’re here to guide you through turning your text into awe-inspiring ancient carvings!
From Museum Walls to Your Screen
Sure, your current tech vocabulary probably heavily relies on CTRL+C rather than Cairo Code, but there’s something incredibly satisfying about merging digital techniques with iconic ancient styles. In this tutorial, we’re going to integrate hieroglyphics and carved text into an ancient Egyptian wall, bringing the ancient world into your creative process.
The first step? Textures. Like a good coffee blend, everything depends on the right base. Here, a stone texture mimics the iconic Egyptian limestone walls. We’ve even provided a neat downloadable texture link right in the video description to ease your artistic endeavors.
Fonts that Would Make a Scribe Proud
Now, let’s talk typography. We’re not just talking Arial or Comic Sans. It’s time to up our font game. Enter the star players: the Pigipda font, which will be our canvas for hieroglyphics-like symbols, and the Meroitic Hieroglyphics font, derived directly from actual Egyptian hieroglyphs. It’s like dressing your text in an Egyptian era tuxedo.
Remember, installation is key. If fonts aren’t your thing, worry not. There’s a guided tutorial waiting to escort you through font installations, ensuring that you won’t encounter any how in Anubis’ name do I install this moments.
Typography Transformation: A Modern Wizardry
Let’s pivot to the magic—a Photoshop magic, if you will. Start by stirring up a document sized at 1280×720 pixels with a 150 ppi (pixels per inch) resolution to ensure our creative potion is primed.
Engaging the Horizontal Type Tool, choose the Pigipda font. With a flourish, start point size at 100 and classic black color for your incantations. Play around with upper and lowercase settings in your text to perfect that lost-in-time feel.
The Text and the Stone
Aligning your text impeccably is as crucial as aligning the stars. To center it, embrace the Move Tool, conjure up CTRL+A (or Command+A), and indulge in pressing the Align Horizontal and Vertical Centers icons. Voila! Your text is now as centered as your morning yoga routine.
With the text in place, it’s time for some embellishments. Drop the fill to zero; it feels like a vanishing act but trust us, it’s magic. Visit the realm of Bevel and Emboss effects—setting the style to Inner Bevel with Chisel Hard technique, size to 43 pixels, and a custom angle will render your text fit for the Rosetta Stone replica.
Shadow, Sheen, and Shine
For a bit of drama (because what historical piece doesn’t have drama?), add a Drop Shadow—set angles and opacity to your creative whim. Think of it as your piece’s dramatic underlighting during its debut museum tour.
Then create a little geometry with lines above and below your text. Wield the Pencil tool at 15 points; imagine yourself an ancient artisan sculpting lines that separate the hieroglyphics from text.
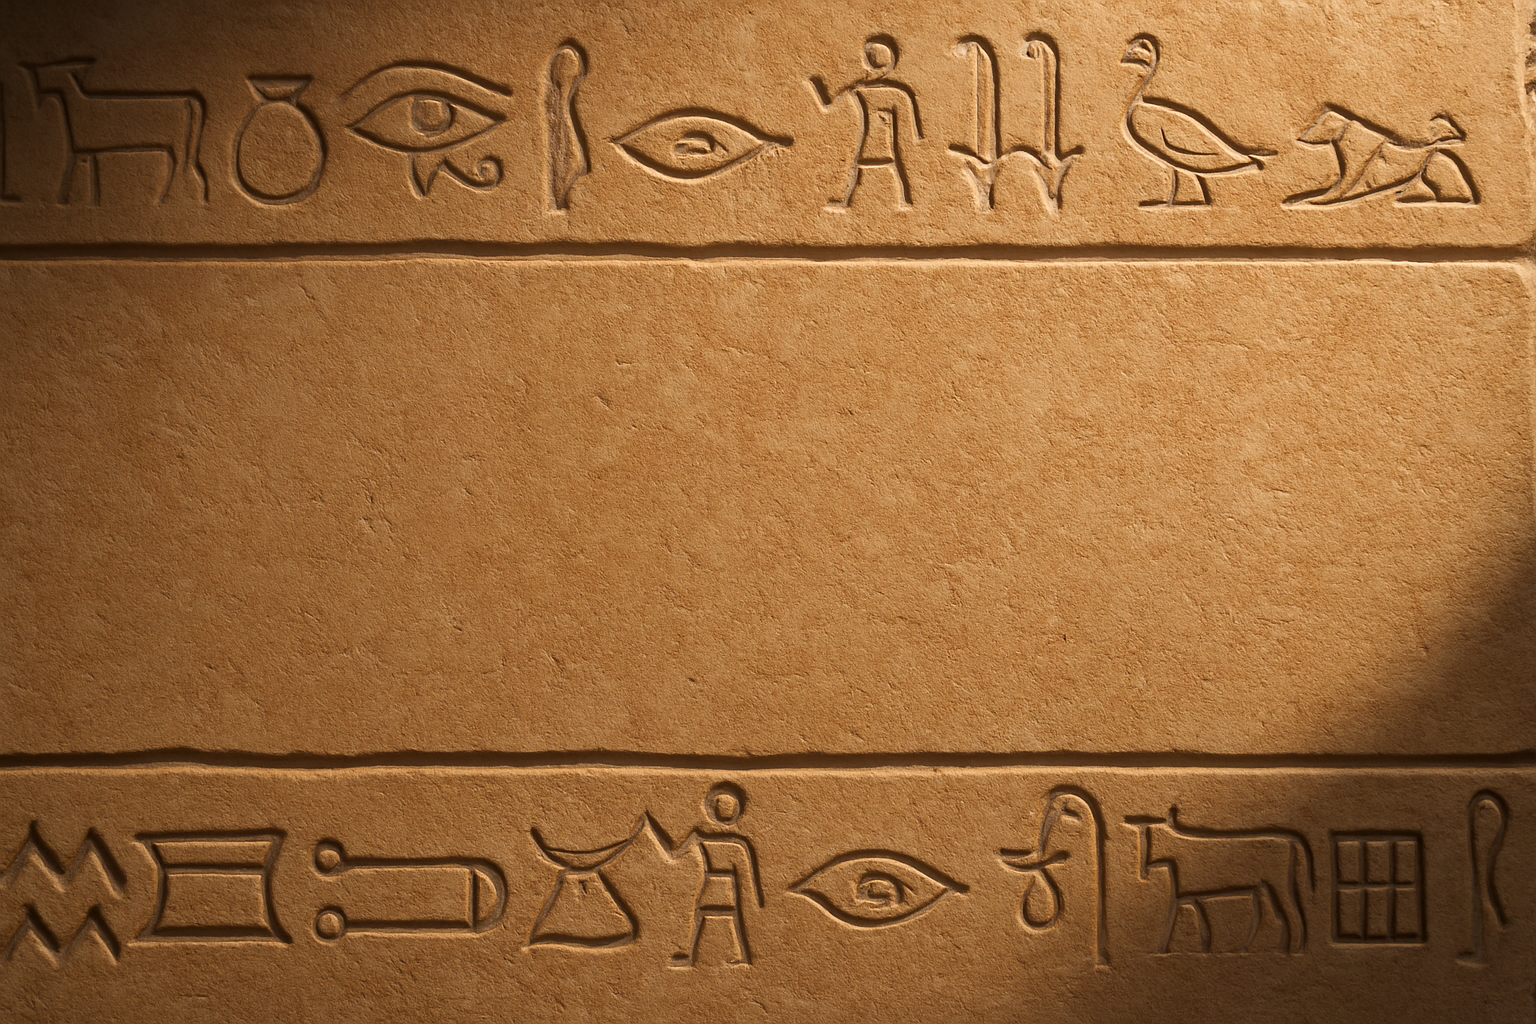
Hieroglyphic Marks: The Egyptian Icons Unveiled
Cue the Meroitic Hieroglyphics font, which will make a chain of symbols dance across your artwork. With size set to 75, these letters are an invitation to ancient stories of dark limestone corridors and forgotten scribe tales.
With copies and transformations, you can curate a display where different chains of hieroglyphics intermingle. The hieroglyphic lines aren’t just line commands—they’re stories reshaped in the modern ether.
Sculpting with Light: Mimicking Sunbeams of the Past
To sum up our dimensional epic, let’s splash brightness like a sunrise hitting stone reliefs. Through your Filter menu, deploy Lighting Effects, bringing our masterpiece to a luminescent crescendo. It’s artificially natural lighting, making it appear like the glorious sun shining through a sky opening.
Adding the Finishing Touches
To complete this artwork’s flourish, get the brush tool ready. A few strokes unlock the right spots on your layer mask, enhancing the visual illusion of depth and a little extra Egyptian oomph.
Before signing off, press CTRL/L and brighten those levels—let that hieroglyphic text bask in a luminous light. Finish with an adjusted vibrance, breathing life into your color scheme.
And there you have it—a digitally carved slice of history straight from the sands of Giza to your computer screen. Pharaohs might’ve had their tombs, but you have Photoshop. Until next time, keep creating!
With images to embellish and skills to sharpen, may your next foray into historical artistry be nothing short of legendary.