Reviving Your Lawn with Digital Magic
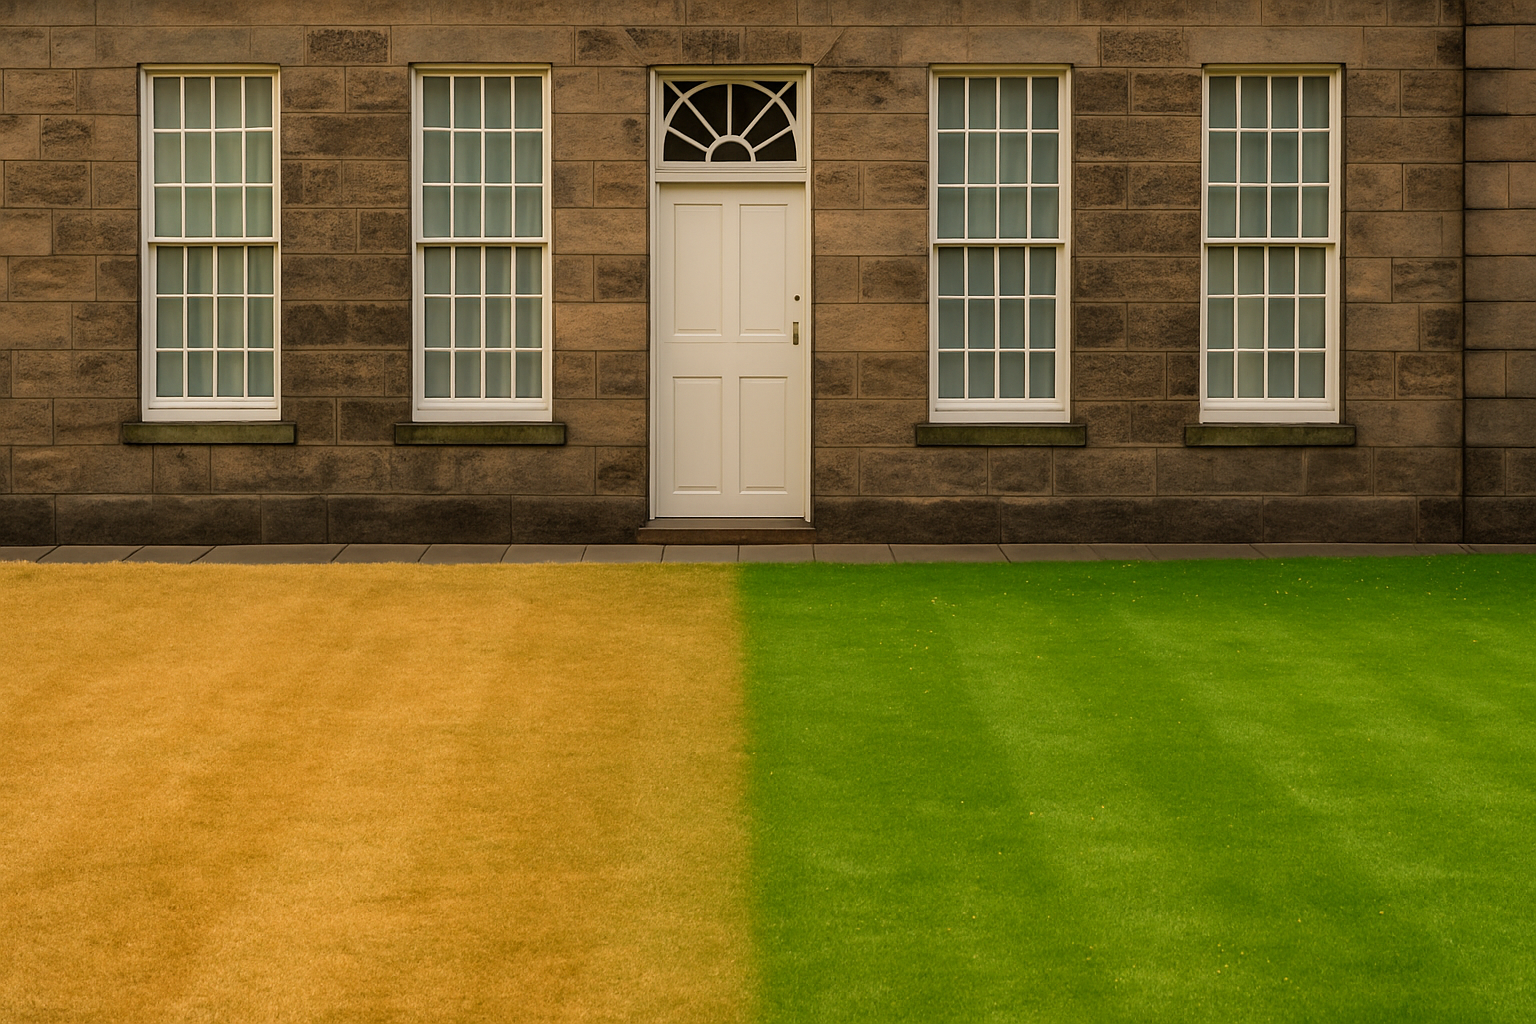
We all know the feeling—looking out your window expecting to see a verdant sea of green, but instead, you’re met with a dreary patch of brown sadness. Fear not! Thanks to the wonders of Photoshop, we’re about to turn that lifeless grass into the lush green oasis of your dreams. With just a few clever tools and some digital wizardry, we can revitalize any drab lawn into a vibrant spectacle. Let’s dive into this visual makeover.
The Photoshop Toolkit for Green Grass
Ah, Photoshop—the holy grail for creatives everywhere. While primarily known for its Photoshop wizardry, here, it serves as the perfect virtual gardener. Whether you’re a seasoned designer or new to the platform, these steps will guide you through reviving your digital lawns.
Step 1: Clone Your Image… Digitally, of Course
Begin by making a copy of your image. This is like saving a backup before you start any drastic changes.
Press Ctrl + J on a PC or Command + J on a Mac. This creates a duplicate layer, ensuring that your original image remains untouched, should you wish to undo your lawn renovation.
Activate Your Green Thumb with the Brush Tool
With the brush tool in hand, ensure that your foreground and background colors are set to black and white, respectively. Clicking the small double box icon will quickly set these default colors. Now, click on the Quick Mask button and select a relatively small brush size with 0% hardness and 100% opacity. The goal is to start brushing over the edges of the lawn, ensuring there are no gaps or holes in your strokes.
This is the digital equivalent of delicately outlining your imaginary boundaries – except you won’t step on any neighboring flowers.
The Paint Bucket and Quick Mask Magic
Once the outlines are done, open your Paint Bucket tool and click inside the lawn area to fill it with the Quick Mask. If the result isn’t perfect, fear not. Press ‘B’ to return to the brush and smooth over those rough edges. When satisfied, press ‘Q’ to convert your Quick Mask into a selection.
Next, invert the selection by pressing Ctrl + Shift + I on a PC or Command + Shift + I on a Mac. It’s like flipping the pancake without the mess—a necessary skill for this digital chef!
Layer Mask and Hue/Saturation Adjustment
Click the Layer Mask button to refine your selection as a layer mask. Following this, open the Adjustment Layers and select Hue/Saturation. Clicking the “Clip to Layer” icon ensures that this adjustment applies only to the copied layer, not the entire image.
To achieve that enviable green, the recommended Hue number is around 70, but feel free to adjust until you’re happy with your Emerald Isle vibes.
Fine-Tuning: From Brightness to Hue
To ensure your new green looks natural, reduce its brightness using the Brightness/Contrast adjustment layer. This step helps mitigate that overtly synthetic glow – like the difference between sunlit fields and neon plastic.
If the overall color still feels off, revisit the Hue/Saturation adjustment layer and tweak the Hue slider to manipulate warmth or coolness. This control is for those who prefer a temperate June lawn over a hot August one.
Conclusion: A Masterpiece Revived
And there you have it—a once-arid patch now transformed into a digital Eden. Armed with these simple techniques, any piece of pasture can turn from an afterthought to an artistic statement.
Your newly minted digital lawn is more than a simple fix—it’s a testament to the wonders of digital creativity, where no grass stain is too stubborn and no creative endeavor too unattainable.
Happy Photoshopping! Here’s to alright lawns and the greener virtual pastures yet to come.


