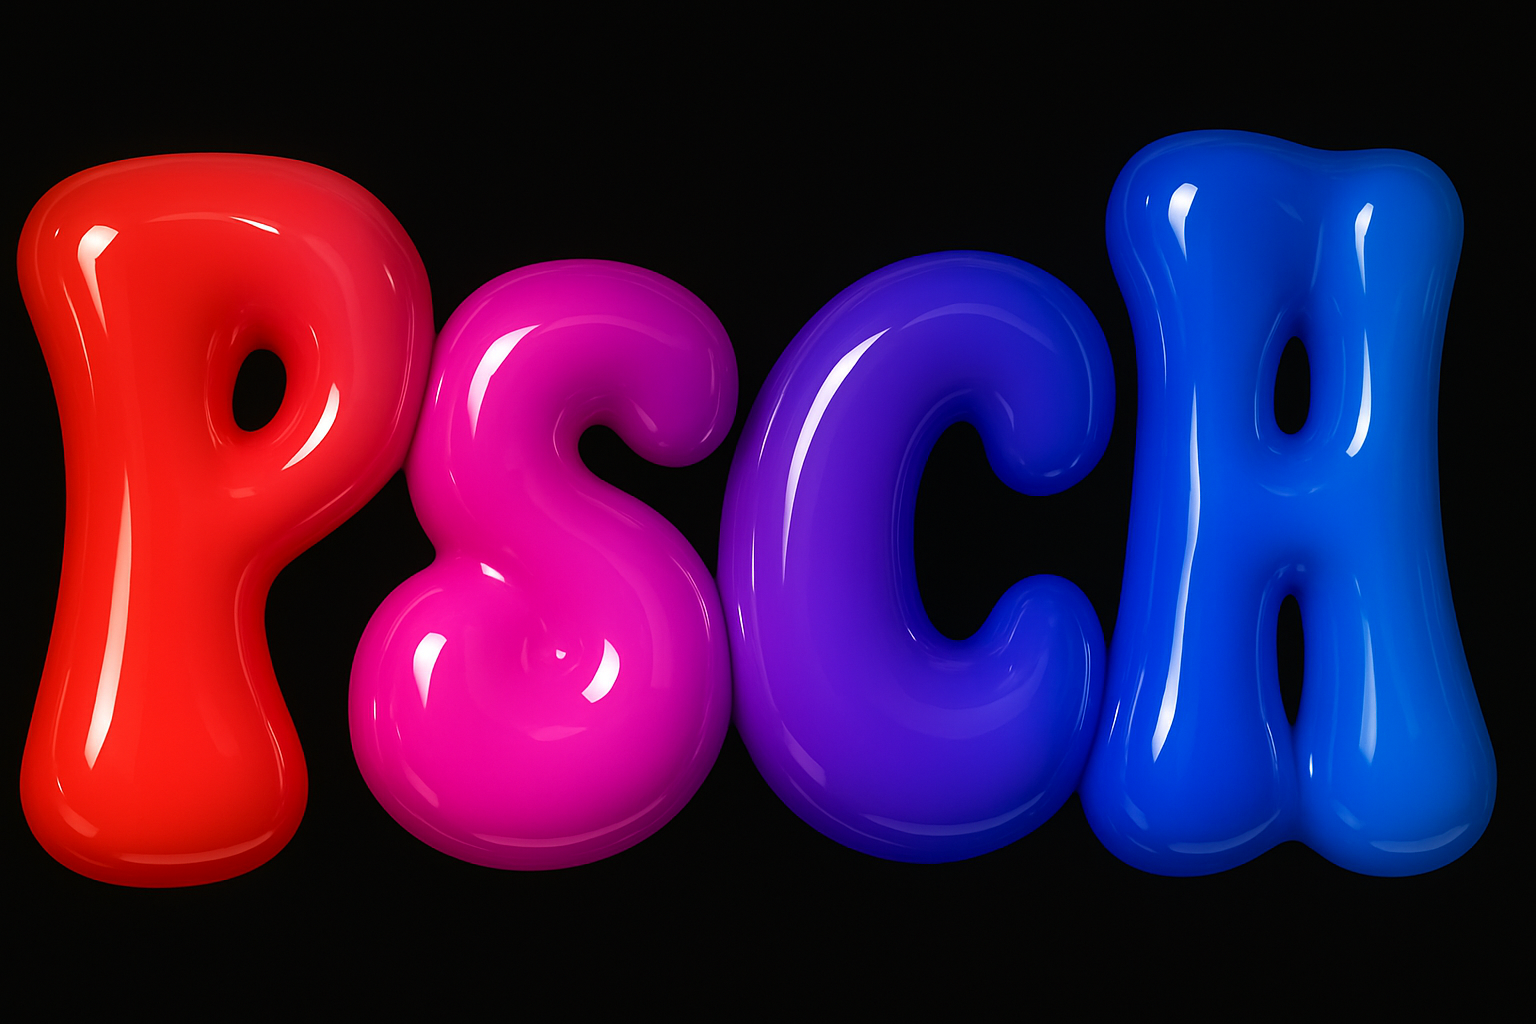
Elevate Your Text with a Glossy, Molded Plastic Look
Turn your ordinary text into dazzling, shiny plastic creations with just a few simple steps in Photoshop. Get ready to craft text that looks as if it’s been freshly molded from colorful, glossy plastic—perfect for grabbing attention at happy events like birthdays or celebrations.
The Basics: Setting Up Your Document
Begin your journey into the world of shimmering text art by setting up a new document in Photoshop. For this tutorial, we recommend a canvas of 1920 by 1080 pixels with a resolution of 150 pixels per inch. A black background enhances the vibrant colors we’ll be adding later. To fill your layer with black, press Alt (or Option on a Mac) + Delete. If your foreground color isn’t black, hit the D key to reset it.
Choosing Your Typeface: Hello Cooper Standard Black
One integral aspect of achieving that classic glossy plastic look is choosing the right font. In this tutorial, we’ll be using the bold, rounded serif typeface, Cooper Black. Known for its friendly appearance, it’s perfect for bold, statement-making text effects. You can download Cooper Black from Adobe Fonts if you’re a Creative Cloud subscriber or check out Font Squirrel for a free alternative.
Creating Your Text: Time to Type
With your document ready, summon your Type Tool and type out your desired text. If your font’s color is set to black, switch it to something more vibrant. To position your text, activate the Move Tool by pressing V, then click and drag until satisfied.
Dazzle with Gradient Magic
After setting your text, it’s time to add some color. First, make a new layer and load a selection onto it by Ctrl (or Command) + clicking on the text layer. Delete your original text layer; it’s done its job. Now, select the Gradient Tool and choose the vibrant “Spectrum” gradient preset from the options. Hold down the Shift key while you draw a straight line across your text for a smooth transition effect.
Achieving the 3D Effect: Bevel and Emboss
Double-clicking your gradient layer brings up the Layer Style window. From here, start by selecting Bevel and Emboss to carve out that glossy shape. Play with the depth, size, and angle settings to give it body—adjustments like a 52% depth and 29 pixels size create a stunning three-dimensional effect.
Enhancements and Finishing Touches
With the bevels in place, open the Contour style and the Glass Contour menu to tweak how light reflects off your text’s curves. Choosing “Ring Triple” helps achieve that genuine plastic shine. Don’t forget to adjust highlights and shadows for realism, setting opacity levels for both to enhance visual depth.
For an even more polished look, employ effects like Inner Glow and Drop Shadow. Blending modes such as Multiply and Color Burn intertwine lights and darks expertly, while adjusting distance and size solidifies the shadows.
Bringing It Together: Lightning Fast Polish
To top it all off, revisit your text layer to pull up the selection, expand it by 16 pixels, and drop it onto a new layer. Repeat the gradient magic, slide your new layer beneath the original, and apply similar but slightly varied Layer Styles for depth. Effects like Satin with a rolling slope contour can further define those luscious curves.
Wrap-Up: Your Happy Message Awaits
Now equipped with these Photoshop tricks, you’re ready to conjure text that screams Party Time in sticky, shiny hues. Whether it’s for a digital greeting or a quirky promo title, these techniques provide the foundation for you to explore and customize as far as your imagination stretches. So, jump in and splash some plastic text pizzazz into your projects!


