Make Your Greeting Cards Stand Out
In a world where digital correspondence rules, there’s something undeniably special about receiving a personalized greeting card. Whether you’re celebrating a birthday, a new job, or simply expressing gratitude, custom greeting cards add a personal touch that resonates. And guess what? With a few tricks in Photoshop, you can create a stunning, bespoke card with a loved one’s name, ready to be printed and cherished. We’re diving into the step-by-step process to take your card-making game to the next level.
Setting Up Your Canvas
To get started, you’ll need a new document in Photoshop. Aim for a size that’s compatible with standard paper dimensions — 17×11 inches worked perfectly for this project, ensuring that the folded card will fit onto an 8.5×11-inch sheet. That means you can print it easily on anything from regular paper to thicker cardstock for a more polished look. Once printed, just fold and trim where needed.
Laying the Foundation
Begin by setting up your canvas. Double-click the background layer to unlock it, and rename it “base” for easy reference. Next, navigate to the ‘View’ menu and ensure both ‘Rulers’ and ‘Snap’ are checked. This helps stay organized as you design each component of your card.
To lay out the card segments, drag out a guideline using the Transform Tool (Ctrl/Command + T). This visual aid marks the center of your card, designating the right half as the front and the left as the back.
Personalizing with Text
Your next step is to wield the Typography tool like a boss. Opt for a font that resonates with the occasion and sentiment — we recommend ‘Gum Regular,’ available for free at Font Mania. Once your text is placed on the canvas, make artistic adjustments like resizing or spacing to give it character. The ability to fine-tune the text’s letting and scaling ensures a perfect fit, visually speaking.
Achieving Text Uniformity
As you stretch and scale your text, it’s common for the typography to lose its consistent weight. To restore uniformity, duplicate your text layer (Ctrl/Command + J) and use the Move Tool to make minute shifts, ensuring that all elements are in harmony. Merge these duplicates into a singular layer for ease of edit later.
Emphasizing the Visual Elements
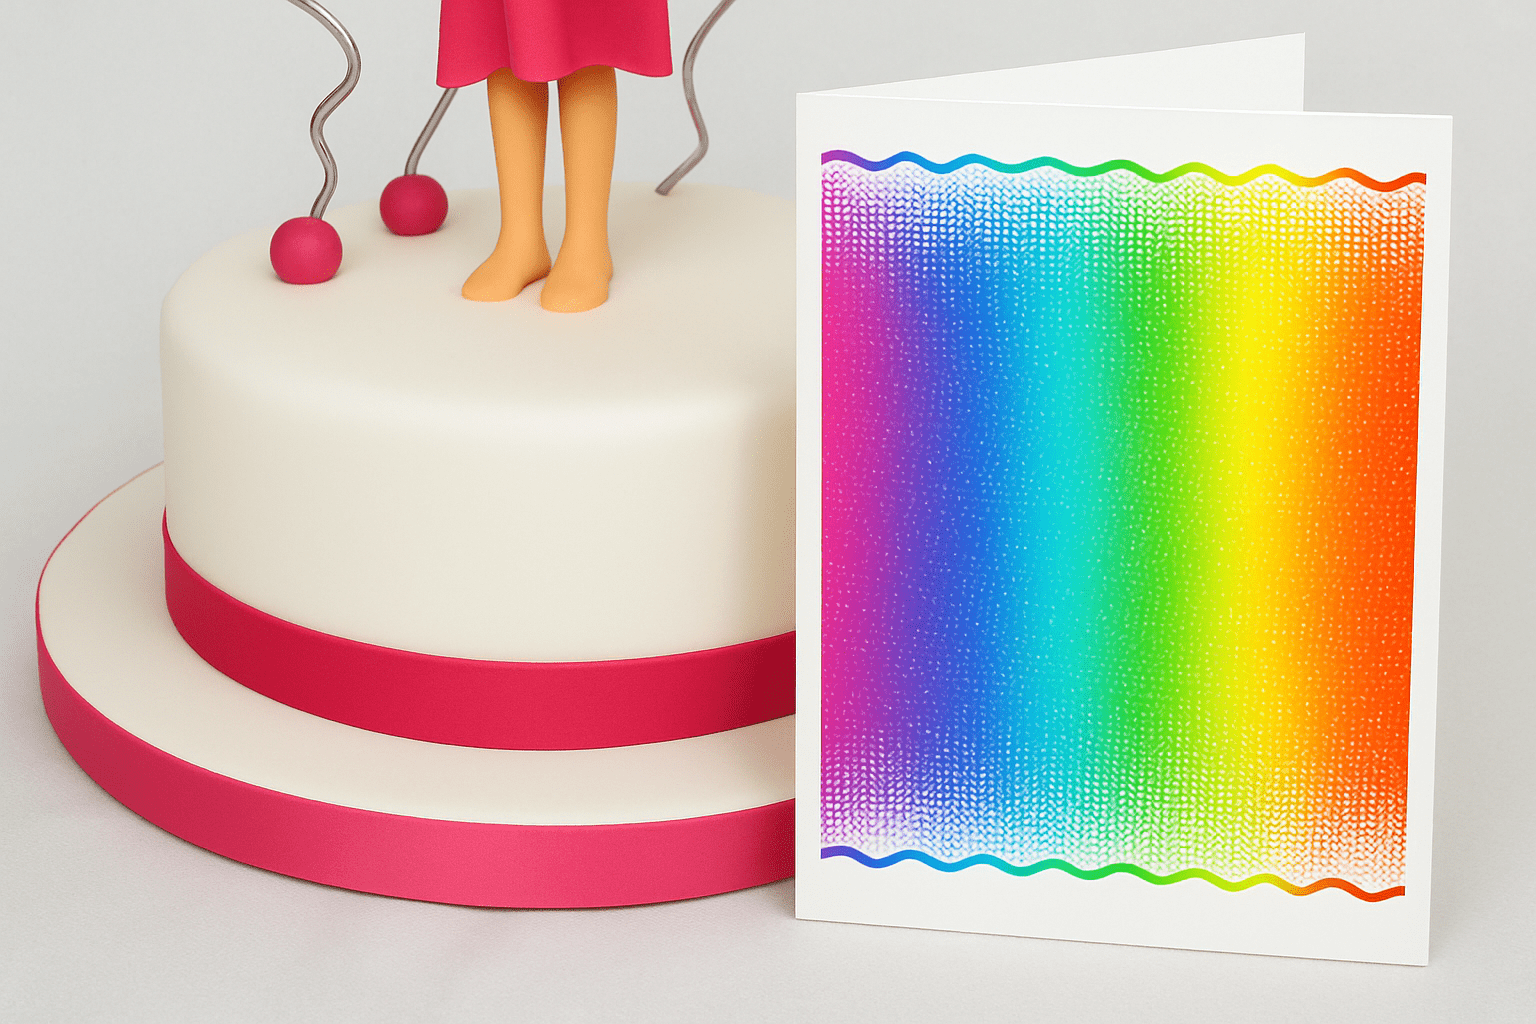
What’s a greeting card without a touch of flair? Apply a Gaussian Blur for a softened effect, duplicating until your desired density is met. The aim is a subtly artistic rendering of your subject.
Switch the image mode between Grayscale and Bitmap as needed to experiment with contrasts and details. You’ll find a halftone screen method improves the overall look — think of it as choosing the right Instagram filter for your image. Set to a frequency of six lines per inch for optimal results.
Adding a Colorful Gradient
To infuse your card with color, employ a rainbow gradient. After selecting your area via the Channels Panel, apply the gradient from left to right, ensuring seamless color transition. This step adds that pop of color which can make all the difference to an otherwise monochrome setup.
Crafting the Finishing Details
As the final act, refine your design with wavelike lines — they’re like the charming doodles you add to letters. Using the Distort and Wave filters, you’ll bring in intricate patterns that complement the rest of your card’s aesthetic. A linear gradient across these elements can lift them just enough to be interesting without overpowering.
Bringing It All Together
With your card sorted out, click ‘File’ then ‘Print’ (Ctrl/Command + P), ready to immortalize your creative labor in physical form. Choose ‘Presentation Printing’ for maximum quality and set your page orientation to ‘Landscape.’ Your custom creation is ready to be delivered from your hands to those of a loved one.
Elevating your card-making not only showcases your creativity but also exemplifies your effort in marking someone’s special occasion. And even though technology offers quick solutions, the labor of love embedded in each fold, each line and hue, is what makes these cards truly invaluable.
So get out there, design with joy, and give the gift that’s undeniably personal.


