Ever fancied turning your favorite photo into a pop-art masterpiece that looks good enough to eat? No, we’re not talking about some new culinary fad. We’re diving into the whimsical world of candy dot portraits—an art style where photographs are transformed to look like sheets of colorful candy dots on paper. Using this technique, you can create eye-catching images that could have your friends and followers wondering how you managed to sprinkle some Willy Wonka magic onto your snapshots.
Transform Your Photos into Delicious Eye-Candy
Step 1: Preparing the Canvas
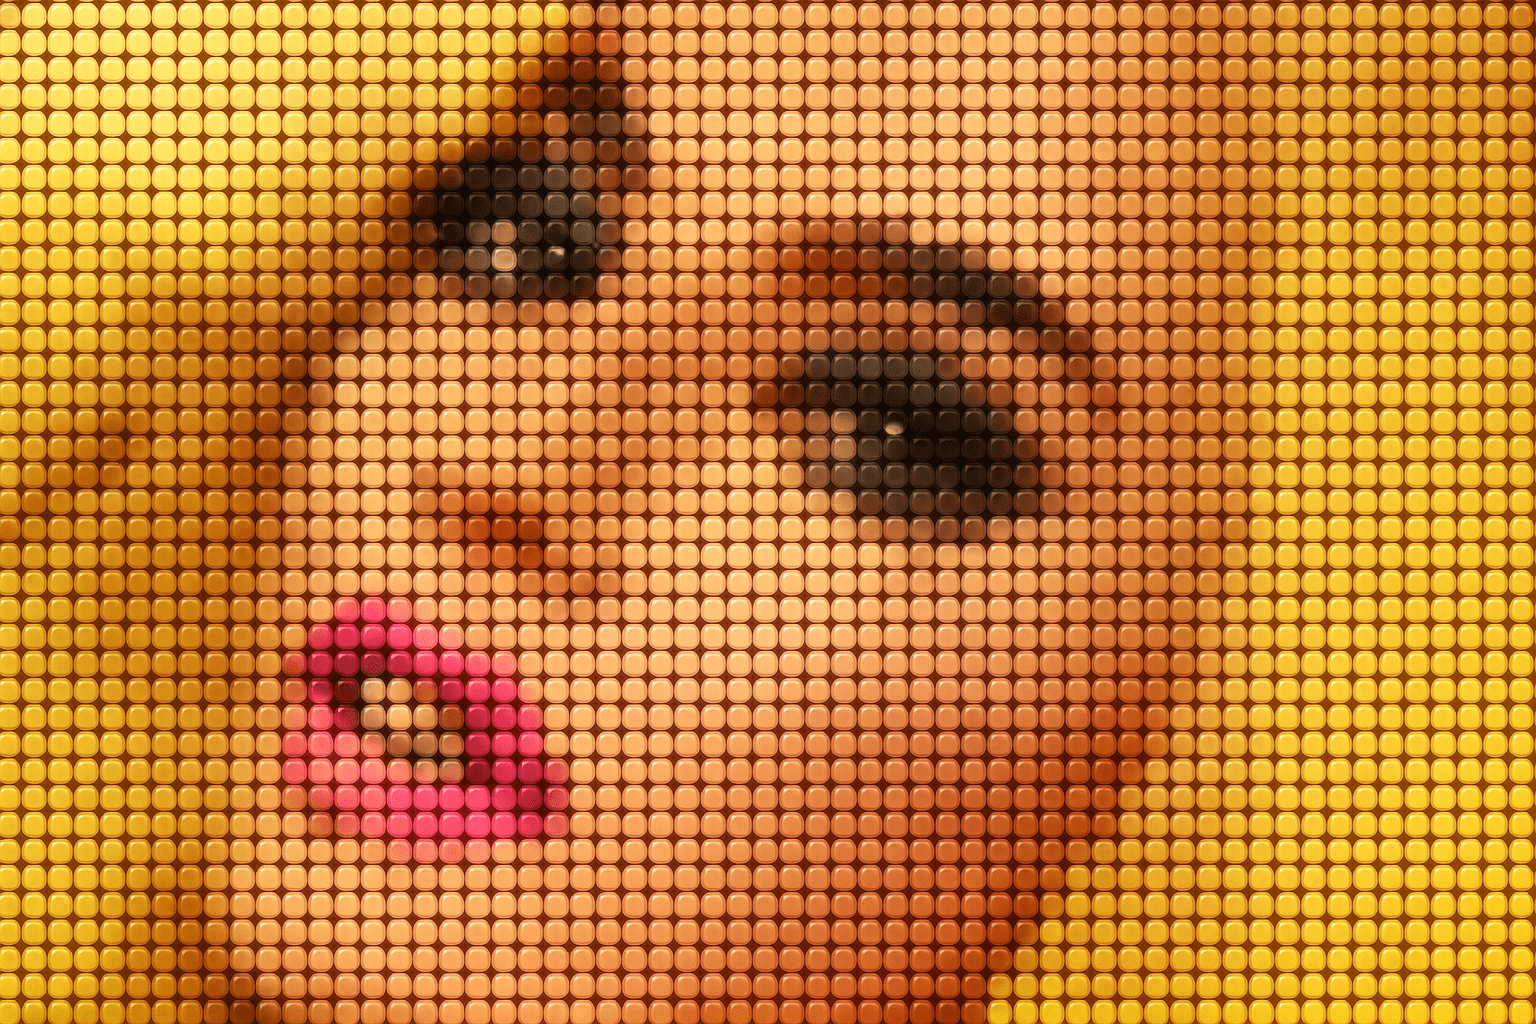
Starting with a photo of your choice—in this case, an over-the-top glamorous shot of Lady Gaga—we set the document size to 1280×720 pixels, a staple for any digital artist who wants nice visuals without overwhelming their processor. Always begin by duplicating the original image. Trust us, once Photoshop gets its candy-colored claws into it, you’ll be glad to have a backup.
Step 2: Pump Up the Vibrance
A candy portrait shouldn’t just blend into the background; it needs to pop! Here’s where we juice up those colors. Using the Vibrance adjustment layer in Photoshop, you can crank up the hues. Slide that Vibrance bar all the way to the right like you’re cranking the bass on a nostalgic 80’s boombox.
Step 3: Get Ready to Pixelate
Now, we’re getting to the fun part. This is where your photo begins to resemble those irresistible candy dots. Apply the Mosaic filter from the Pixelate menu, setting your cell size, in this instance, to 15. Every photo is different—much like every packet of candy dots—so feel free to adjust until it feels just right.
Step 4: Designing Your Candy Dot
Next, you’ll need to create a new, tiny Photoshop document to serve as your dot template, matching dimensions to the Mosaic cell size. With the Elliptical Marquee Tool, draw a perfect little circle and fill it with black. Now, your mini-canvas is ready to become a pattern stamp—the very essence of candy dots!
Step 5: Patterning with Purpose
Once your dot is saved in Photoshop’s pattern arsenal, it can be easily summoned for duty in your masterpiece. Overlay this pattern on your image, then work a bit of channel magic, creating a selection of the white dots with just a few clicks. This makes quick work of turning an ordinary image into a vibrant, candy-coated wonder.
Step 6: Elevate with Emboss
Who doesn’t love a dot with a shadow? Adding some dimension with Bevel and Emboss is like frosting on cake. Choose ‘Inner Bevel’ and the ‘Smooth’ style to give those dots depth, and add a hint of Highlight and Shadow for that extra theatrical flair. Remember, lighting and shadows are key to making it look as if your creation could hop off the screen and into a candy store showcase.
Step 7: Switch It Up with a Midnight Backdrop
Inverting the background from white to black isn’t just to toughen up the piece; it’s about letting those dots truly illuminate. This process transforms flat dots into glowing gems, giving any photo that next-level wow factor.
Step 8: A Dash of Glow
Make your creation even more luminous by copying the dots, applying some Gaussian Blur, and then switching the layer mode to ‘Hard Light.’ The glow effect causes a jaw-drop inducing ‘before-and-after’ transformation that adds the ideal finishing touch.
Craft Your Own Candy Portrait
And just like that, you’ve transformed a standard photo into an avant-garde piece of candy art. These delightful portraits are not just a feast for the eyes but a great way to immortalize memories with a playful twist.
With a bit of patience and creativity, you can make your own candy dot portraits. So go ahead, dig into your photo library, pick a picture, and let those candy dots fly! Whether it’s a DIY project or a last-minute gift for a friend, this technique is all about fun, flavor, and fantastic results.
Art doesn’t always have to be serious—it can be sweet and playful too!


