A Galactic Adventure in Digital Art
Creating cosmic wonders from scratch is no longer the sole domain of astrophysicists or engineers. As creatives, we can whip up celestial bodies with nothing more than a trusty mouse and Adobe Photoshop. Yes, we’re talking about creating asteroids. This isn’t just a lesson in artistic dexterity; it’s a digital conjuration that will transform a flat blank document into an out-of-this-world spectacle.
Setting the Stage: Your Canvas Awaits
First things first, let’s get that digital canvas sorted. Open a new document in Photoshop with a resolution that’s perfect for all your sci-fi needs: 1280 by 720 pixels at 150 pixels per inch. That’s plenty of space-tech speak to say it’s optimal for detailed work without bogging down your system. Make sure to fill this newly minted universe with a base coat of black, channeling your inner cosmos.
Defining Your Stellar Shape
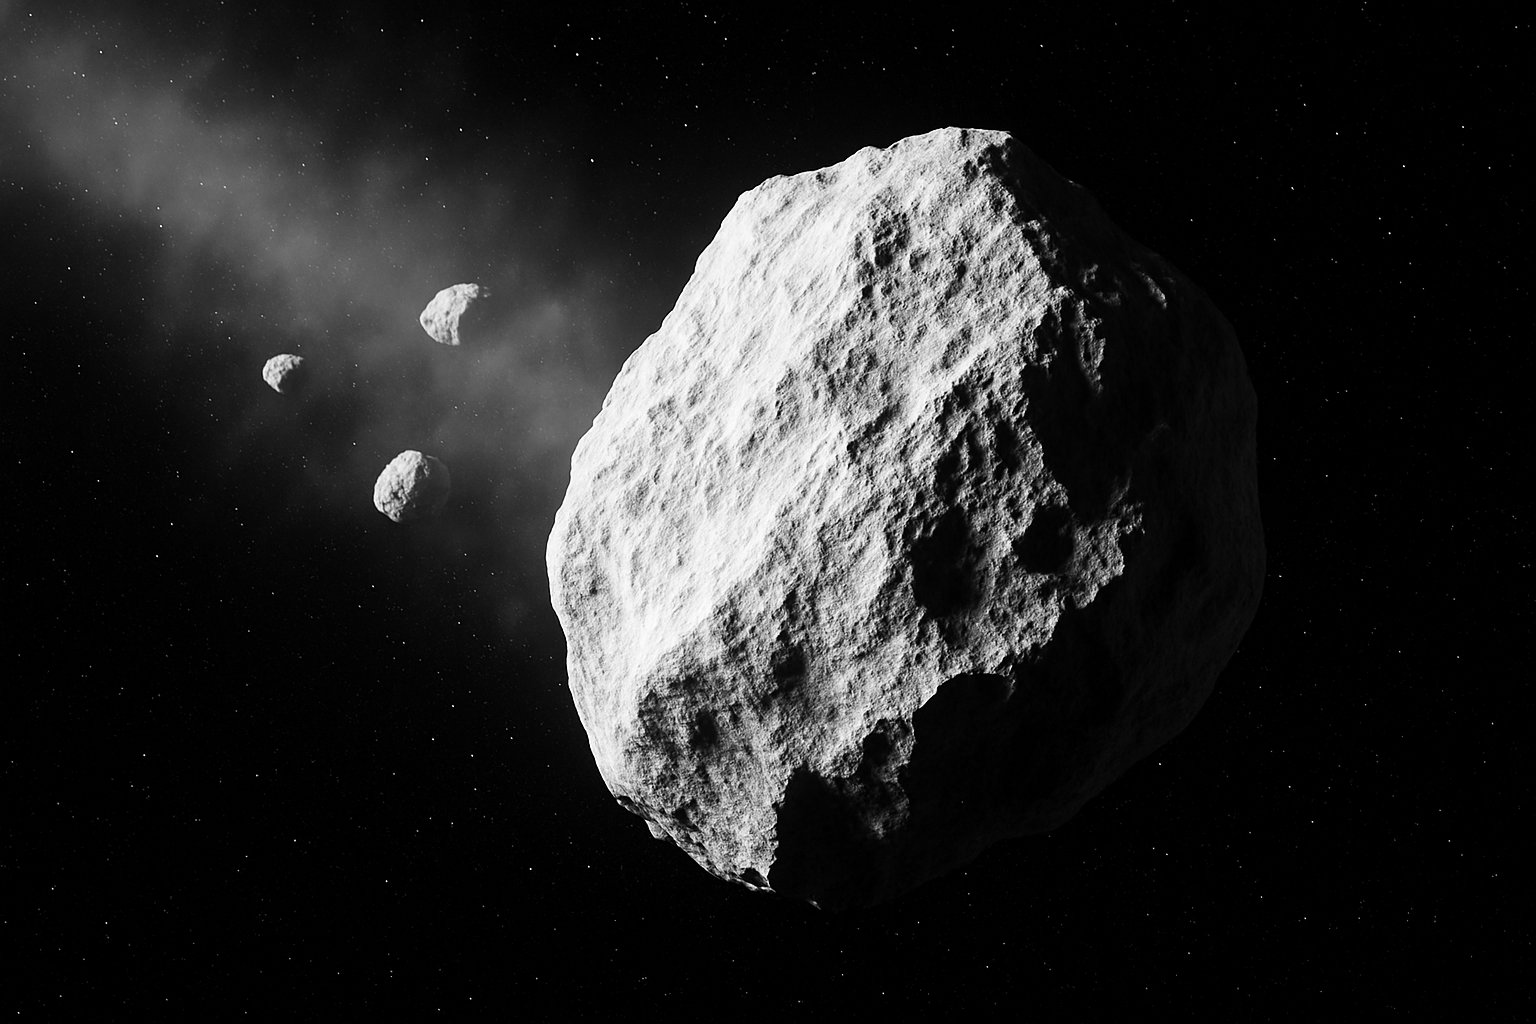
Next up, let’s draw that asteroid! Using the pencil tool set to a dainty 3 pixels with full 100% hardness, let your imagination run wild. The edges should be jagged, unlike those supposedly smooth renditions we see in early 2000s sci-fi movies.
From Sketch to Cosmic Cratered Reality
Use the paint bucket to bring your drawn shape into three-dimensional prominence. Pressing ‘Q’ will help you isolate it into a selection, which you can invert to stand it out from the void by merging away from the background. Now, for the fun part—simulating craters. Select a soft brush from the “M Brushes” that Photoshop thoughtfully provides, and dot across your rocky surface. Switch up colors to incorporate black marks, achieving the desired cratered effect.
The Asteroid Gets Its Shadows
We’re elevating this asteroid to Oscar levels, with some dramatic lighting and shading. A bit of ‘bevel’ and ’emboss’ magic transforms a simple sketch into a looming space rock ready for its close-up. This technique utilizes both highlights and shadows in harmonious juxtaposition, making it appear much more authentic.
Dust Clouds and Stars: The Celestial Backdrop
With a new layer and a touch of opacity finesse, introduce a dust cloud behind your asteroid. To truly sell the illusion of depth and space, we need a starry backdrop. By adding noise and using the ‘Gaussian Blur’ effect, your scene will look like it’s been lifted directly from a planetary observatory deck (minus the shaky cam, of course).
Creating a Galactic Ensemble
No asteroid belt would be complete without trailing celestial companions. Clone your main asteroid to create smaller orbiting rocks. Alter their size, angle, and positioning to imply a bustling galactic scene.
Final Touches: Add The Dust Trail
Every asteroid needs its dramatic exit. Use reduced-opacity brush strokes to simulate a dust trail. This gives the impression of motion, as if your asteroid is streaking across the cosmos, perhaps fleeing from some intergalactic calamity or heading toward an uncharted region.
The Big Picture: Why This Photoshop Technique Rocks
Alright, cosmic creators, you’ve not only crafted an asteroid from scratch but also learned to leverage the myriad functions Photoshop has to offer—from basic tool usage to advanced layer styling and mask manipulation. This complete guide isn’t just about creating a solitary asteroid—it’s about embracing the vast toolkit digital artists have and making the mundane extraordinary.
So the next time you’re looking to spice up a digital landscape—or perhaps wow your peers with your mastery of celestial illustrations—you now know how to throw an asteroid into the mix. Go on, give it a spin. Your graphical universe awaits!


