Elevate Your Brushwork with Stroke Smoothing in Photoshop
In the ever-evolving landscape of digital art, the tools of the trade constantly advance to support artistic expression, often more seamlessly than our shaky hands might allow. Enter Photoshop’s Stroke Smoothing feature—your new best friend if you’re rocking version CC 2018 or later. If you’ve ever felt like your digital brush or pencil strokes are about as smooth as a bumpy country road, this feature is here to glide those uneven paths into beautifully flowing lines. Stick with us as we break down how this tool can transform your digital creations faster than you can say “smooth operator.”
The Basics of Stroke Smoothing
What is it that makes Stroke Smoothing so beneficial? Quite simply, it tackles the challenge of creating smooth strokes in your digital art projects. Whether you’re using a brush, pencil, or even an eraser, applying Stroke Smoothing adjusts the path drawn based on your set preferences. This is crucial not only for professional designers but also for hobbyists who crave that perfect line.
Adjusting Smoothing Levels
So, how do you wield this powerful tool? The smoothing level is adjustable through percentage settings. Imagine having a magic dial that instantly moves your jittery lines to become as smooth as butter. Simply adjust these settings by:
- Using the slider directly under the brush options.
- Clicking and dragging left or right over the “Smoothing” label.
- Employing keyboard shortcuts: Hold down ‘Alt’ (Option on Mac) and hit a number corresponding to your desired percentage (e.g., Alt + 5 for 50%).
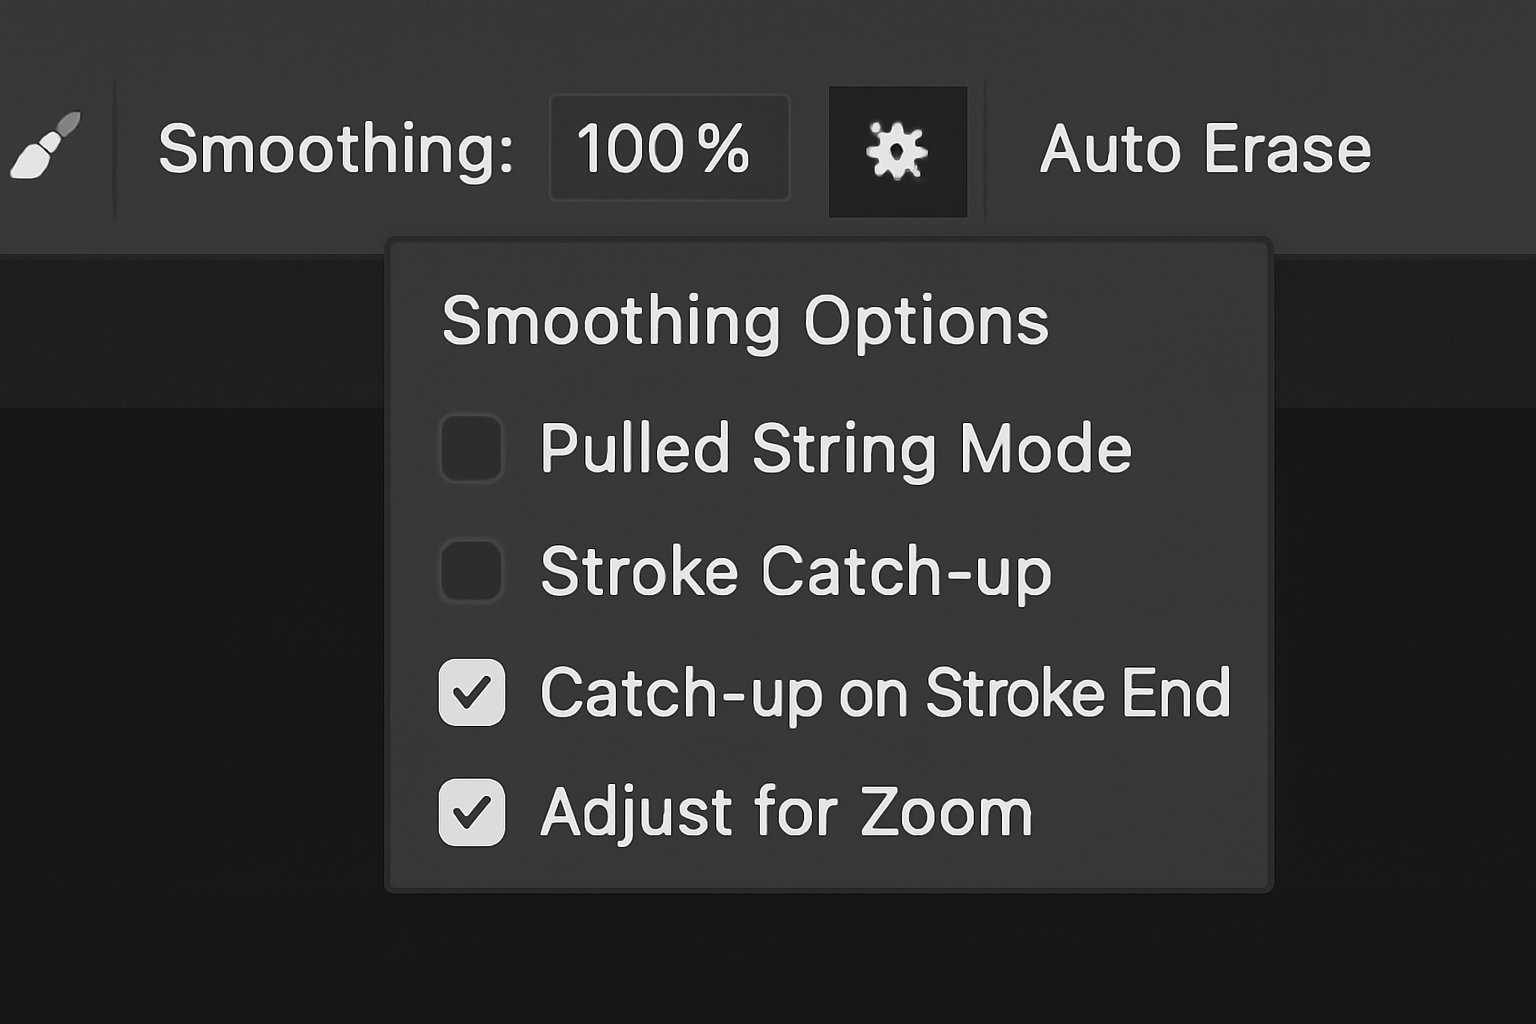
Navigating the Smoothing Options
As you delve deeper into the world of Stroke Smoothing, you’ll find a variety of customization options to suit your artistic needs. Let’s break down these elements further because it’s not just about smoothing out the bumps but controlling your creative vehicle like a pro racer:
Stroke Catch-Up and Adjust for Zoom
- Stroke Catch-Up: Enables your stroke to catch up to wherever your cursor pauses within the program. It’s like giving your cursor little rest breaks for sharp detailing.
- Adjust for Zoom: Automatically modifies your smoothing level based on how much you zoom in or out, ensuring stroke consistency regardless of your zoom level.
Innovative Customizations
- Pulled String Mode: Introduces a unique, circular visual guide that lets you control the stroke’s direction like a puppet on a string. It’s perfect for detailed sections, where sharp corners and precise curves are the name of the game.
- Changing Leash Colors: If the default leash color doesn’t sync with your vibe or workspace, tweak it. Navigate to Edit > Preferences > Cursors and select your desired color to match your creative aura.
How This Changes the Game
Using these functions feels less like enhancing a photo and more like paving the way for elegance in design. It’s an upgrade akin to switching from juniors to varsity. What once required painstaking precision now flows naturally, enabling you to focus on your creativity rather than technical perfection.
For the artists who love to test the limits of their brushes and explore the utmost potential of their craft, Stroke Smoothing in Photoshop empowers you to reach new horizons with crisp, clean strokes that reflect your vision more accurately.
In conclusion, this Photoshop quick tip opens the doors to smoother digital illustrations, granting more control over your creative outcomes and aligning your digital toolset with your artistic intentions. Get ready to take your artistic strokes from jittery to genius with just a few tweaks!