Let’s Dive into the World of Crop Circles
Crop circles, those mysterious patterns that seem to appear overnight, have fascinated and bewildered us for decades. While they might conjure images of alien communications visible from thousands of feet above the Earth, creating your own digital version is quite possible—and you won’t need a UFO to do it. With Photoshop, you can transform any ordinary image into a stunning crop circle formation. Follow along as we explore this fun and creative process that you can master with just a bit of practice.
Preparing Your Canvas
The secret to creating a visually captivating crop circle design begins with your foundational image. For this project, your starting document should have a 1280×720 pixels resolution at 150 pixels per inch. This resolution ensures that your design remains crisp and clear when viewed.
Selection and Isolation
Kickstart your design by making a selection. Whether it’s a person, a pet, or a random object, ensuring that your subject’s head or central feature is isolated is vital for later steps. Utilize the Lasso Tool in Photoshop for a quick and effortless selection process, even if it means drawing a broad outline.
Transferring and Transforming
With the selection in place, hit Control + J (or Command + J on Mac) to cut and replicate the element onto its own layer. This separate layer allows you to maneuver the piece into your crop circle document easily. Just drag and drop onto the new canvas like a digital puzzle piece.
The Art of Manipulation
Transforming a colored image into a black and white silhouette is the next magic step. By pressing Control + Shift + U (or Command + Shift + U), you instantly remove color, leaving you with a high-contrast visual. Apply the Auto Levels with Control + Shift + L (or Command + Shift + L) for a balanced tonality.
Stamp it Up
Under Filters, navigate to Filter Gallery and select Stamp from the Sketch folder. By adjusting light/dark balance and smoothness, you control the emerging shape based on your original image’s characteristics. For dramatic flair, opt for 40 in light/dark balance and 1 in smoothness, giving your crop circle-head an intricately etched look.
Cleaning Up and Refining
Clean-up is crucial for polish. With the Pencil Tool, fine-tune edges by ensuring your blend mode is set to Normal, and opacities soar to 100%. By reversing your color options [press X], you can quickly alternate between black (foreground) and white (background), facilitating seamless retouching.
Emboss with Impact
A practical use of Photoshop’s FX features—like Bevel and Emboss—will elevate your crop circle to a three-dimensional experience. Opt for an Inner Bevel style with a smooth technique, tweaking your size and pixilation suitably. Playing around with angles, altitude, and blending modes can bring impressive depth to your creation.
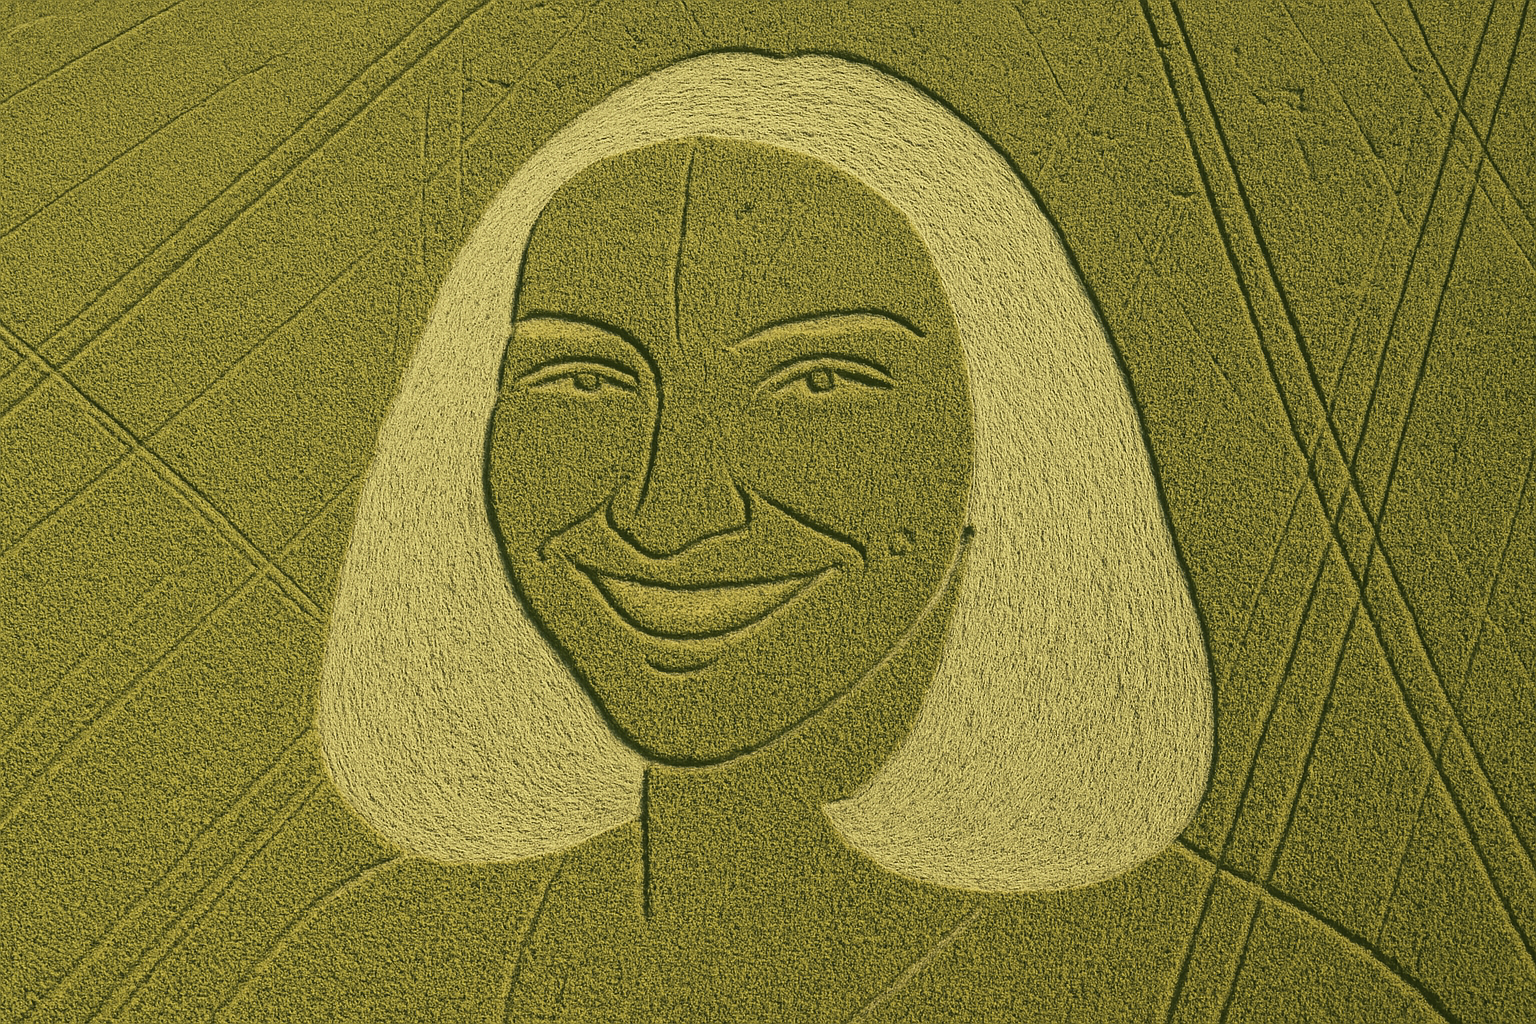
Adding Perspective with Panache
The dual touch of Drop Shadow settings and twirling the image blend transforms simple doodles into full-fledged visual art. Distort and twirl your image for a ripple effect hitting those ‘eye from the skies’ vibes. Tweaking the transform’s perspective gives that final aerial authenticity to your digital masterpiece which looks tantalizingly mysterious as if embedded in a wheat field.
Have fun and tap into your artistic side by turning anyone or anything into an enormous, gorgeous crop formation that looks straight out of a UFO enthusiast’s scrapbook. This delightful endeavor will not only spice up your Photoshop skills but will also make you the go-to crop circle creator among friends. How fun is that?
Enjoy your exploration into the extraterrestrial twist of Photoshop art. Engage, transform, and maybe spark a little curiosity one crop circle at a time.


