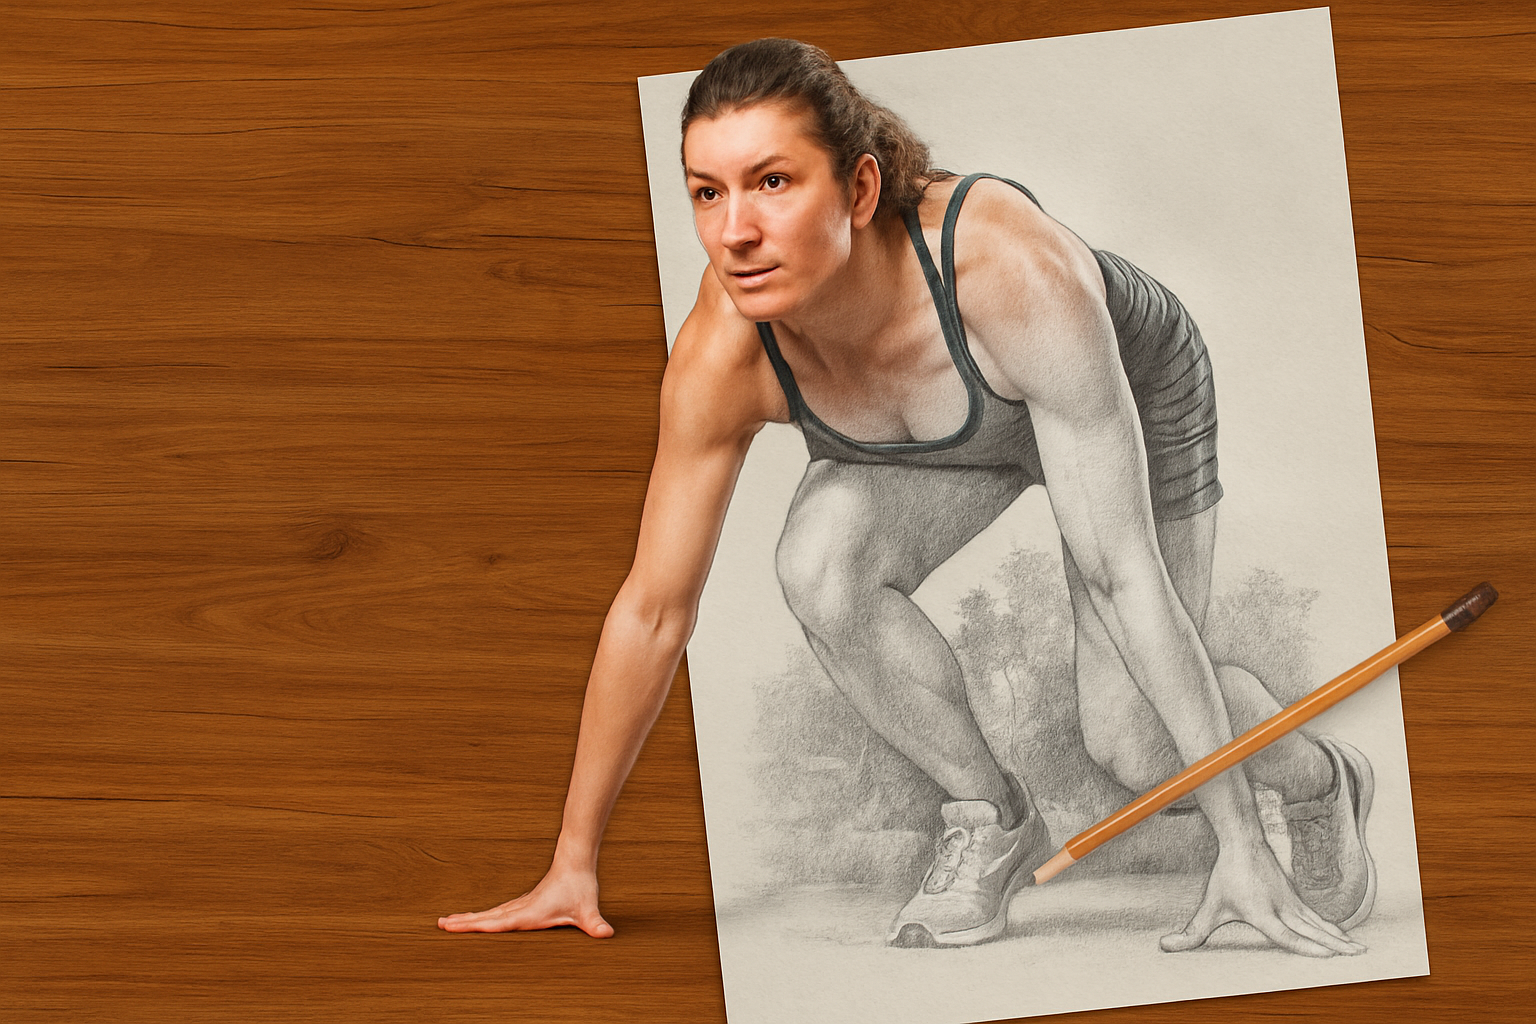
Transform Your Photos into Mesmerizing Sketches with a 3D Twist
Ever wished your creative endeavors could bridge the gap between the simplicity of a sketch and the depth of a 3D photo? In this tutorial, we explore how to achieve precisely this effect using the prowess of Photoshop. Dive into the fascinating world where art meets reality—transforming a simple portrait into a dynamic masterpiece that tells a story and wows the viewers.
The Secret Sauce: Photoshop Templates and Custom Brushes
Before jumping into the tutorial, make sure you have the essentials. You’ll need a Photoshop template complete with a wood background, a sheet of paper, and a graphite pencil—all on separate layers for maximum flexibility. You can resize, reposition, and readjust each layer to perfectly match your chosen photo. Don’t forget to grab the custom sketch brush, which will play a pivotal role later in the process.
These resources are crucial because they set the stage for creating a sketch that seamlessly morphs into a 3D photo. The versatility they offer lets you tailor the visual experience to the unique qualities of each subject.
Isolating Your Subject: Precision is Key
Start by choosing a photo where the subject’s front or back really pops out into the foreground. A little tip—images from Shutterstock work splendidly for this purpose. Isolating your subject from the background is the first pivotal step. This can be efficiently achieved using the Quick Selection Tool. As you drag over the inner edges of the subject, you can fine-tune your selections, ensuring crisp outlines.
For a seamless cutout, use the Refine Edge or Select and Mask options depending on your Photoshop version. Adjusting the brush size and employing the Smart Radius can make the difference in capturing softer elements like hair.
Breathing Life into Your Sketch: Crafting Dynamic Depth
To grant your sketch a more profound sense of life and dimension, convert your isolated subject into a smart object. Layering is your friend here as you create a black-and-white effect and then refine the image using the Gaussian Blur filter. Adjusting tonal contrasts with levels ensures that the key features of your photo aren’t lost.
For those areas where you want the sketch and the color photo to dance together harmoniously, layer masks and clipping masks will be your magic touch. These techniques give you the painter’s ability to decide where colors blend and where they stand apart starkly.
Enhancing with Artistry: Playing with Blends and Brushes
The delicate balance between sketchy and realistic can be perfected using blend modes like Color Dodge or Multiply. Tweak the opacity settings until you hit that sweet spot where the charcoal effects look authentic yet never overpowering.
Here’s where the custom sketch brush comes into play. Brush meticulously around your subject to reveal the color segments that are destined to leap from the canvas. Keep in mind: always toggle between black and white colors to alternate between hiding and revealing your selection.
Final Touches: Making Your Creation Pop
Rotate and adjust the pencil layer for added realism—replicating that inexplicable charm of a hand-drawn sketch. If needed, create subtle shadows with a soft round brush to ground the floating elements. Remember, light and shadow are comrades in articulating depth and drama.
By now, you’ve woven together the threads of design, technique, and personal artistry. You’re left with a creation that isn’t just a 2D image—but a vibrant intermission between sketch and reality. So go ahead, create awe-striking images that stand out in today’s bustling visual culture. Your masterpiece awaits, ready to be showcased. Happy Photoshopping!


