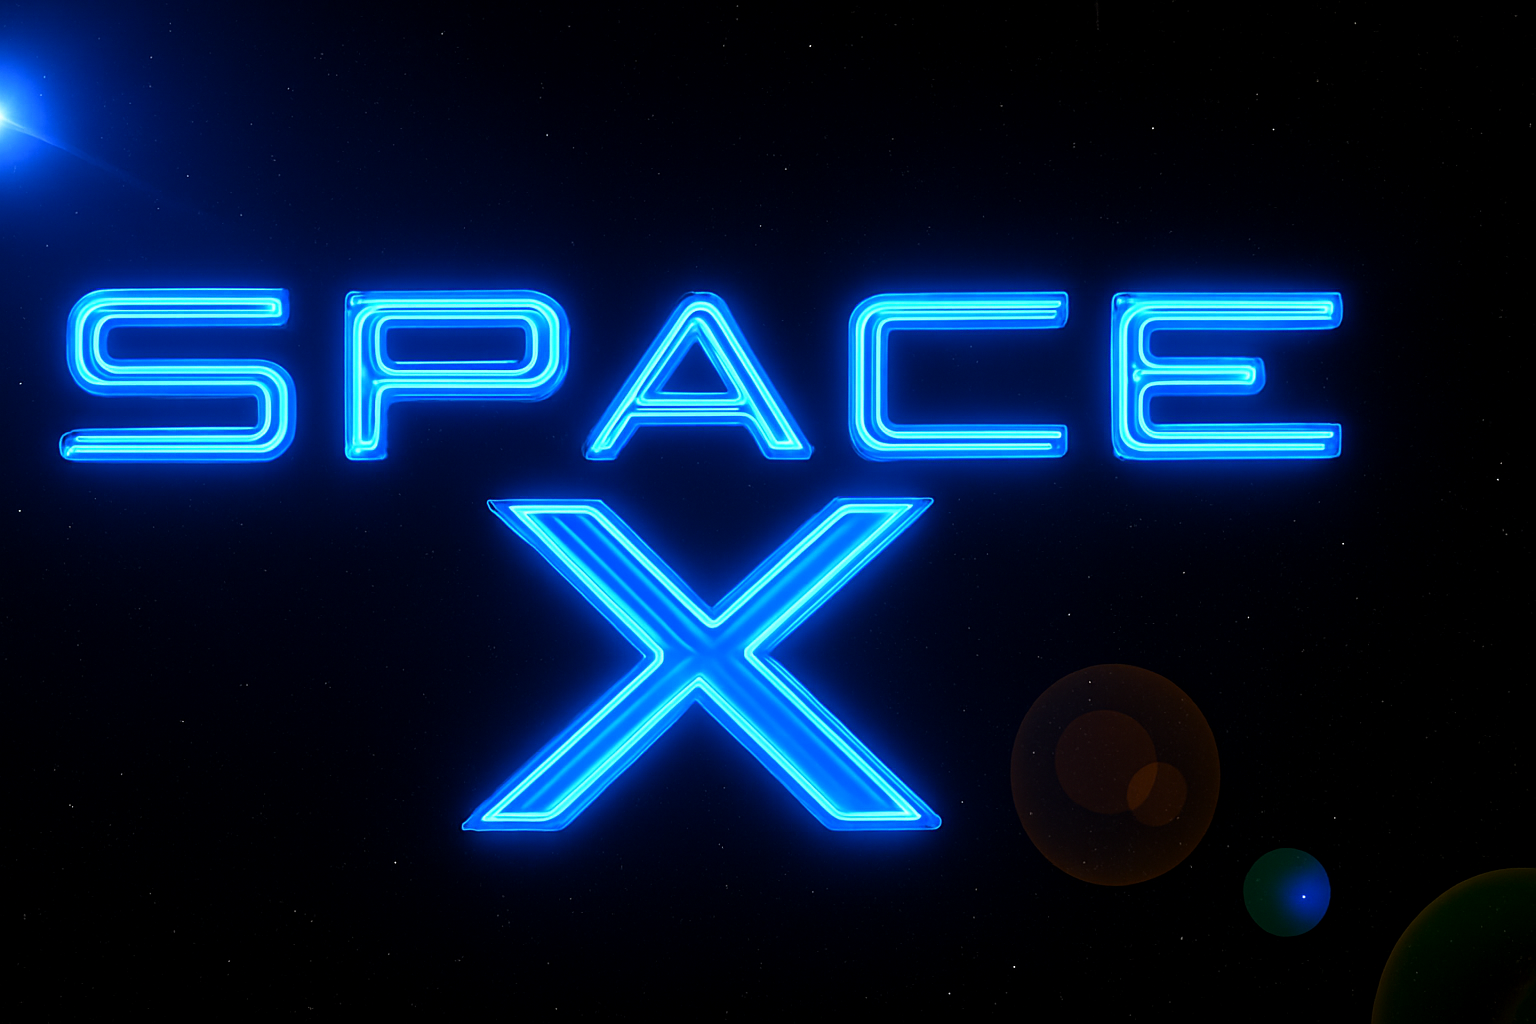
Dive into the Cosmic Realm of Photoshop with Space-Themed Text Effects
Ever wanted to make your text stand out like a celestial object in deep space? Look no further! Today, we’re exploring how to create epic Blue Glass images and text that seem to float majestically in the cosmos, all using Photoshop. This updated guide will walk you through every step, ensuring you master this galactic look in no time.
Starting with the Basics – Preparing Your Workspace
For this stellar design, we’ll be working in Photoshop with a document size of 1920×1080 pixels and a resolution of 150 pixels per inch. This resolution ensures your artwork is high-quality and ready for sharing across digital platforms. Remember, if you’re creating your own design, maintain these settings for consistency and quality akin to ours.
Magic Wand Magic – Separating Elements
To get started, you need to separate your text or design from the background, especially if it’s white. Here’s where the trusty Magic Wand Tool comes into play. With a tolerance set to five, ensure anti-alias is checked, and contiguous unchecked. This setup allows you to select all black areas, providing a clean separation from the background.
Pro Tip: If the contiguous option isn’t unchecked, only the area you click will be selected, which isn’t what we want.
Creating the Illusion with Smart Objects
To keep your creative work non-destructive and flexible, convert your design layer into a Smart Object. This step means you can modify or swap out designs without losing applied effects—a true caffeine boost for your workflow!
Once you’ve got your Smart Object set, you’ll duplicate it, hide the copy, and start experimenting with Layer Styles. This includes setting a striking color overlay and inner shadow. Use bold colors like our signature blue (hex: #1732FF) for an impactful look.
Transforming Text with Perspective
Want to give your floating text an additional dimension? Use Photoshop’s transform tools to adjust its perspective. This tweak helps create that “out-of-this-world” effect, giving your text the illusion of depth that screams sci-fi coolness.
Starry Backdrop – Setting the Scene
Next, your floating text needs a backdrop as awe-inspiring as the final frontier itself. Start by filling your background layer with black, then sprinkle in a star field using the ‘Add Noise’ filter. Add a Gaussian Blur for realism and tweak the Levels adjustment layer until the star density feels just right. Voilà, you’ve just created a universe in Photoshop!
Adding the Glass Effect
To give your text or design that sleek, extra-terrestrial glass finish, explore the ‘Filter Gallery’ and apply the Chrome filter. By adjusting the blend mode to ‘Vivid Light’, you transform it into a glowing interplanetary object.
Shine Bright Like a Lens Flare
Complete your cosmic scene with an enticing lens flare to simulate cosmic light sources. Set the brightness to 140% with a 50-300mm Zoom lens. Add a Hue/Saturation adjustment layer for an ethereal blue tint, culminating in an immersive space background that’s ready for Instagram fame.
Final Touches – Brushing Brightness
The celestial masterpiece isn’t over until the details sing. With a soft brush tool, selectively brighten parts of the lens flare on an overlay blending mode. This will make your design pop with extra terrestrial brilliance.
Final Words: Crafting these powerful blu glass images and dramatic text effects might take some practice, but once you get the hang of it, you’ll be crafting designs that are truly out of this world. With layers, effects, and the perfect amount of Photoshop wizardry, your creative content won’t just float in space; it’ll rule the galaxy!


