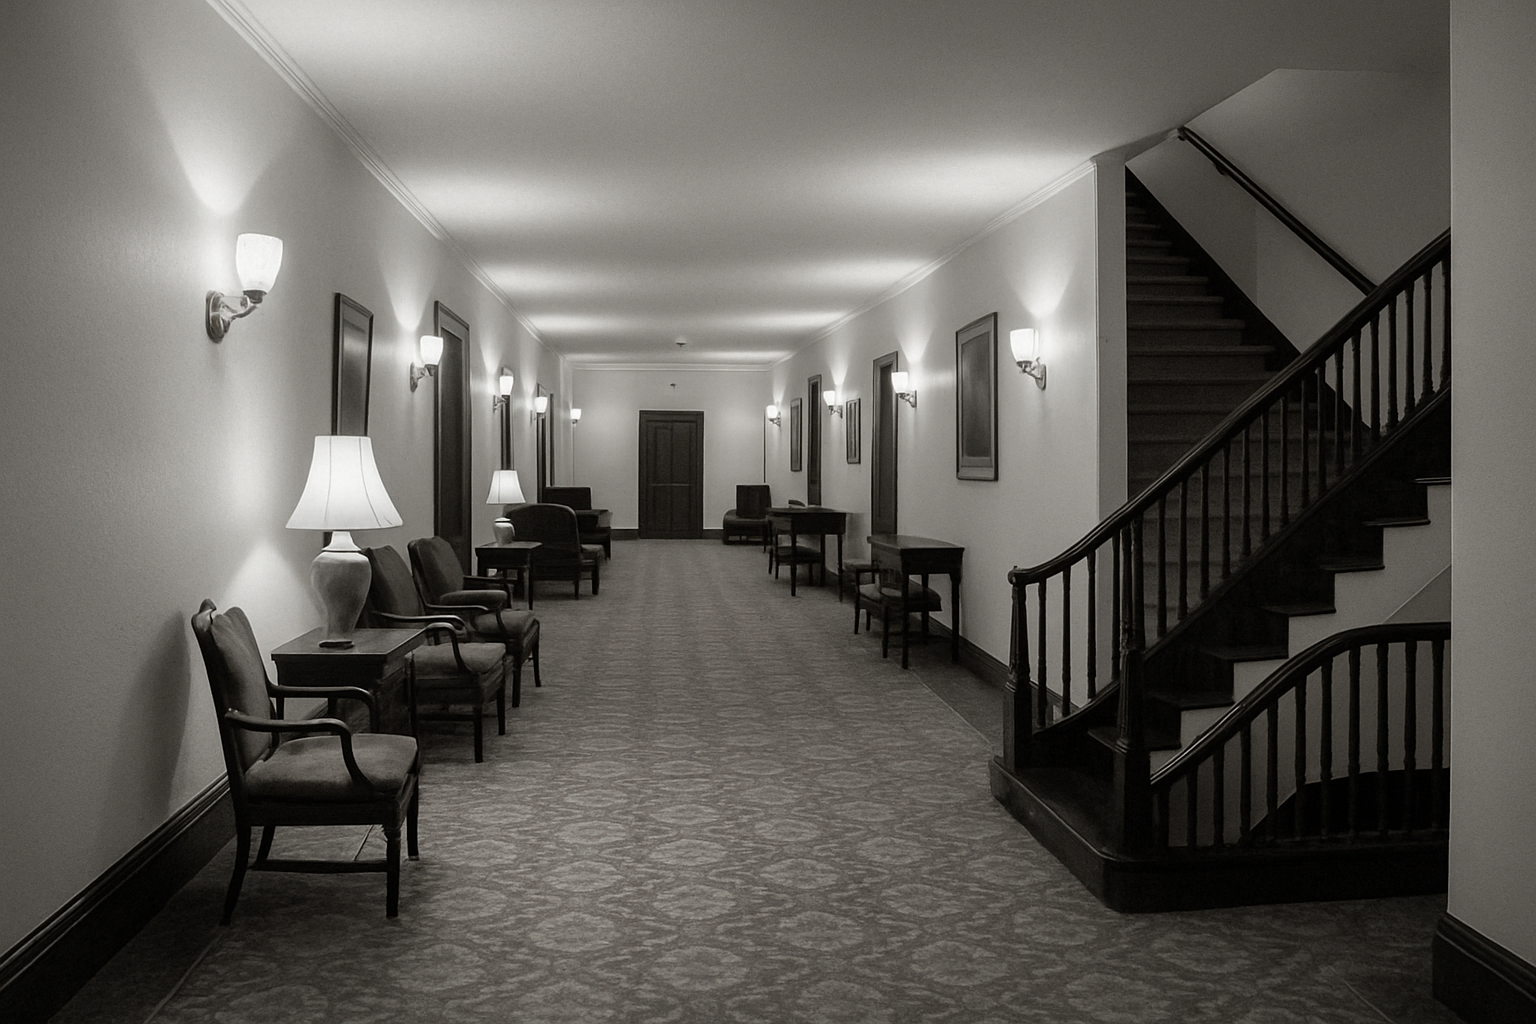
Dive into the World of Vintage Surveillance Aesthetics
Ever look at an old surveillance camera freeze frame and think, "Wow, that’s what real vintage filter should look like"? Well, today, let’s wave the wand of contemporary editing tools and add a splash of nostalgic flair to your photos. Turn your everyday images into moody snapshots reminiscent of classic security camera footage. Whether you’re looking to add a unique vibe to a creative project or just want some retro fun, this guide will walk you through achieving that iconic low-res surveillance look using Adobe Photoshop.
Setting the Stage
Before you jump into Photoshop, set up the canvas for this retro masterpiece. Start with an image that measures 800 by 1200 pixels and a resolution of 72 pixels per inch. The low resolution is key here as it mimics the grainy quality that we’ve come to associate with vintage surveillance footage.
Pro Tip: Remember to duplicate your original image layer by pressing Ctrl or Command + J. This little habit keeps your original intact and ready in case anything goes awry. Having a backup means no worries as you experiment!
Giving Your Photo a Fish-eye Lens Look
Surveillance cameras are notorious for their distinctive fish-eye lens distortion. Capture this iconic look by heading over to the Filter menu. Choose the Lens Correction tool and under the Custom tab, apply a distortion setting of -30. This adjustment is going to bend your image a little, emulating the surveillance lens effect.
While you’re in the Lens Correction mode, slide the Vignette amount to -100. This deepens the image’s border, pushing the viewer’s focus to the center—exactly where you’d want it in a surveillance setting. Adjust the Midpoint to 39 to fine-tune the vignette’s spread on your image.
Adding That Classic Grainy Texture
Now that your image is appropriately narrowed and darkened, let’s give it the gritty texture it deserves. Go to Filter, select Texture, and then choose Grain. Opt for the ‘Clumped’ grain type and set both the Intensity and Contrast at 50. This will gift your image with that raw, lo-fi quality typical of old security tapes.
Crafting the Iconic Scan Lines
Scan lines are the hallmark of any surveillance footage worth its weight in nostalgia. Here’s how you create them:
- Create a new layer and set your foreground color with a hue of 0, saturation of 0, and brightness of 50%.
- Fill this new layer with your selection by pressing
AltorOption + Delete. - Navigate to Filter, select Sketch, and then Halftone Pattern.
- Set the size to 1, contrast to 40, and choose ‘Line’ as the pattern type.
By doing this, you create the flickering, static-like effect that viewers equate with old-school cameras.
Turning on the Night Vision
A subtle greenish tinge can make all the difference in recreating that authentic surveillance camera look:
- Add a new adjustment layer and choose Solid Color.
- Pick a very light green—say, #ef3e7.
- Convert the blend mode from Normal to Color.
This lends your image that eerie glow synonymous with nightly CCTV captures, heightening the atmosphere.
Creating that Timestamp Effect
No surveillance frame is complete without the quintessential timestamp. Utilize your trusty text tool and consider downloading a pixel font like Altera Pixel Font from DaFont.
- Set up guidelines an inch from each side.
- Use the font to type out a dummy date and time for that touch of realism.
- Position your text box smartly within the guidelines, letting it snap into place.
- Group text elements and apply a slight Gaussian Blur to mimic the slightly out-of-focus look of old camera displays.
Adding the Flashing Red Light
And last but not the least, let’s add the recording indicator:
- Use your Elliptical Marquee Tool to create a small red dot.
- Fill it with a bright red and apply a bit of Gaussian Blur.
Position this dot neatly in the upper corners of your image to suggest the camera is in recording mode. Voilà! Your photo is the spitting image of a legendary surveillance frame.
Wrapping it Up
Here’s what you’ve accomplished: A complete transformation from a regular photo to a compelling piece of vintage surveillance footage. Whether for a design project, a video editing endeavor, or simply to astonish your social media audience, you’ve crafted an image that blends simplicity and nostalgia in a way few filters can.
Now, it’s your turn. Dive into your photo archive, boot up Photoshop, and start freezing your moments in retro surveillance style!