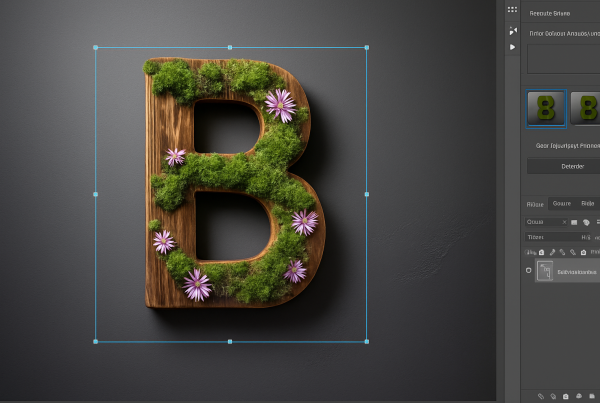
Create Mesmerizing Wood Carvings from Your Photos
If you’ve ever wanted to merge the timeless beauty of wood with the cherished moments captured in photographs, you’re not alone. The artistry of wood carvings has fascinated cultures for centuries, and with the power of Photoshop, you can infuse your photographs with this rustic, artistic charm. Today, I’m diving into the ultimate guide to transforming your everyday photos into wood carvings using Adobe Photoshop—a method that’s as quick as a scroll through TikTok and as rewarding as finding an uncropped photo on the ‘gram.
Prepping Your Canvas with Textures
Picture this: a serene forest, the whisper of the wind through the trees, and the intricate patterns on the bark that tell a thousand stories. That’s the essence we’re bringing into your photos. Start by choosing a wood texture. Whether you sourced your wood photo from a stock website like Shutterstock or snagged it from a treasure trove of free textures online, make sure it’s something that resonates with the mood you’re aiming for. Open this photo in Photoshop; this will serve as your backdrop—the canvas for your masterpiece.
Layering Your Subject Over the Wood
You probably have a photo in mind that you’d like to carve into digital wood. Dragging your subject over the wood background is as simple as being careful while swiping right on a Tinder profile—don’t let go of the mouse until you’re sure it’s positioned perfectly. Be sure that your Move Tool is active and drag your subject in place onto the wood texture tab. This transfer feels seamless when using the Transform Tool (Ctrl or Cmd + T), allowing you to adjust size and position like a contour-perfecting Snapchat filter.
Precision Cutting with a Quick Selection
Now comes the part where we add that razor-sharp detail. Imagine you’re cutting shapes in a TikTok cooking challenge; precision is key. Use the Quick Selection Tool to isolate your subject. One quick click on the Select Subject button at the top and you’re almost there. Refine your selection using Quick Mask mode (triggered by the Q key) to ensure no stray pixels are sneaking into your wood carving. If you find areas that need adjustment, jump back into selection mode and brush over the necessary tweaks. To remove unwanted selections, remember: it’s Alt or Option to the rescue!
Creating Depth and Texture
Applying Smart Filters for Non-Destructive Editing
Here’s where Photoshop’s magic—like AI suggesting scary accurate content—comes into play. To apply effects without risking a design apocalypse, convert your image into a Smart Object. This allows edits to be as non-destructive as your latest attempt to hashtag gracefully on Insta. Shift-click to select both the subject and the white background layer, converting them into a Smart Object through the Convert to Smart Object option.
Crafting the Carved Look with Emboss
It’s time to mimic the real wood carving feel. Head over to the Filter menu, navigate to Stylize, and select Emboss. Here’s where it’s important to steal a glance at our settings: Angle set to -135 degrees, Height to 5 pixels, and Amount cranked up to 500%. This setup is tailored like a designer outfit, but be open to adjustments depending on your image’s size and resolution. Hit Soft Light in the Blend Mode dropdown for that authentic chiseling glow.
Enhancing Relief and Polish
To accentuate the embossed texture, duplicate your embossed layer (Ctrl or Cmd + J). Tweak the copy by doubling the Height to 8 pixels and reducing the Amount to 200% for a more nuanced, polished look. For an additional sensory dimension, blur it slightly using Gaussian Blur (a neat 6 pixels should do), adding a tactile finish flirting closely with realism.
The Grand Finale
Voila! What you’re left with is a testament to digital craftsmanship akin to that stunning travel photo you posted last summer. This wood carving photorealism technique offers more than a pretty picture; it’s a new way of storytelling—combining the past’s tactile artistry with today’s digital capabilities. Whether it’s for a unique personal project or just to flex a bit of creative muscle, transforming photos to wood carvings is a handy trick to have up your leash.
Now that your artistry is tuned to channel leisure department-grade creativity, it’s time to harness those skills and dive into the digital workshops where photos and grain lines meet to create more immersive narratives. Ready to carve out your next story?
Adapt the tools from Adobe’s digital woodworking bench, blend with the warmth and texture of nature’s canvas, and voila—an ode to digital craftsmanship! More than just a cool technique, it’s a tool to infuse your projects with the eloquence of nature’s narrative, all from the comfort and pixels of your screen.